Structural Dust Cover - Installation
INSTALLATION
STRUCTURAL COLLAR - AUTOMATIC TRANSAXLE EQUIPPED
CAUTION: Torque procedure for the structural collar and bending strut must be followed or damage could occur to oil pan, collar, and/or bending strut.


1. Perform the following steps for installing structural collar and bending strut. Refer to:
2. Place collar into position between transaxle and oil pan. Install collar to transaxle bolt (1), hand start only.
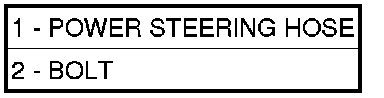
3. Position power steering hose (1) support bracket and install collar to oil pan bolt (2), hand tight only.

4. Position bending strut in place and hand start only bolt (3) into the upper transaxle hole.
5. Install bolt (2), through strut and collar, hand start only.
6. Install bolt (6), strut to cylinder block, hand tight only.
7. Position power steering hose support bracket and install the remaining collar to oil pan bolt (5), hand tight only.
8. Final torque collar to transaxle bolts (1 - 3), to 101 Nm (75 ft. lbs.)
9. Install bolts (7) and (8), through strut and into cylinder block.
10. Final torque bolts (4 - 8) to 61 Nm (45 ft. lbs.).
11. Lower vehicle.
STRUCTURAL COLLAR - MANUAL TRANSAXLE EQUIPPED
CAUTION: Torque procedure for the structural collar and bending strut must be followed or damage could occur to oil pan, collar, and/or bending strut.
1. Perform the following steps for installing structural collar and bending strut. Refer to:
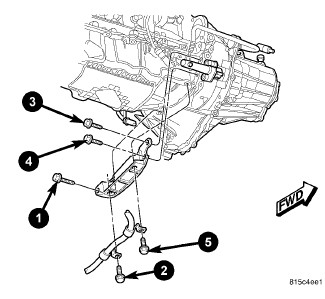
2. Place collar into position between transaxle and oil pan. Install collar to transaxle bolt (1), hand start only.
3. Position power steering hose support bracket and install collar to oil pan bolt (2), hand tight only.
4. Position clutch slave cylinder into mounting position and install bolts (3) and (4) hand tight only.
5. Position power steering hose support bracket and install the remaining collar to oil pan bolt (5) hand tight only.
6. Final torque all bolts in sequence shown in to the following torque values:
7. Torque bolt (1) to 101 Nm (75 ft. lbs.)
8. Torque bolts (2) and (5) to 61 Nm (45 ft. lbs.)
9. Torque bolts (3) and (4) to 28 Nm (20 ft. lbs.)
10. Torque bolt
11. Lower vehicle.