W/ Air Conditioning
Fig. 8 Air conditioning & heater hose routing:
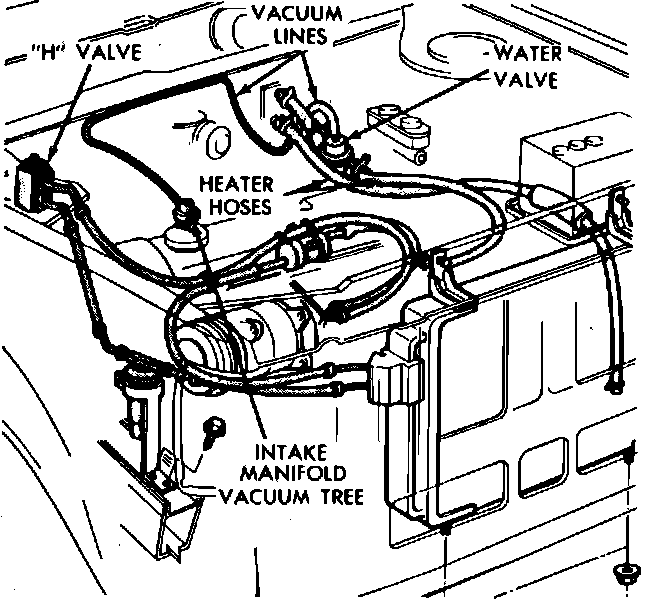
Fig. 9 Heater assembly. Models with A/C:
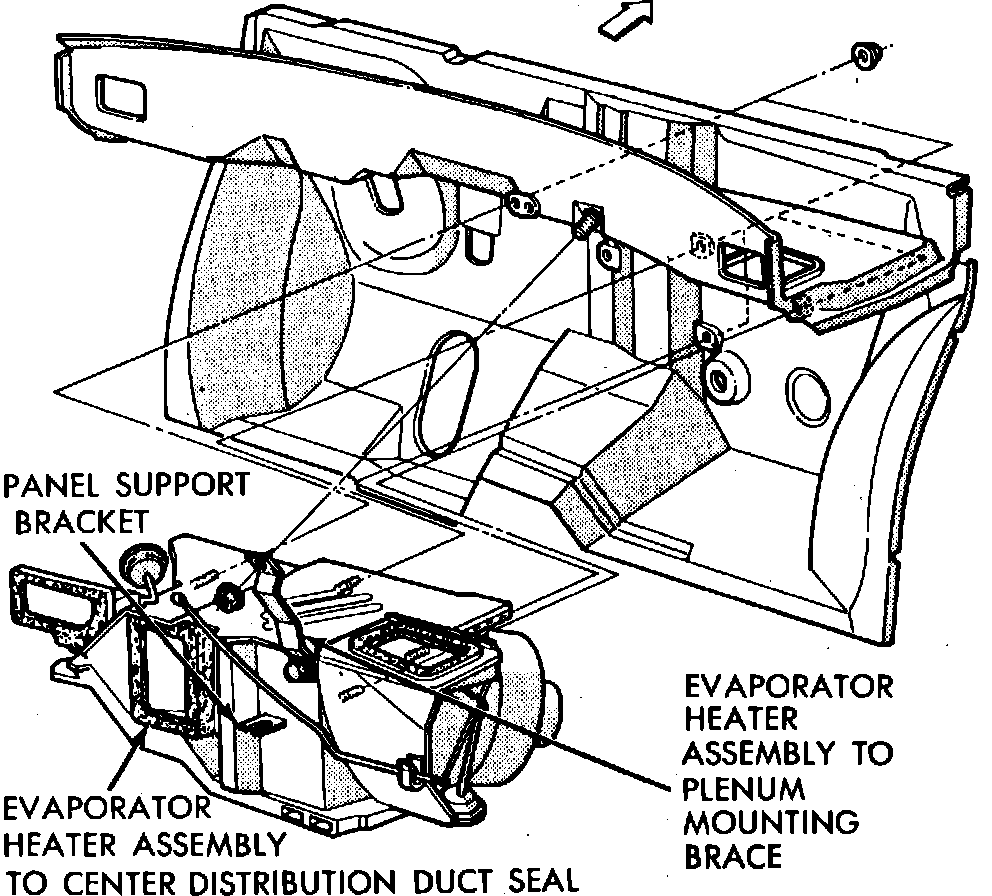
1984 Models
1. Disconnect battery ground cable, then drain cooling system and discharge A/C system.
2. Disconnect blend air door cable and disengage from clip on heater air duct.
3. Remove glove box and door assembly.
4. Remove center bezel attaching screws, then the center bezel.
5. Remove center distribution duct and defroster duct adapter.
6. Disconnect heater hoses and A/C lines. Plug heater core tube openings.
7. Disconnect vacuum lines at engine and water valve.
8. Remove four dash retaining nuts, then the right side cowl trim panel.
9. Remove right instrument panel pivot bracket attaching screw, then the two screws attaching lower instrument panel at steering column.
10. Remove panel top cover.
11. Remove all but left panel to fenceline attaching screw, then pull carpet from under A/C unit as far rearward as possible.
12. Remove support strap attaching nut and blower motor ground cable, then support heater unit with hands and remove strap from its plenum stud.
13. Lift and pull evaporator heater assembly rearward to clear dash panel and liner. The panel will also have to be pulled rearward to allow assembly clearance.
14. Remove evaporator heater assembly from dash panel, taking care to prevent dash panel attaching studs from hanging up in dash liner.
15. Place evaporator heater assembly on workbench, then remove nut from mode door actuator arm on top cover.
16. Remove two retaining clips from front edge of cover, then the mode door actuator to cover attaching screws and mode door actuator.
17. Remove 15 heater unit cover attaching screws, then the cover. Lift mode door out of heater assembly.
18. Remove heater core tube retaining bracket attaching screw, then lift core from heater assembly.
19. Reverse procedure to install.