Overhaul
The heater-A/C housing assembly must be removed from the vehicle and disassembled for service access of the blower motor, blower motor wheel, heater core, evaporator coil, blend-air door, and each of the various mode control doors.
WARNING:
- REVIEW THE WARNINGS AND CAUTIONS BEFORE PERFORMING THE FOLLOWING OPERATION.
- ON VEHICLES EQUIPPED WITH AIRBAGS, REFER TO AIRBAGS AND SEAT BELTS/AIRBAGS BEFORE ATTEMPTING ANY STEERING WHEEL, STEERING COLUMN, OR INSTRUMENT PANEL COMPONENT DIAGNOSIS OR SERVICE. FAILURE TO TAKE THE PROPER PRECAUTIONS COULD RESULT IN ACCIDENTAL AIRBAG DEPLOYMENT AND POSSIBLE PERSONAL INJURY.
DISASSEMBLY
1. Place the heater-A/C housing on a work bench, with the heater-A/C housing cover facing down. Refer to: Heating and Air Conditioning, Housing Assembly HVAC, Service and Repair, Front, Front HVAC Unit Removal and Installation, Front HVAC Housing Removal and Installation
2. Remove the two screws that secure the heater- A/C housing cover to the top of the blower motor housing cover.
3. If the vehicle is so equipped, unplug the two vacuum harness connectors from the recirculation air door actuator.
4. Unplug the vacuum harness connector from the panel-defrost door actuator.
5. Remove the four screws that secure the floor duct to the bottom of the heater-A/C housing and remove the duct from the housing.
Heater-A/C Housing Floor Outlet Screws:
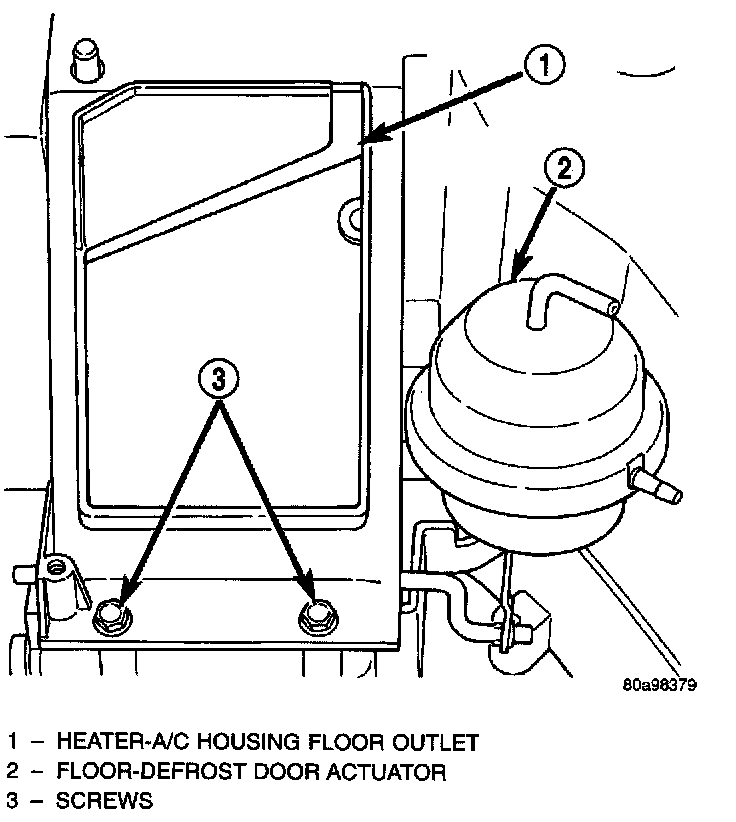
6. Remove the two screws that secure the heater- A/C housing cover to the lower housing near the floor outlet.
7. Turn the heater-A/C housing over on the work bench, with the heater-A/C housing cover facing up.
8. Disengage the vacuum harness retainer from the hole near the left end of the heater-A/C housing cover.
Blend-Air Door Lever Remove/Install:
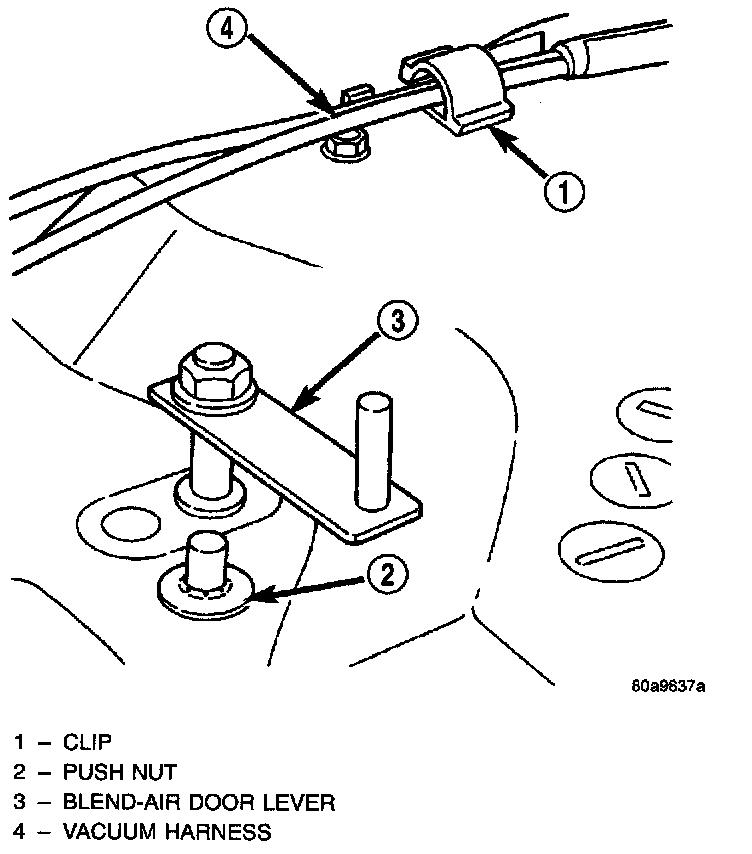
9. Remove the vacuum harness from the molded clips on the heater-A/C housing cover.
10. Remove the thirteen screws that secure the perimeter of the housing cover to the heater-A/C housing.
11. Remove the nut that secures the blend-air door lever to the blend-air door pivot shaft and remove the lever.
12. Gently pry off the push nut that secures the heater-A/C housing cover to the heater-A/C housing post.
Panel-Defrost Door Lever Remove:
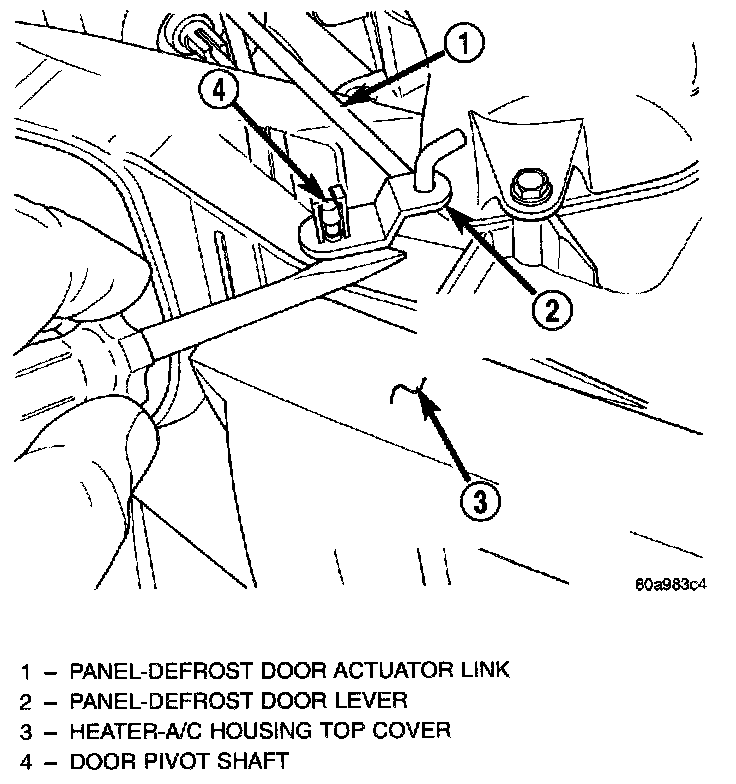
13. Using a trim stick or another suitable wide flat-bladed tool, gently pry the panel-defrost door lever off of the panel-defrost door pivot shaft.
14. Pull up the perimeter edges of the heater-A/C housing cover far enough to separate the cover sealant from the heater-A/C housing.
15. Remove the housing cover from the heater- A/C housing.
16. If the vehicle is so equipped, remove the recirculation air door actuator from the blower motor housing cover. Refer to: "Air Door : Service and Repair" Service and Repair
Blower Motor Housing Cover Remove/Install:
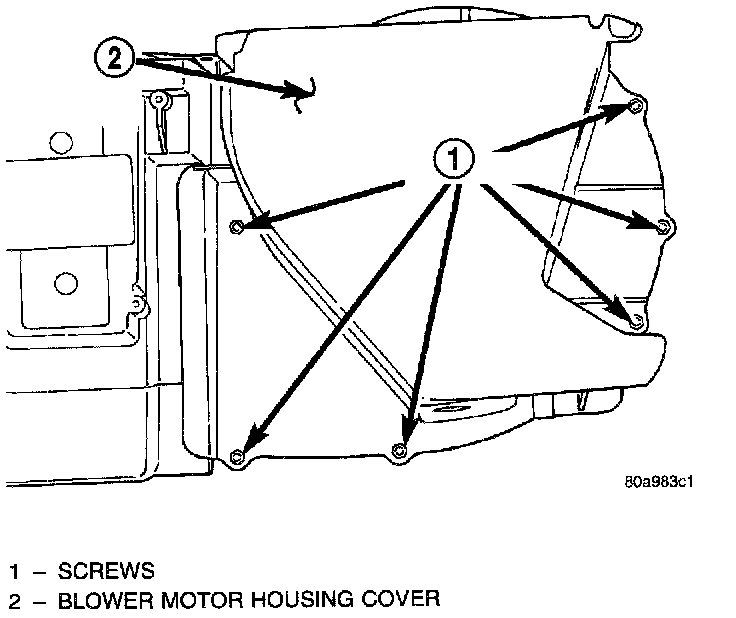
17. Remove the six screws that secure the blower motor housing cover to the heater-A/C housing.
18. Remove the blower motor housing cover from the heater-A/C housing.
ASSEMBLY
Blower Motor Housing Cover Sealent:
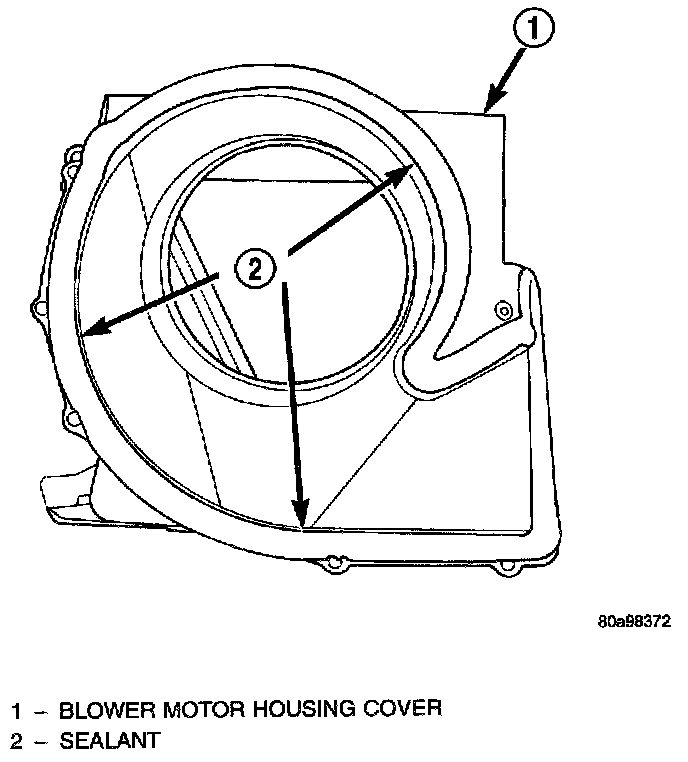
1. Before installing the blower motor housing cover, be certain that the cover sealant is in place and in good condition.
2. Position the blower motor housing cover to the heater-A/C housing.
3. Install the six screws that secure the blower motor housing cover to the heater-A/C housing. Tighten the screws to 2.2 Nm (20 in. lbs.).
4. If the vehicle is so equipped, reinstall the recirculation air door actuator. See Mode Door Vacuum Actuators for the procedures.
Heater-A/C Housing Cover Sealant:
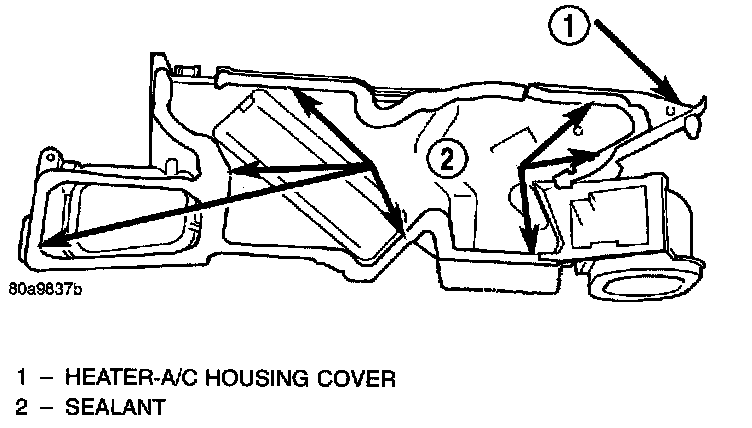
5. Before installing the heater-A/C housing cover, be certain that the cover sealant is in place and in good condition.
6. Position the heater-A/C housing cover on the heater-A/C housing. Be certain that the pivots for the floor-defrost, the panel-defrost, the blend-air, and the recirculation air (if the vehicle is so equipped) doors are properly positioned.
7. Reinstall the push nut that secures the heater- A/C housing cover to the heater-A/C housing post.
8. Install the thirteen screws that secure the perimeter of the housing cover to the heater-A/C housing. Tighten the screws to 2.2 Nm (20 in. lbs.).
9. Snap the panel-defrost door lever onto the panel-defrost door pivot shaft.
10. Install the blend-air door lever to the blend- air door pivot shaft and secure it to the shaft with the nut.
11. Install the vacuum harness retainer into the hole near the left end of the heater-A/C housing cover.
12. Route the vacuum harness through the molded clips on the heater-A/C housing cover.
13. Turn the heater-A/C housing over on the work bench, with the heater-A/C housing cover facing down.
14. Install the two screws that secure the heater- A/C housing cover to the lower housing near the floor outlet. Tighten the screws to 2.2 Nm (20 in. lbs.).
15. Position the floor duct to the bottom of the heater-A/C housing and secure with four screws. Tighten the screws to 2.2 Nm (20 in. lbs.).
16. Plug in the vacuum harness connector to the panel-defrost door actuator.
17. If the vehicle is so equipped, plug in the two vacuum harness connectors to the recirculation air door actuator.
18. Install the two screws that secure the heater- A/C housing cover to the top of the blower motor housing cover. Tighten the screws to 2.2 Nm (20 in. lbs.).
19. Reinstall the heater-A/C housing in the vehicle. Refer to: Heating and Air Conditioning, Housing Assembly HVAC, Service and Repair, Front, Front HVAC Unit Removal and Installation, Front HVAC Housing Removal and Installation