Cruise Control Servo: Service and Repair
Servo Location - Remove/Installation:

REMOVAL
1. Disconnect both negative battery cables at both batteries.
2. Disconnect positive battery cable at battery (drivers side battery).
Battery Holddown:

3. Remove battery holddown bolts.
Battery Heat Shield:

4. If equipped, pull up on battery heat shield to remove it.
5. Remove battery from vehicle.
Battery Tray Lower Mounting Nuts:
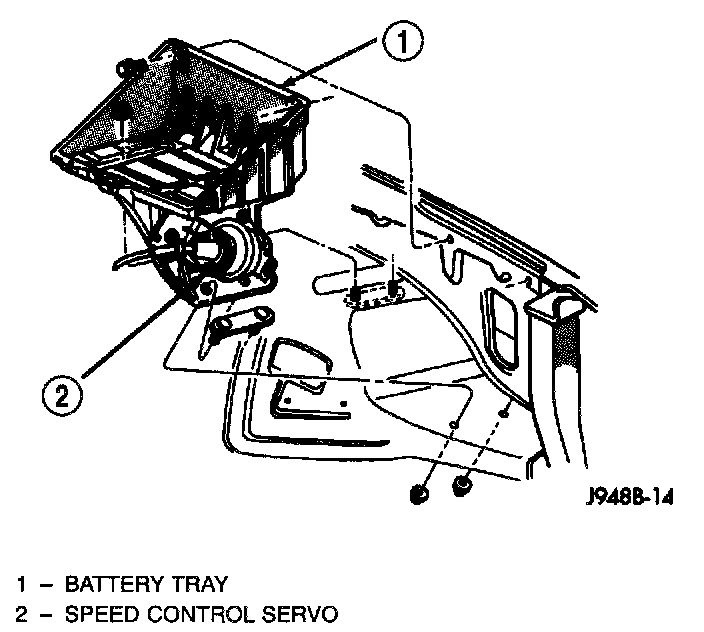
6. From under vehicle, and in front of left front wheelhouse, remove 2 lower battery tray nuts.
Battery Tray Mounting:

7. Remove 2 nuts and 2 bolts holding battery tray to vehicle.
Cable/Lever/Throttle Linkage Cover:
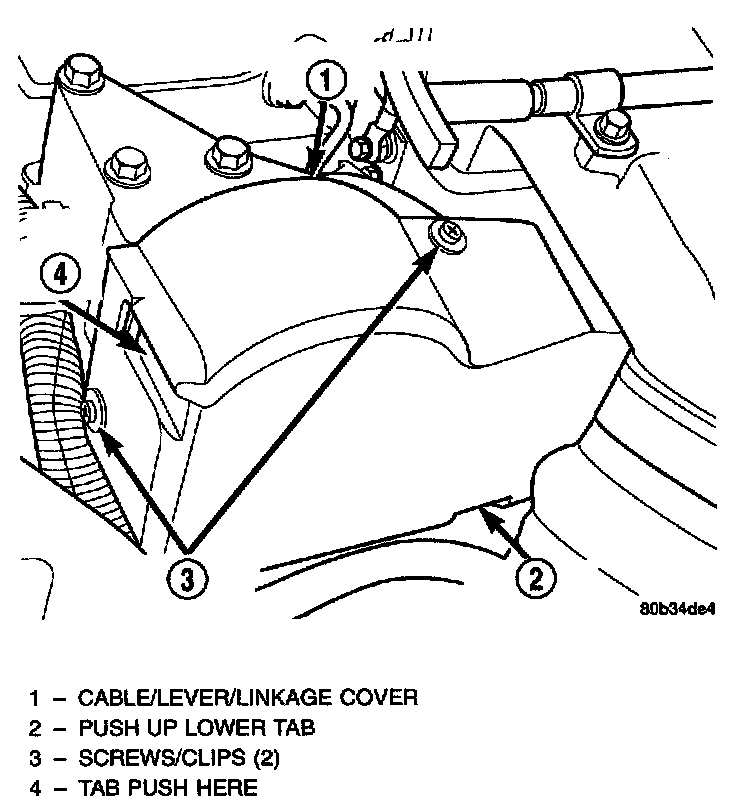
8. Remove cable cover. Cable cover is attached with 2 Phillips screws, 2 plastic retention clips and 2 push tabs. Remove 2 Phillips screws and carefully pry out 2 retention clips. After clip removal, push rearward on front tab, and upward on lower tab for cover removal.
Servo Cable at Throttle Lever:
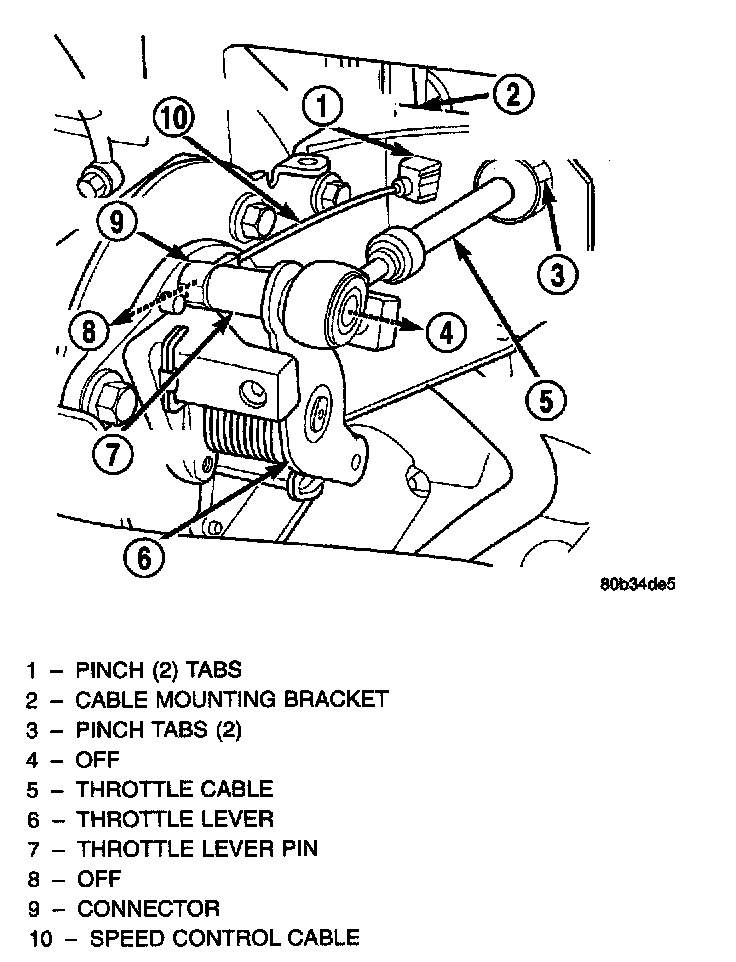
9. Using finger pressure only, disconnect end of servo cable from throttle lever pin by pulling forward on connector while holding lever rearward. DO NOT try to pull connector off perpendicular to lever pin. Connector will be broken.
10. Position battery tray up far enough for access to speed control servo electrical connector and vacuum line.
11. Disconnect electrical connector and vacuum line at servo.
Servo Mounting at Battery Tray:

Servo Cable Clip Remove/Install - Typical:

12. Position battery tray with attached servo assembly to gain access to 2 servo mounting nuts.
13. Remove 2 mounting nuts holding servo cable sleeve to bracket.
14. Pull speed control cable sleeve and servo away from servo mounting bracket to expose cable retaining clip and remove clip. Note: The servo mounting bracket displayed in is a typical bracket and may/may not be applicable to this model vehicle.
15. Remove servo from mounting bracket. While removing, note orientation of servo to bracket.
INSTALLATION
1. Position servo to mounting bracket.
2. Align hole in cable connector with hole in servo pin. Install cable-to-servo retaining clip.
3. Insert servo studs through holes in servo mounting bracket.
4. Insert servo studs through holes in servo cable sleeve.
5. Install servo mounting nuts and tighten to 8.5 Nm (75 in. lbs.) torque.
6. Connect vacuum line to servo.
7. Connect electrical connector to servo terminals.
8. Connect servo cable to throttle lever by pushing cable connector rearward onto lever pin while holding lever forward.
9. Install battery tray. Tighten all battery tray mounting hardware to 16 Nm (140 in. lbs.) torque.
10. Position battery into battery tray.
11. If equipped, install battery heat shield.
12. Install battery holddown clamp. Tighten bolt to 4 Nm (35 in. lbs.) torque.
13. Connect positive battery cable to battery.
14. Connect negative battery cables to both batteries.
15. Before starting engine, operate accelerator pedal to check for any binding.
16. Install cable/lever cover.