Distribution Duct Replacement
The distribution duct can be removed from the vehicle without disconnecting the refrigerant lines or discharging the refrigerant system. The distribution duct assembly must be removed from the vehicle and disassembled for service access of the floor-defrost door or the floor-panel door.WARNING: ON VEHICLES EQUIPPED WITH AIRBAGS, REFER TO AIRBAGS AND SEAT BELTS/AIRBAGS BEFORE ATTEMPTING ANY STEERING WHEEL, STEERING COLUMN, OR INSTRUMENT PANEL COMPONENT DIAGNOSIS OR SERVICE. FAILURE TO TAKE THE PROPER PRECAUTIONS COULD RESULT IN ACCIDENTAL AIRBAG DEPLOYMENT AND POSSIBLE PERSONAL INJURY.
REMOVAL
1. Disconnect and isolate the battery negative cable.
2. Remove the instrument panel from the vehicle. Refer to: Body and Frame, Interior Trim, Dashboard/Instrument Panel, Service and Repair, Instrument Panel Assembly Replacement, Instrument Panel Assembly
3. Remove the blend-air door motor from the distribution duct.
4. Unplug the two vacuum harness connections from each of the two vacuum actuators on the upper half of the distribution duct.
5. Remove the one screw that secures the vacuum harness retaining strap to the left end of the distribution duct.
6. Remove the vacuum harness from the distribution duct.
Distribution Duct Remove/Install:
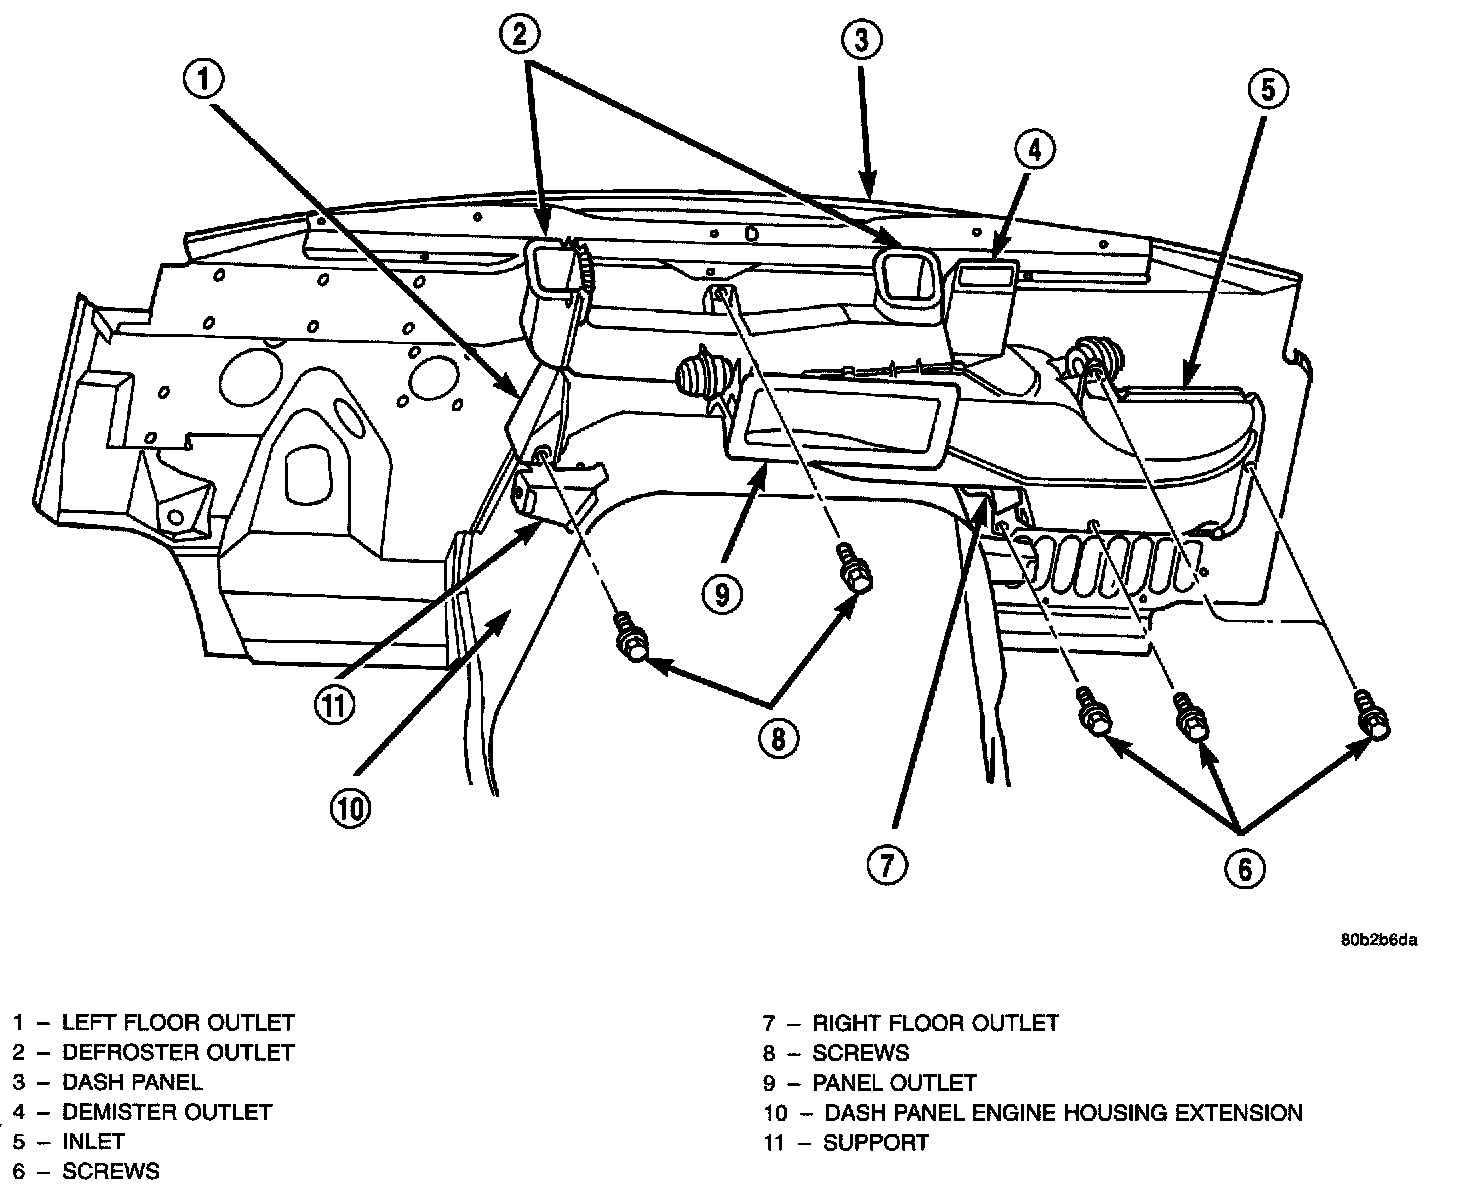
7. Remove the one screw that secures the left floor outlet of the distribution duct to the instrument panel support on the left side of the dash panel engine housing extension.
8. Remove the five screws that secure the distribution duct to the dash panel.
9. Remove the distribution duct from the dash panel.
INSTALLATION
1. Position the distribution duct to the dash panel.
2. Install the four screws that secure the distribution duct to the right side of the dash panel. Tighten the mounting screws to 2.7 Nm (24 in. lbs.).
3. Install the one screw that secures the left floor outlet of the distribution duct to the instrument panel support on the left side of the dash panel engine housing extension, and the one screw that secures the distribution duct to the dash panel between the two defroster outlets. Tighten the mounting screws to 4.5 Nm (40 in. lbs.).
4. Position and route the vacuum harness over the distribution duct.
5. Install the one screw that secures the vacuum harness retaining strap near the left end of the distribution duct. Tighten the mounting screw to 2.2 Nm (20 in. lbs.).
6. Plug in the two vacuum harness connections to each of the two vacuum actuators on the upper half of the distribution duct.
7. Reinstall the blend-air door motor to the distribution duct.
8. Reinstall the instrument panel to the vehicle. Refer to: Body and Frame, Interior Trim, Dashboard/Instrument Panel, Service and Repair, Instrument Panel Assembly Replacement, Instrument Panel Assembly
9. Connect the battery negative cable.