Disassembly and Assembly
DISASSEMBLYWARNING: Differential is only to be serviced as an assembly, and no disassembly is required.
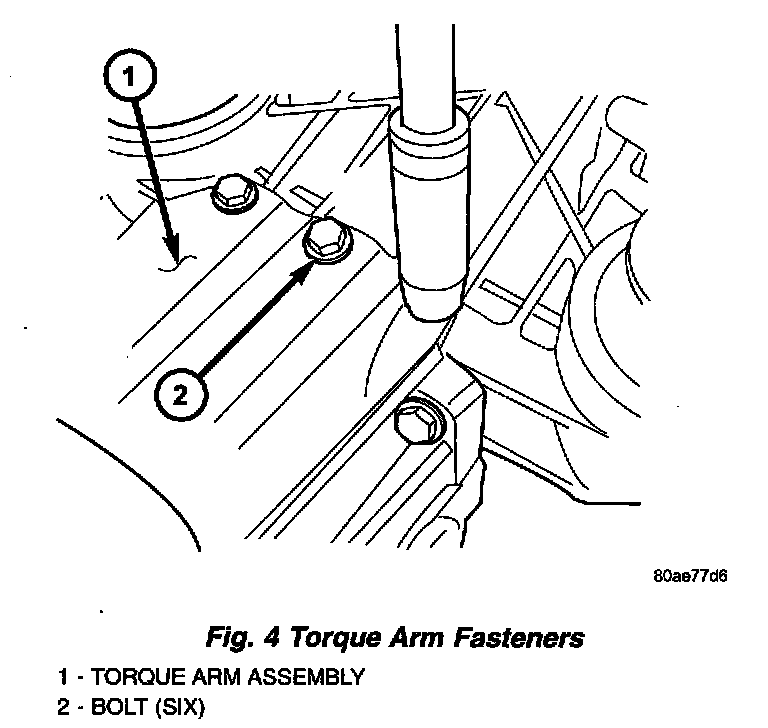
1. Remove six torque arm-to-differential case bolts and remove torque arm assembly (Fig. 4).
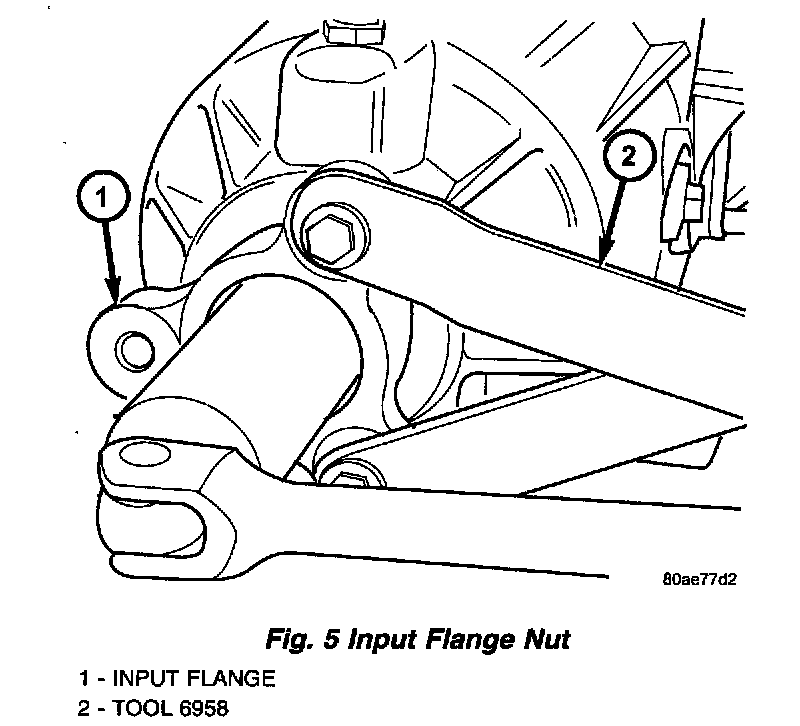
2. Remove input flange nut and washer using Tool 6958 and a breaker bar (Fig. 5).
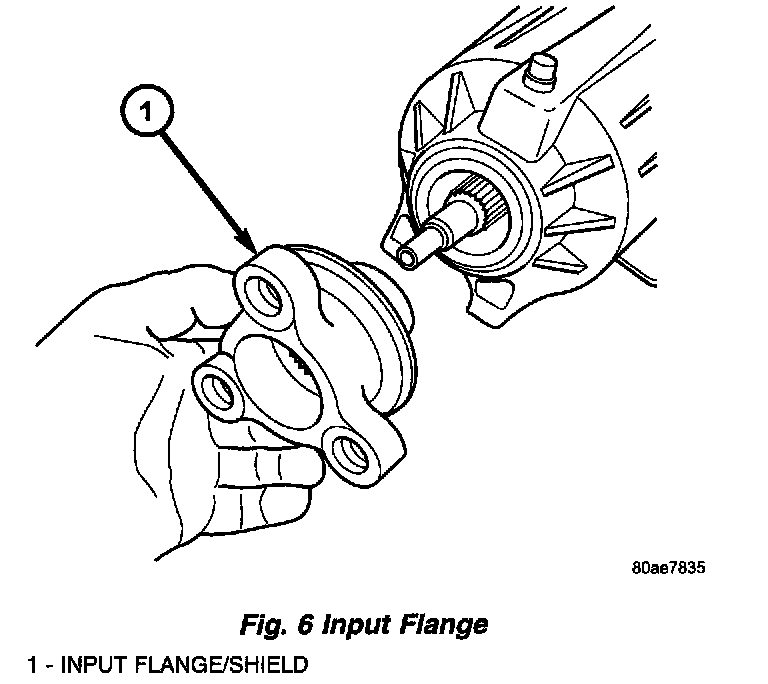
3. Remove input flange (Fig. 6).
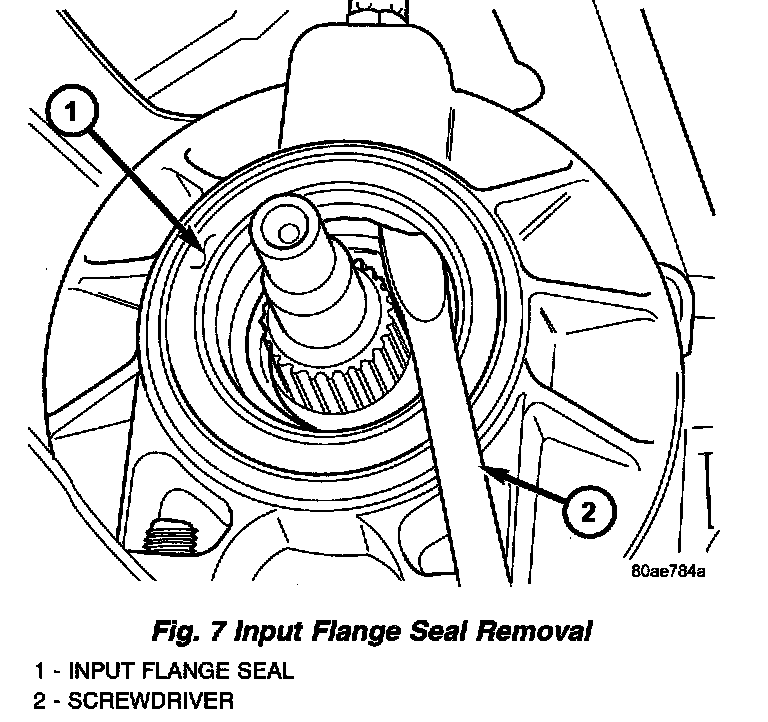
4. Remove input flange seal from overrunning clutch housing using suitable screwdriver (Fig. 7).
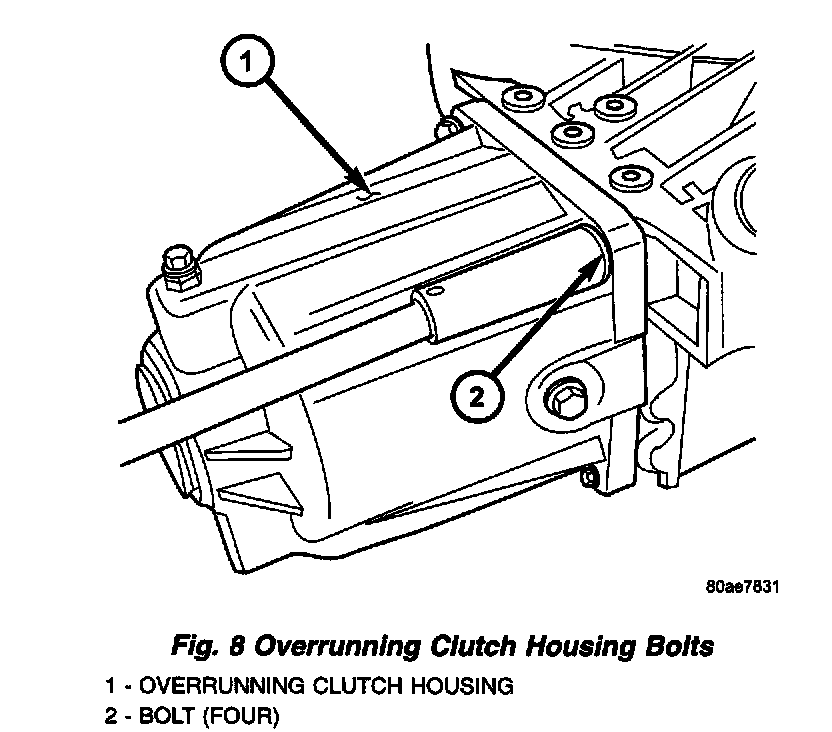
5. Remove four overrunning clutch housing-to-differential assembly bolts (Fig. 8) and remove housing.
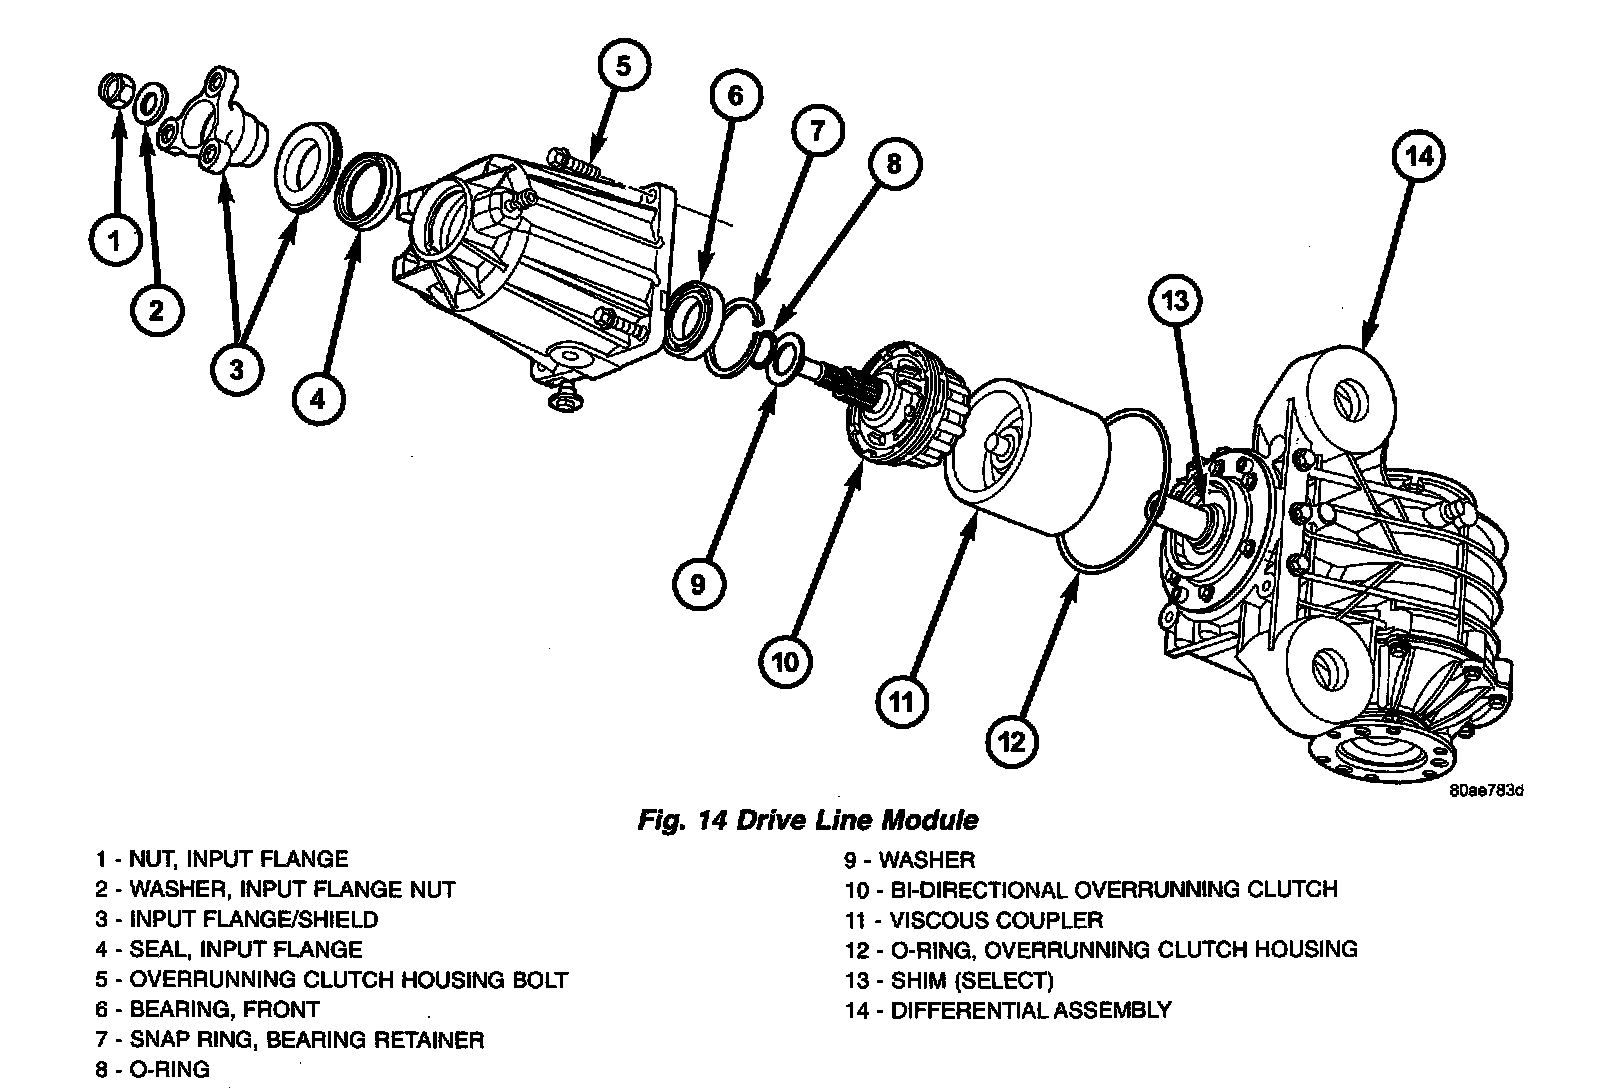
6. Remove front bearing snap ring (Fig. 14).
7. Remove front bearing (Fig. 14).
8. Remove O-ring and washer from overrunning clutch assembly (Fig. 14).
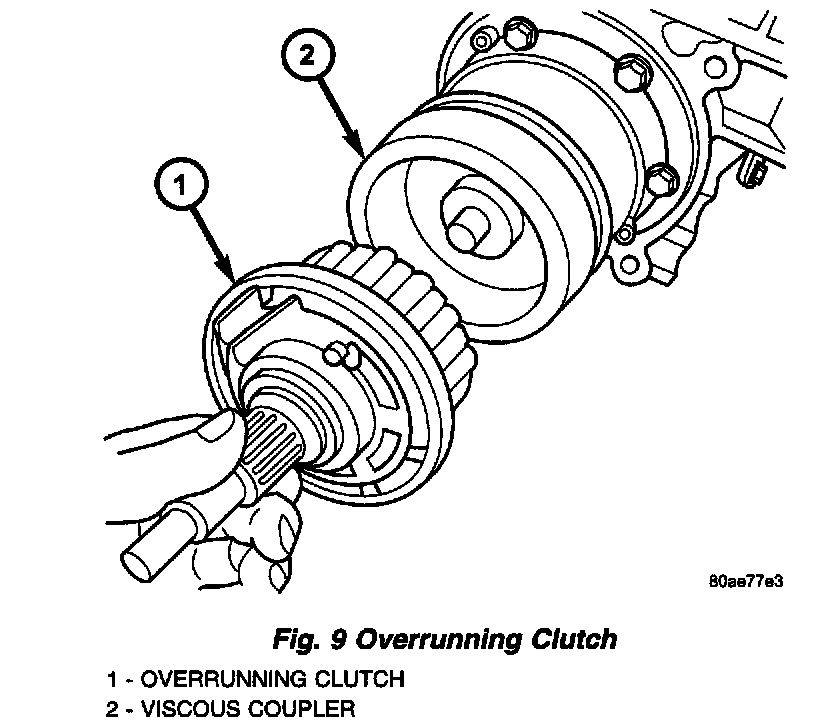
9. Remove overrunning clutch assembly from viscous coupler (Fig. 9).
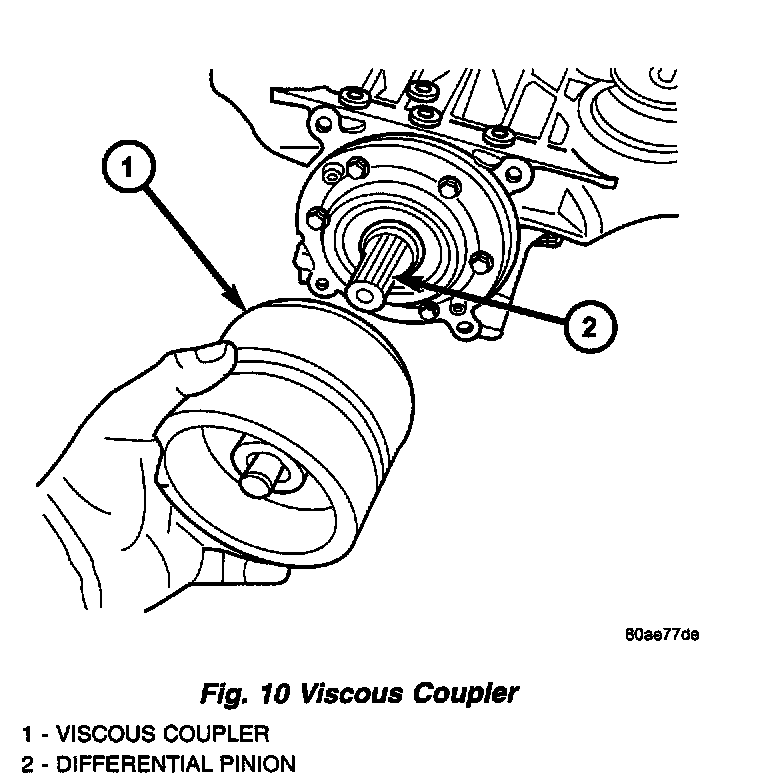
10. Remove viscous coupler from differential pinion shaft (Fig. 10).
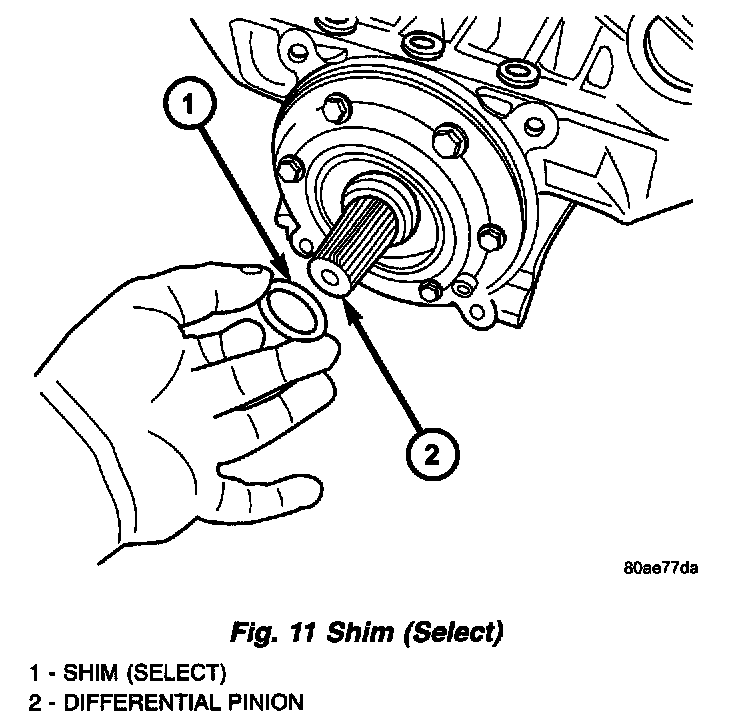
11. Remove shim (select) from differential pinion gear (Fig. 11).
12. Remove overrunning clutch housing large O-ring from differential assembly (Fig. 14).
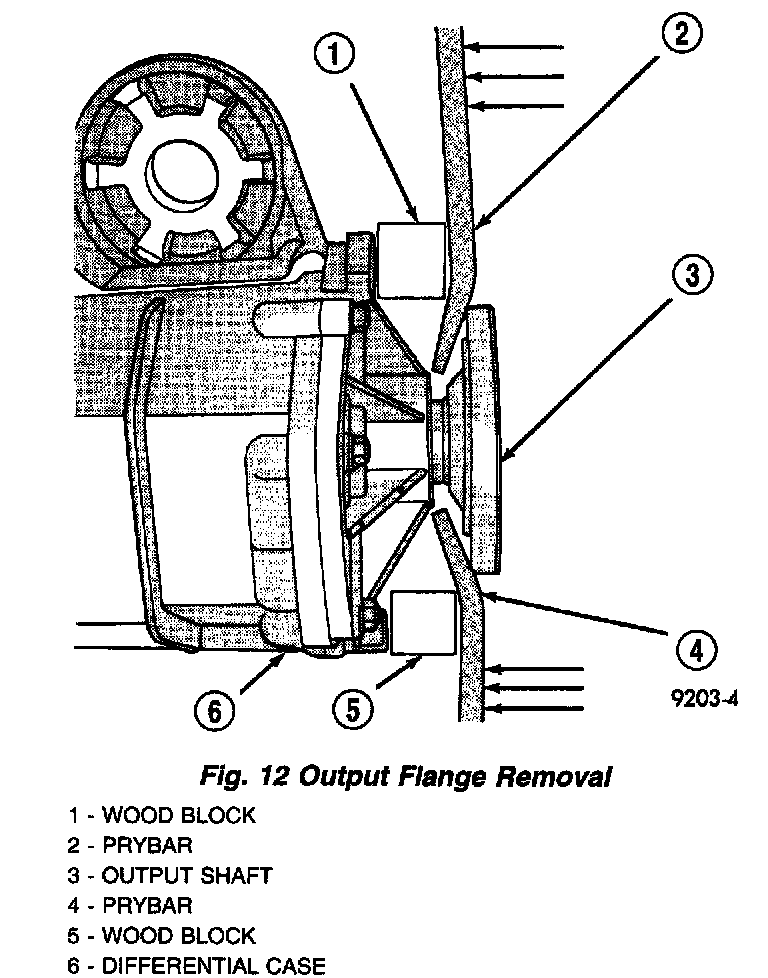
13. Remove output flanges using suitable screwdrivers and wood blocks to protect casting (Fig. 12).
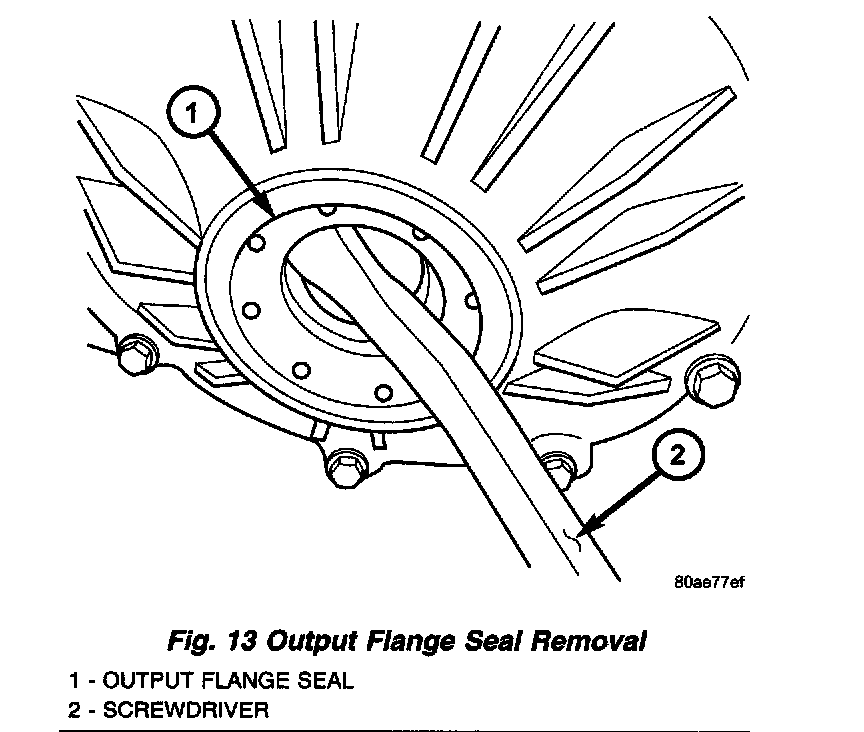
14. Remove output flange seals (Fig. 13).
ASSEMBLY
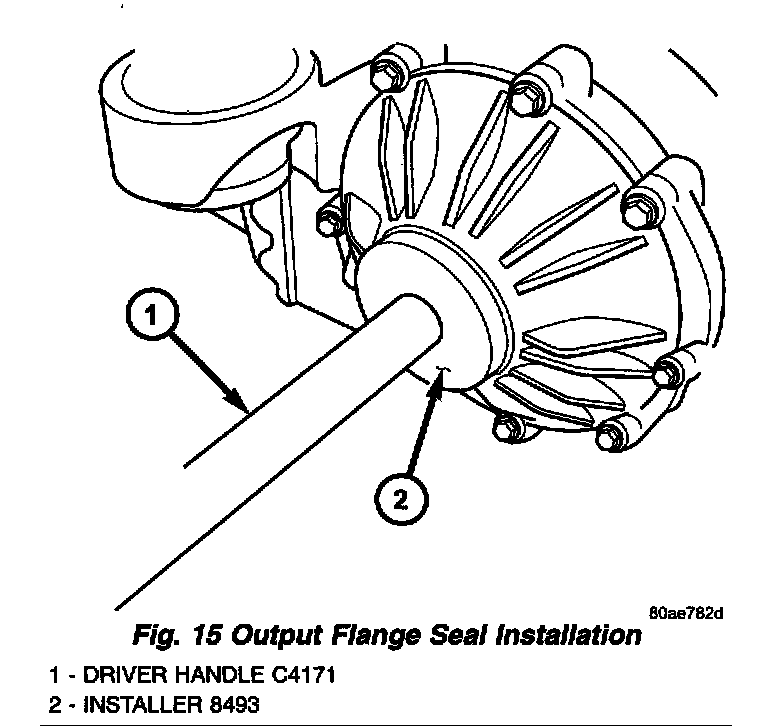
1. Install output flange seals using tools C4171 and 8493 (Fig. 15).
2. Install large overrunning clutch housing O-ring to differential assembly (Fig. 14).
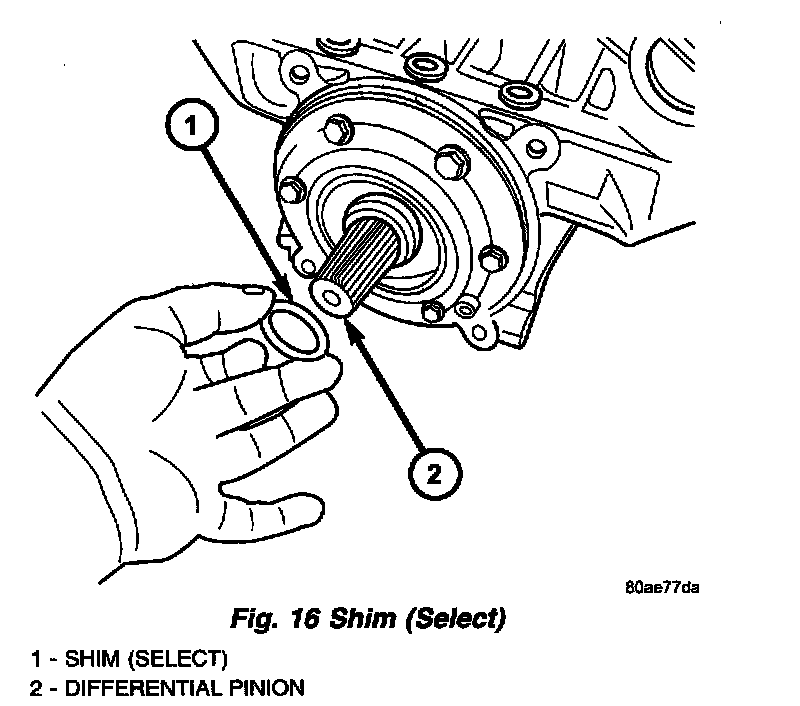
3. Install shim to differential pinion shaft (Fig. 16).
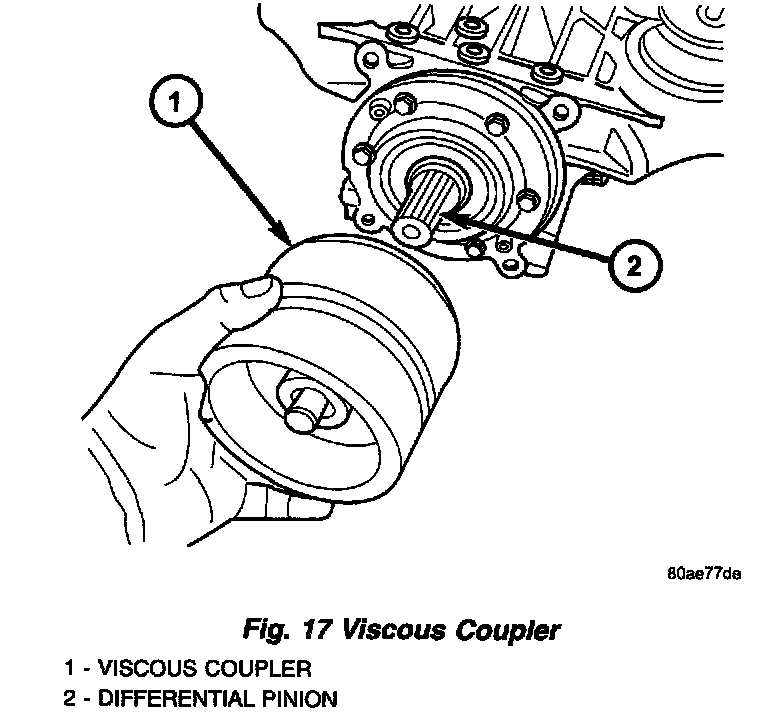
4. Install viscous coupler to differential pinion shaft (Fig. 17).
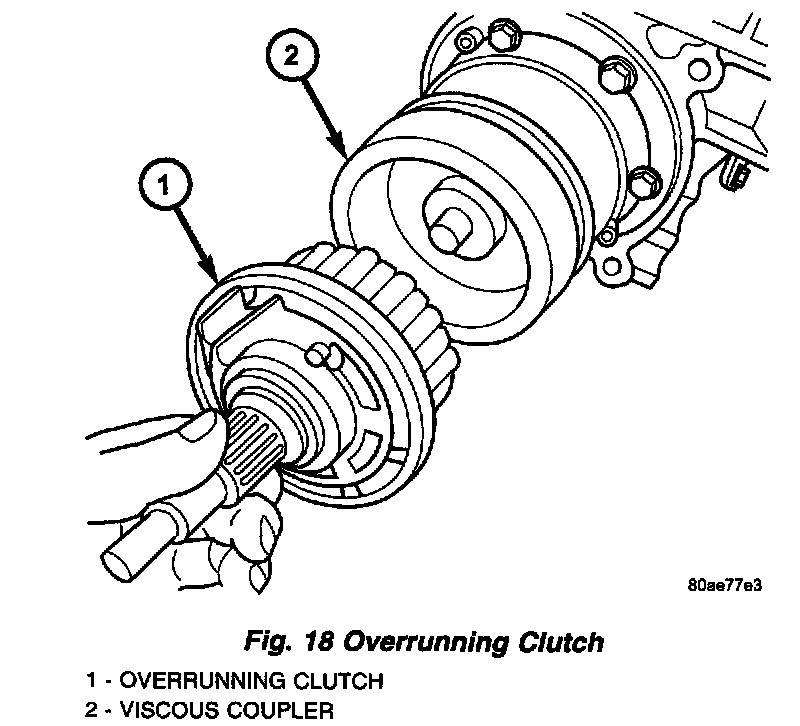
5. Install overrunning clutch assembly to viscous coupler (Fig. 18).
6. Install washer to overrunning clutch (Fig. 14).
7. Install O-ring to overrunning clutch (Fig. 14).
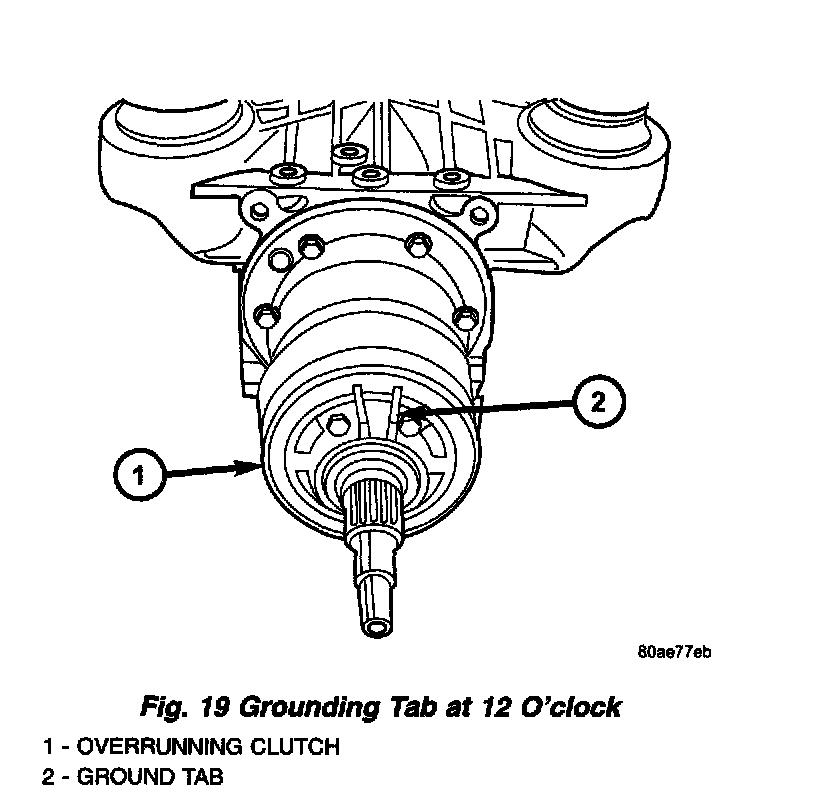
8. Align overrunning clutch ground tab to 12 o'clock position (Fig. 19).
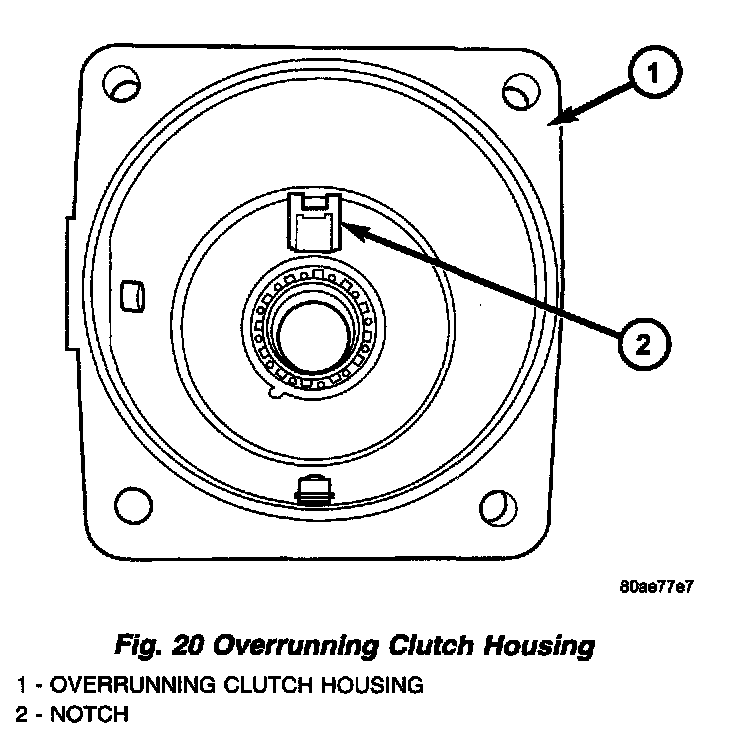
9. Install overrunning clutch housing into position, making sure ground tab engages with notch in housing (Fig. 20).
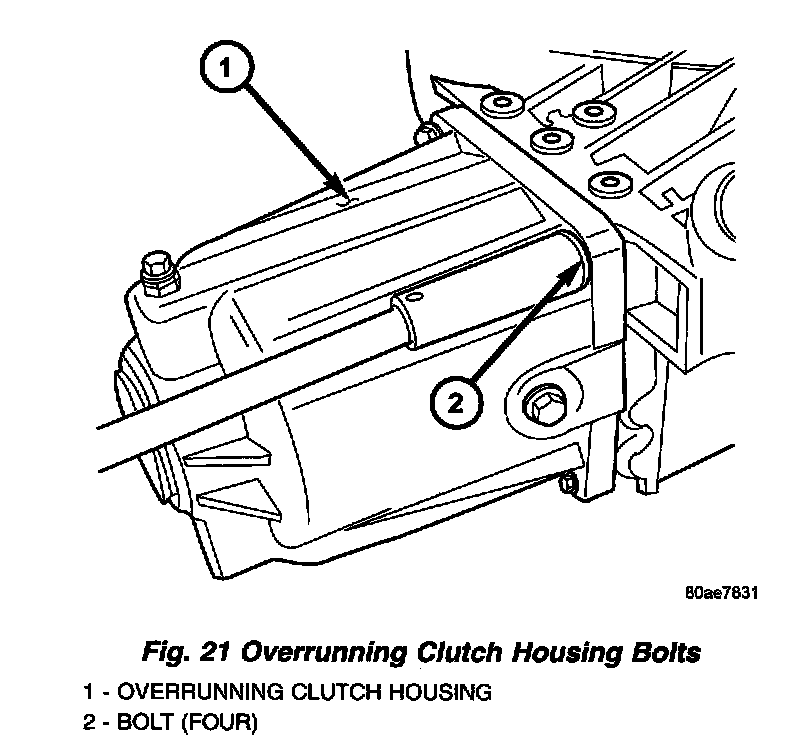
10. Install and torque overrunning clutch housing-to-differential assembly bolts (Fig. 21) to 60 Nm (44 ft. lbs.).
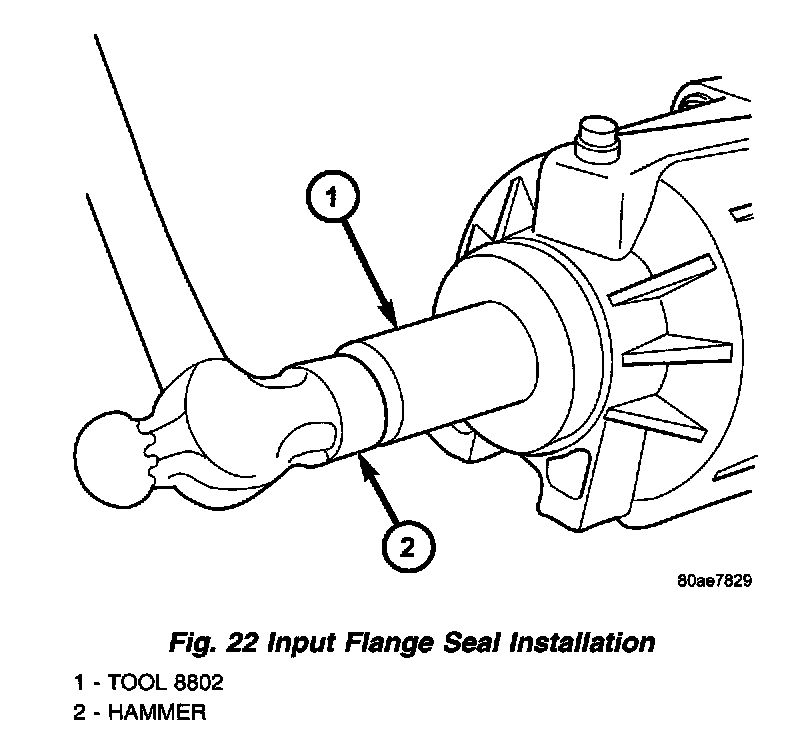
11. Install input flange seal using tool 8802 (Fig. 22).
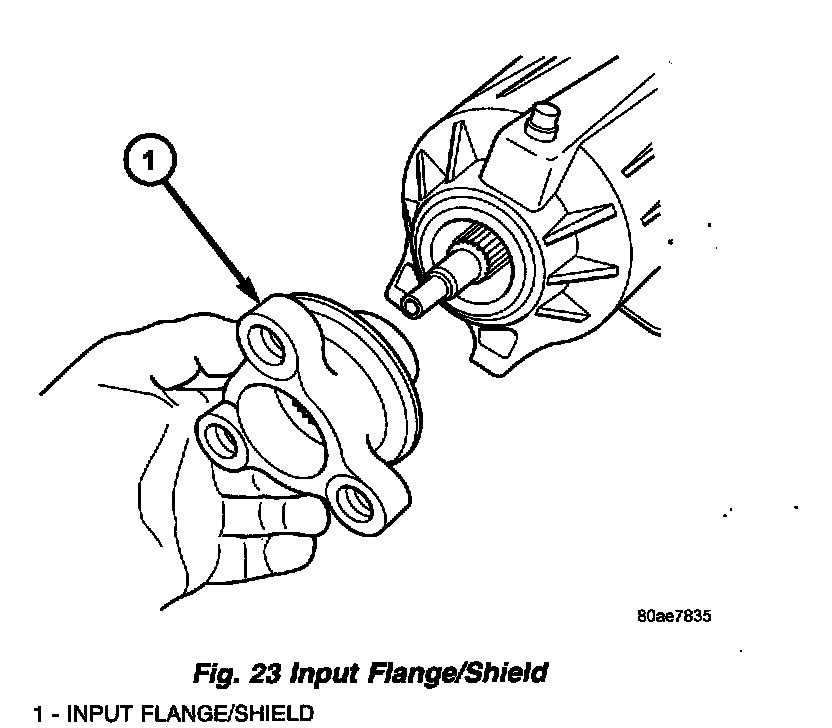
12. Install flange/shield assembly (Fig. 23).
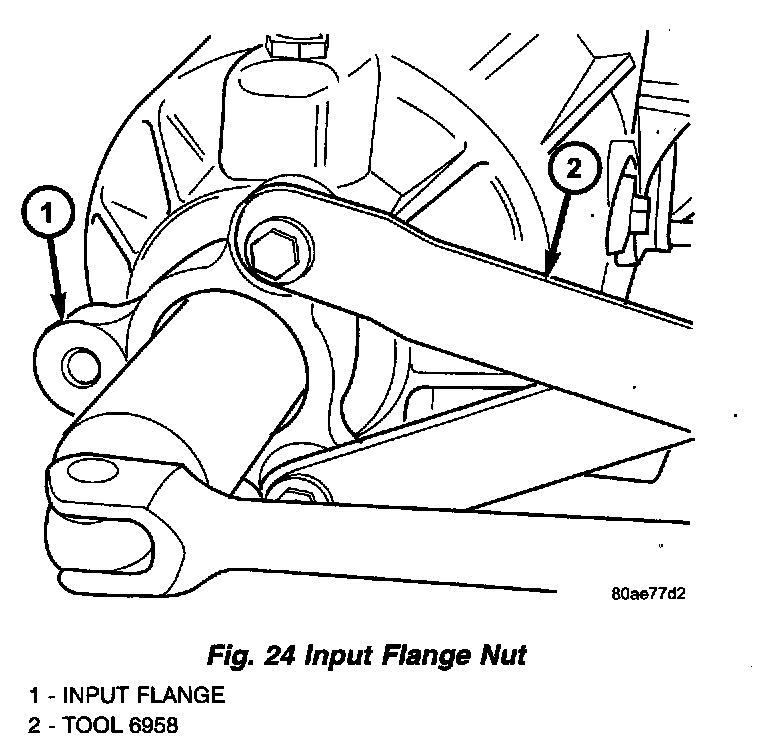
13. Install input flange washer and nut. Using tool 6958 (Fig. 24), torque nut to 136 Nm (100 ft. lbs.).
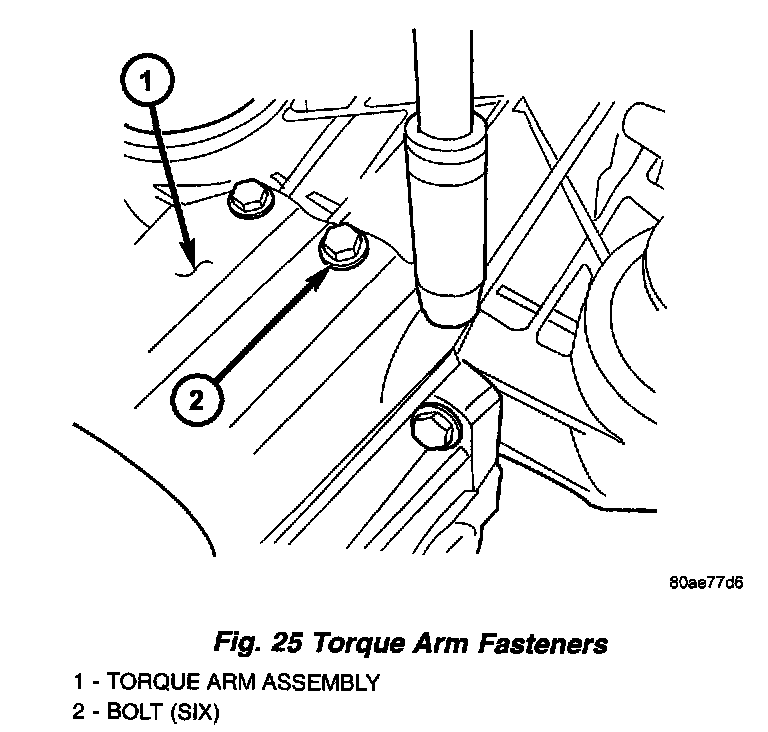
14. Install torque arm assembly into position. Install and torque torque arm-to-differential assembly bolts (Fig. 25) to 60 Nm (44 ft. lbs.).