Locating Vacuum Leaks
REMOVAL1. Disconnect and isolate the battery negative cable.
2. Remove the right front fender extension from the fender.
Fig. 39 Vacuum Reservoir Remove/Install:
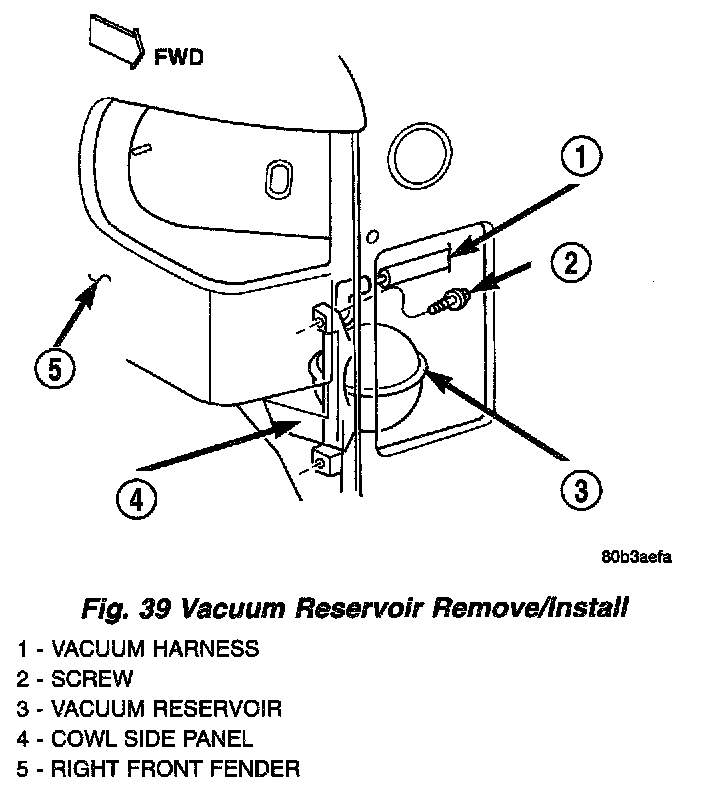
3. Unplug the vacuum harness connector from the vacuum reservoir.
4. Remove the two screws that secure the vacuum reservoir to the right cowl side panel.
5. Remove the vacuum reservoir from the right cowl side panel.
INSTALLATION
1. Position the reservoir to the right side cowl panel.
2. Install the two mounting screws. Tighten the mounting screws to 3.9 Nm (35 in. lbs.).
3. Connect the vacuum harness connector to the vacuum reservoir.
4. Install the right side fender extension.