Front
DISASSEMBLY
WARNING: Review the warnings and cautions before performing the following operation. Service Precautions
CAUTION: On vehicles equipped with airbags, disable the airbag system before attempting any steering wheel, steering column, or instrument panel component diagnosis or service. Disconnect and isolate the battery negative (ground) cable, then wait two minutes for the airbag system capacitor to discharge before performing further diagnosis or service. This is the only sure way to disable the airbag system. Failure to take the proper precautions could result in accidental airbag deployment and possible personal injury.
1. Place the heater-A/C housing on a work bench, with the heater-A/C housing top cover facing up.
Fig. 14 Blend-Air Door Linkage:
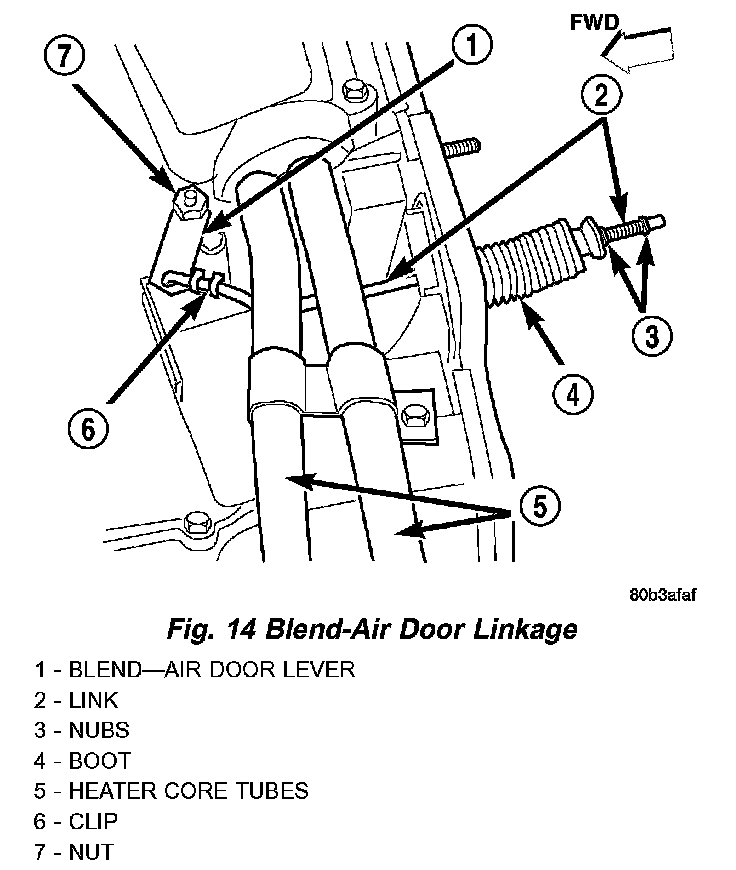
2. Remove the nut that secures the lever to the blend-air door pivot shaft.
3. Disengage the boot for the blend-air door link from the rear mounting flange of the heater-A/C housing.
4. Remove the blend-air door link, boot and lever from the heater-A/C housing as a unit.
Fig. 15 Heater - A/C Housing Top Cover Remove/Install:
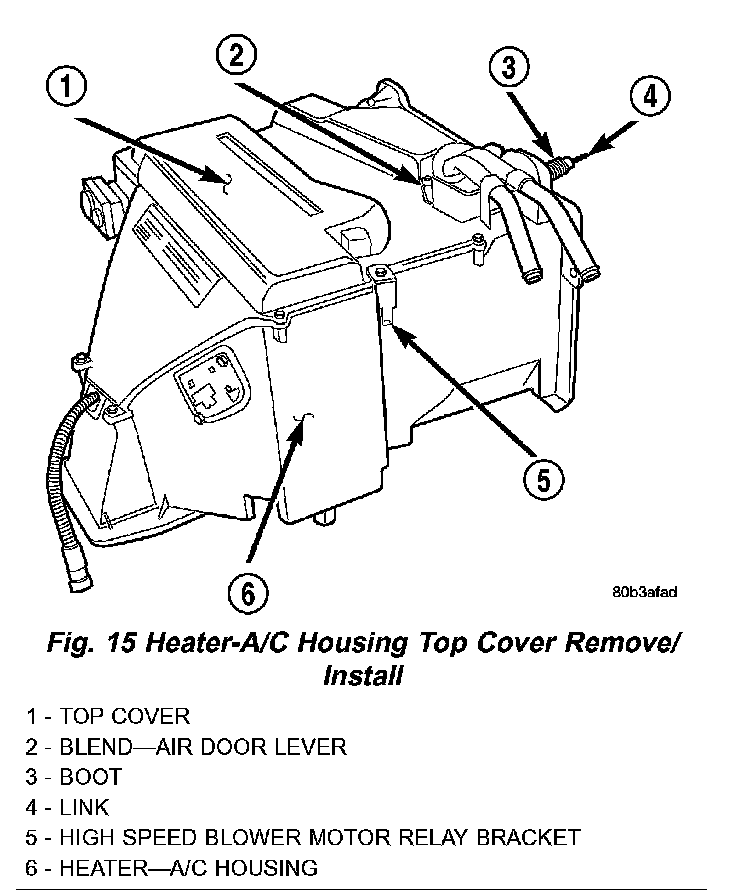
5. Remove the screw that secures the high speed blower motor relay mounting bracket to the heater-A/C housing and remove the relay and bracket.
6. Remove the screws that secure the top cover to the heater-A/C housing.
7. Remove the top cover from the heater-A/C unit.
ASSEMBLY
WARNING: Review the warnings and cautions before performing the following operation. Service Precautions
CAUTION: On vehicles equipped with airbags, disable the airbag system before attempting any steering wheel, steering column, or instrument panel component diagnosis or service. Disconnect and isolate the battery negative (ground) cable, then wait two minutes for the airbag system capacitor to discharge before performing further diagnosis or service. This is the only sure way to disable the airbag system. Failure to take the proper precautions could result in accidental airbag deployment and possible personal injury.
1. Position the top cover onto the heater-A/C unit. Be certain that the blend-air door pivots, all seals, and the grommet for the fin sensing cycling clutch switch wire harness are properly positioned.
2. Secure the top cover to the heater-A/C housing with screws. Tighten the mounting screws to 2.2 Nm (20 in. lbs.).
3. Rotate the blend-air door pivot shaft back and forth to confirm that the door moves freely throughout its travel. If there is any binding or interference, remove the top cover from the heater-A/C housing and repair as required.
4. Reinstall the blend-air door lever, link, and boot unit to the heater-A/C housing. Be certain that the boot flange is properly seated in the hole on the rear mounting flange of the housing.
5. Reinstall the lever to the blend-air door pivot shaft and secure it to the shaft with a nut.
6. Position the high speed blower motor relay and mounting bracket to the heater-A/C housing and secure it with a screw. Tighten the mounting screw to 2.2 Nm (20 in. lbs.).