Blower Motor: Service and Repair
REMOVALFront
1. Disconnect and isolate the battery negative cable.
Fig. 8 Front Blower:
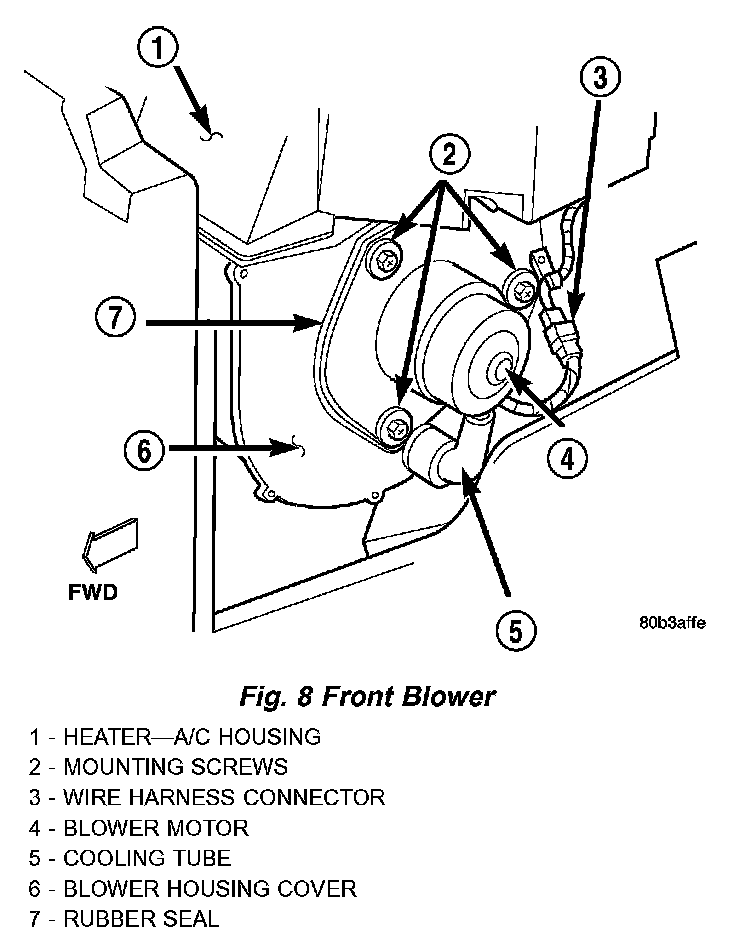
2. Unplug the wire harness connector from the blower motor.
3. Remove the blower motor cooling tube from the nipple on the blower housing cover below the blower motor.
4. Remove the three screws that secure the blower motor mounting plate to the blower housing cover.
5. Remove the blower motor assembly from the blower housing.
6. If the vehicle is equipped with air conditioning, move the suction and discharge lines as required to remove the blower motor assembly from the engine compartment.
Fig. 9 Blower Motor Wheel Remove/Install:
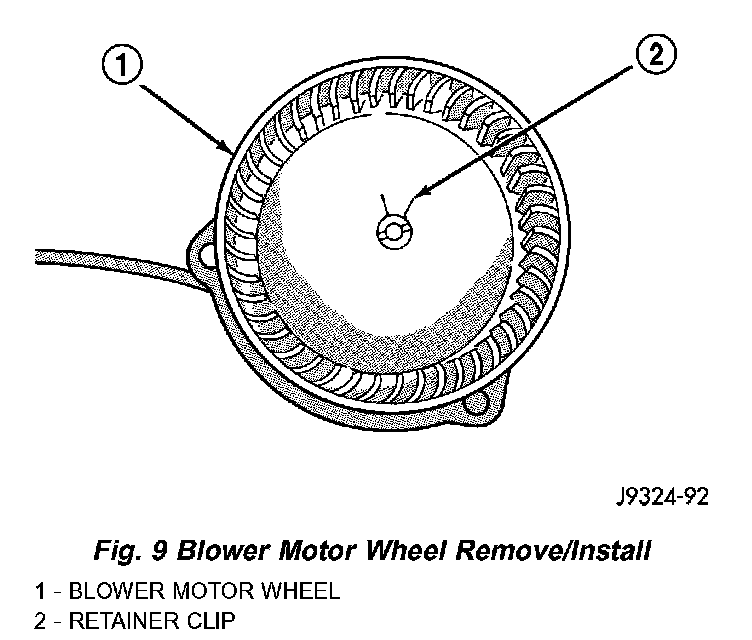
7. Remove the retainer clip from the hub of the blower wheel.
8. Remove the wheel from the blower motor shaft.
Rear
The rear blower motor is used only on models with the optional rear heater-A/C unit. The blower motor can be removed without removing the rear heater-A/C unit from the vehicle.
1. Disconnect and isolate the battery negative cable.
2. Remove the cover from the rear heater-A/C unit.
3. Remove the vertical duct from the rear heater- A/C unit.
4. Remove the horizontal duct from the rear heater-A/C unit.
5. Remove the upper housing from the rear heater-A/C unit.
6. Remove the three screws that secure the blower motor mounting plate to the rear heater-A/C unit upper housing.
7. Remove the blower motor assembly from the rear heater-A/C unit upper housing.
8. Remove the retainer clip from the hub of the blower wheel.
9. Remove the wheel from the blower motor shaft.
INSTALLATION
Front
1. Press the hub of the blower wheel onto the blower motor shaft. Be sure the flat on the blower motor shaft is indexed to the flat on the inside of the hub.
2. Install the retainer clip over the blower wheel hub. The ears of the retainer clip must be indexed over the flats on the blower motor shaft and blower wheel hub.
3. Apply a small bead of RTV rubber sealant to the blower motor side of the rubber seal and isolator unit. This will help to secure the seal to the blower mounting plate during installation.
4. Position the rubber seal and isolator unit to the blower motor mounting plate.
5. Position the blower motor and seal to the three mounting bosses on the blower housing cover and press the isolators over the mounting bosses.
6. Secure the blower motor mounting plate to the blower housing cover with the three mounting screws. Tighten the mounting screws to 2.2 Nm (20 in. lbs.).
7. Reinstall the blower motor cooling tube to the nipple on the blower housing cover.
8. Plug in the blower motor wire harness connector.
9. Connect the battery negative cable.
Rear
1. Press the hub of the blower wheel onto the blower motor shaft. Be sure the flat on the blower motor shaft is indexed to the flat on the inside of the hub.
2. Install the retainer clip over the blower wheel hub. The ears of the retainer clip must be indexed over the flats on the blower motor shaft and blower wheel hub.
3. Position the rubber seal and isolator unit to the blower motor mounting plate.
Fig. 10 Rear Blower Motor Remove/Install:
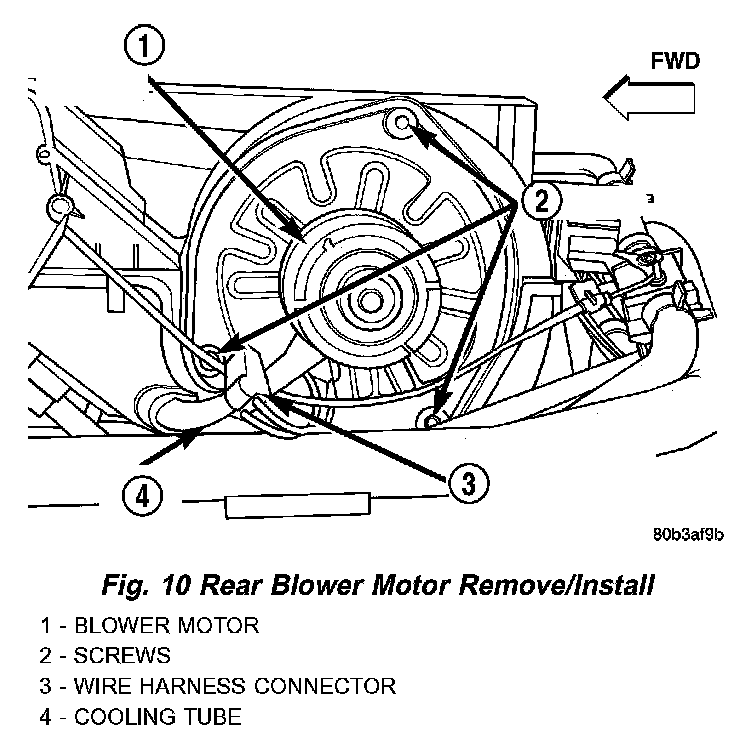
4. Position the blower motor and seal to the three mounting bosses on the rear heater-A/C unit upper housing and press the isolators over the mounting bosses.
5. Secure the blower motor mounting plate to the rear heater-A/C unit upper housing with the three mounting screws. Tighten the mounting screws to 2.2 Nm (20 in. lbs.).
6. Reinstall the upper housing onto the rear heater-A/C unit.
7. Reinstall the horizontal duct to the rear heater- A/C unit. 8. Reinstall the vertical duct to the rear heater- A/C unit. 9. Reinstall the cover to the rear heater-A/C unit.
10. Connect the battery negative cable.