Condenser HVAC: Service and Repair
REMOVALWARNING: REFER TO THE APPLICABLE WARNINGS AND CAUTIONS FOR THIS SYSTEM BEFORE PERFORMING THE FOLLOWING OPERATION. FAILURE TO FOLLOW THE WARNINGS AND CAUTIONS COULD RESULT IN POSSIBLE PERSONAL INJURY OR DEATH.
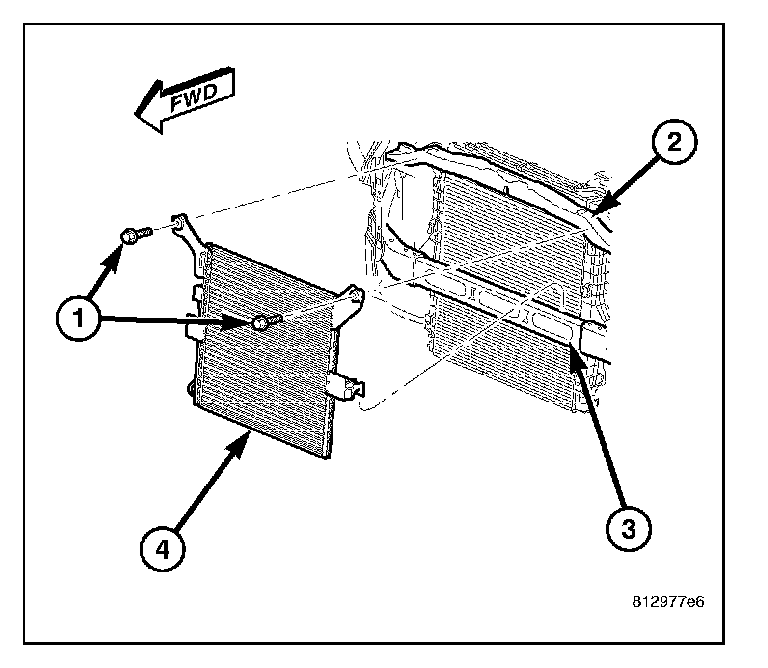
1. Recover the refrigerant from the refrigerant system.
2. Disconnect and isolate the negative battery cable.
3. Disconnect the A/C discharge line and the A/C liquid line from the A/C condenser.
4. Remove the two bolts (1) that secure the A/C condenser and shroud assembly (4) to the upper radiator support (2).
5. Carefully lift the A/C condenser and shroud assembly off of the front bumper support (3) and remove the assembly from the engine compartment.
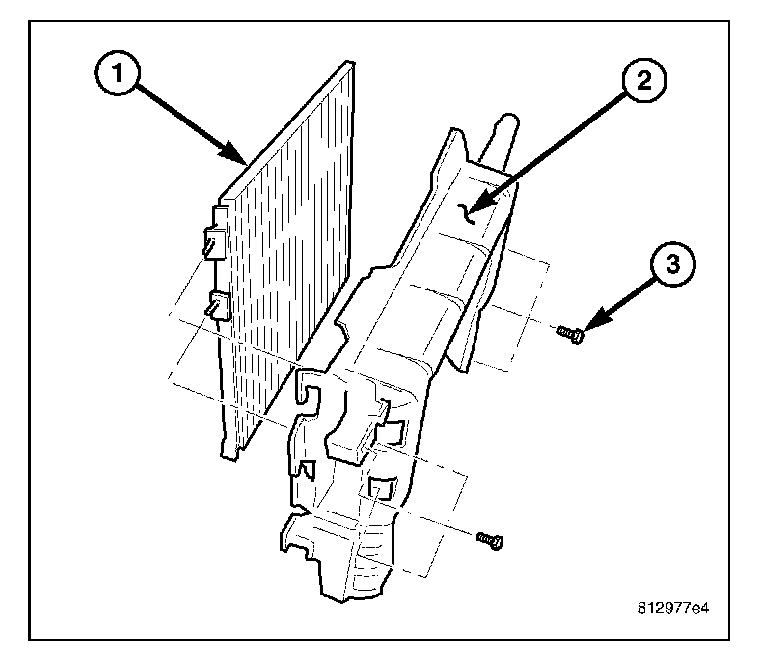
6. If required, place the A/C condenser and shroud assembly on a workbench and remove the six bolts (3) that secure the condenser shroud (2) to the A/C condenser (1) and separate the shroud from the A/C condenser.
INSTALLATION
NOTE:
- If the A/C condenser is being replaced, add 30 milliliters (1 fluid ounce) of refrigerant oil to the refrigerant system. Use only refrigerant oil of the type recommended for the A/C compressor in the vehicle.
- Be certain that each of the radiator and condenser air seals are reinstalled in their proper locations. These air seals are required for the A/C and engine cooling systems to perform as designed.
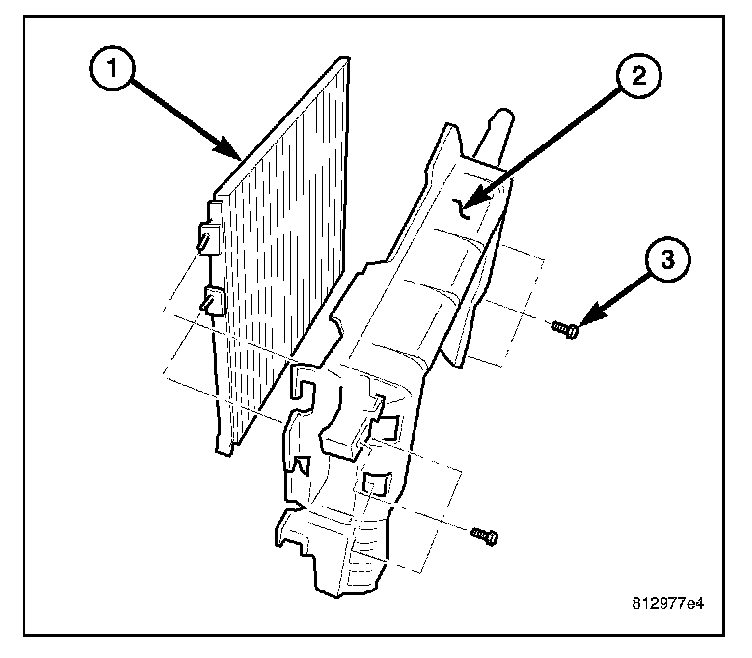
1. If removed, install the condenser shroud (2) onto the A/C condenser (1).
2. Install the six bolts (3) that secure the condenser shroud to the A/C condenser. Tighten the bolts to 2.2 N.m (20 in.lbs.).
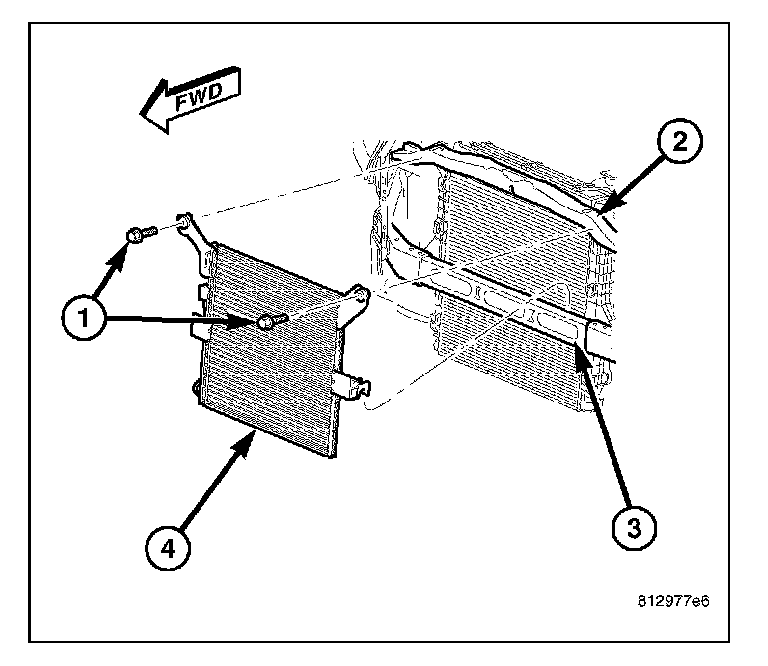
3. Position the A/C condenser and shroud assembly (4) into the engine compartment.
4. Install the A/C condenser and shroud assembly onto the front bumper support (3).
5. Install the two bolts (1) that secure the A/C condenser and shroud assembly to the upper radiator support (2). Tighten the bolts to 10.5 N.m (95 in.lbs.).
6. Connect the A/C discharge line and the A/C liquid line onto the A/C condenser.
7. Reconnect the negative battery cable.
8. Evacuate the refrigerant system.
9. Charge the refrigerant system.