Engine Controls - MIL ON/DTC's P0430/P0420 Set
NUMBER: 18-028-05 REV. AGROUP: Vehicle Performance
DATE: July 20, 2005
THIS BULLETIN REVISES SERVICE BULLETIN 18-028-05, DATED JUNE 14, 2005 WHICH SHOULD BE REMOVED FROM YOUR FILES. THIS REVISIONS ADDS A NEW PART NUMBER FOR AN OXYGEN SENSOR OMITTED FROM THE ORIGINAL BULLETIN. THE DRBIII(R) FLASH FILES FOR THIS BULLETIN ARE AVAILABLE ON DealerCONNECT. FOR MARKETS OUTSIDE OF THE UNITED STATES AND CANADA, THE FLASH FILES AND REPROGRAMMING INSTRUCTIONS WILL BE AVAILABLE ON ITIL/ISIS DVD AUGUST, 2005.
SUBJECT:
Flash: Diagnostic Trouble Code P0430, P0420 - Catalyst Efficiency
OVERVIEW:
This bulletin involves reprogramming the Powertrain Control Module (PCM) and replacing the downstream oxygen sensor.
MODELS:
2005 (DR/DH) Ram Truck
NOTE:
This Bulletin Applies To Vehicle Equipped With 5.7L engines (Sales Code EZA) built on or before June 1, 2005 (MDH 0601XX).
SYMPTOM/CONDITION:
Customers may experience a MIL light with Diagnostic Trouble Code (DTC) - P0430 or P0420 - Catalyst Efficiency.
DIAGNOSIS:
If the DTC is present, perform the Repair Procedure.

PARTS REQUIRED
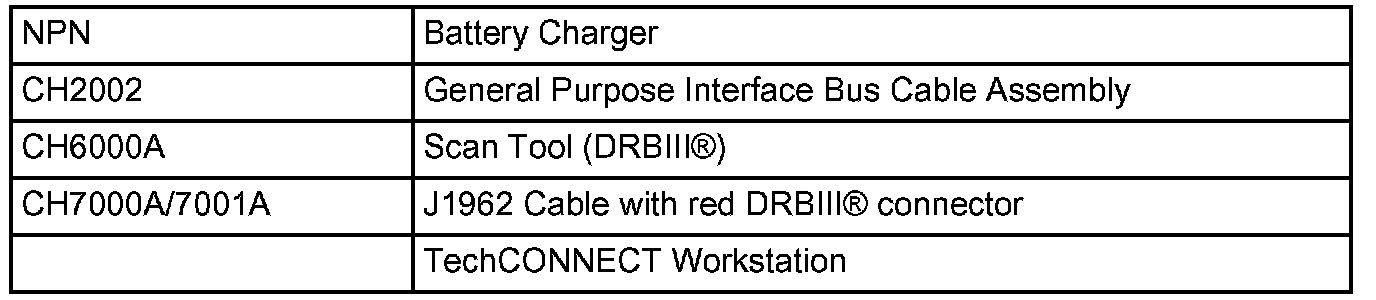
SPECIAL TOOLS/EQUIPMENT REQUIRE
NOTE:
An updated J1962 cable has been released. This cable has a red colored connector at the DRBIII(R) connection. Use this cable whenever a flash is being performed.
REPAIR PROCEDURE:
Using the procedure outlined on TeChCONNECT, remove the down stream oxygen sensor and install the appropriate part number listed above.
REPAIR PROCEDURE FOR DOMESTIC VEHICLES USING DealerCONNECT:
NOTE:
Whenever a module is reprogrammed, the software in the DRBIII(R); must be programmed with the latest revision level available.
NOTE:
If this flash process is interrupted/aborted, the flash process should be restarted and then follow the directions on the DRBIII(R).
1. Before beginning the flash procedure, remove any old flash files from the DRBIII(R) memory. To clear the memory from the MAIN MENU:
a. Simultaneously press the "MORE" and "YES" keys.
b. A screen will appear requesting a "COLD BOOT".
c. Follow the on screen instructions by selecting the "F4" key.
d. When the DRBIII(R) reboots to the MAIN MENU, proceed to Step # 2.
2. With the ignition switch in the "RUN" position, determine the original part number of the PCM currently in the vehicle. Using the DRBIII(R) select:
a. "DRBIII(R) Standalone".
b. "1998 - 2005 Diagnostics".
c. "All (Except Below)".
d. "Engine".
e. "Module Display".
f. Record the "PCM part #" on the repair order for later reference.
3. Connect the DRBIII(R) to TechCONNECT. Open TechTOOLS and verify that the "DRBIII(R) Status: Connected" message is in the upper right corner of the TechTOOLS screen.
4. Enter the "PCM part #" recorded in Step # 2 in the "Parts Criteria" area and select "Show Updates". TechTOOLS will populate the appropriate flash file.
5. Select the flash file.
6. Select the "DRBIII" radio button which is next to the "Download/Update" button.
7. Select the "Download/Update" button.
8. Monitor the "Flash Download/Update Progress" window on the TeChCONNECT and follow the instructions on TeChCONNECT. When the flash process is complete, proceed to Step # 9.
9. Disconnect the DRBIII(R) from TeChCONNECT.
10. Open the hood, install a battery charger and verify that the charging rate provides approximately 13.5 volts.
11. Connect the DRBIII(R) to the vehicle.
12. Download the flash file from the DRBIII(R) to the vehicle. Using the DRBIII(R) select:
a. "Vehicle Flash".
b. Follow the directions on the DRBIII(R) screen. When the flash process is complete, proceed to Step # 15.
13. Reset the "Pinion Factor" as necessary.
14. Perform the transmission Quick Learn Procedure as necessary.
NOTE:
Due to the PCM programming procedure, a DTC may be set in other modules (TCM, BCM, MIC, SKIM, etc.) within the vehicle, if so equipped. Some DTC's may cause the MIL to illuminate. Check all modules using "Module Scan", record the DTC's, and erase these DTC's prior to returning the vehicle to the customer. Erase any DTC's in the PCM only after all other modules have had their DTC's erased.
NOTE:
The following step is required by law.
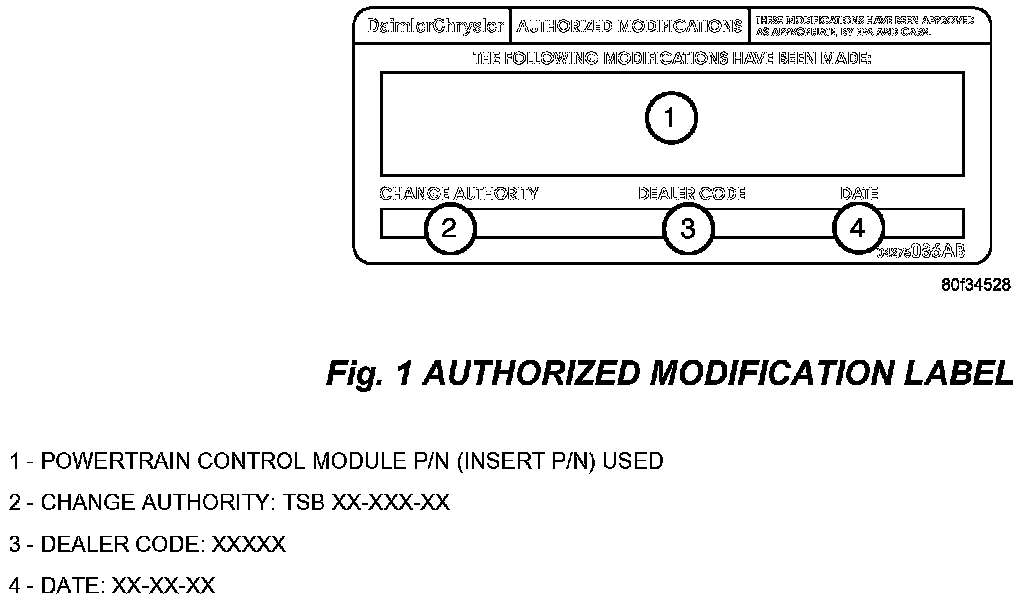
15. Type the necessary information on the "Authorized Modification Label" p/n 04275086AB and attach near the VECI label (Fig. 1).
REPAIR PROCEDURE FOR EXPORT VEHICLES USING DealerCONNECT:
NOTE:
Whenever a controller is programmed, the software in the DRBIII(R); must be programmed with the latest revision level available.
NOTE:
If this flash process is interrupted/aborted, the flash should be restarted and then follow the directions on the DRBIII(R).
1. Before beginning the reprogramming procedure, remove any old flash reprogramming files from the DRBIII(R) memory. To clear the memory from the MAIN MENU:
a. Simultaneously press the "MORE" and "YES" keys.
b. A screen will appear requesting a "COLD BOOT".
c. Follow the on screen instructions by selecting the "F4" key.
d. When the DRBIII(R) reboots to the MAIN MENU, proceed to Step # 2.
2. With the ignition switch in the "RUN" position, determine the original part number of the ECM currently in the vehicle. Using the DRBIII(R) select:
a. "DRBIII(R) Standalone"
b. "1998 - 2005 Diagnostics"
c. "All (Except Below)"
d. "Engine"
e. "Module Display"
f. Record the "ECM part #" on the repair order for later reference.
g. Disconnect the DRBIII(R) from the vehicle.
h. Connect the DRBIII(R) to the ITIL/ISIS PC and NULL modem cable.
3. Log into DealerCONNECT. Proceed to: Service/Repair - Flash.
4. Select vehicle Year, Model, and Engine (YME). Then select the "Submit" button at the bottom of the screen.
5. Compare the calibration part number available for flash reprogramming to the module part number recorded earlier. Select the new calibration if applicable.
6. Download the new calibration to the PC.
7. Using the "DRBIII - WINFLASH II" application on the PC, download the flash calibration file to the DRBIII(R) from the PC.
8. Disconnect the DRBIII(R) from the PC and NULL modem cable.
9. Open the hood, install a battery charger and verify that charging rate provides approximately 13.5 volts.
10. Connect the DRBIII(R) to the vehicle.
11. Turn the ignition switch to the "Run" position (engine not running).
12. Reprogram the ECM by downloading the flash from the DRBIII(R) to the vehicle. Using the DRBIII(R) select:
a. "Vehicle Flash"
b. Follow the directions on the DRBIII(R) screen. When the flash process is complete, proceed to the next step.
13. Reset the "Pinion Factor" as necessary.
14. Perform the transmission Quick Learn Procedure as necessary.
15. Update the Sentry Key Immobilizer Module (SKIM) or Sentry Key Remote Entry Module (SKREEM), Secret Key data as necessary.
NOTE:
Due to the ECM programming procedure, a DTC may be set in other modules (TCM, BCM, MIC, SKIM, etc.) within the vehicle, if so equipped. Some DTC's may cause the MIL to illuminate. Check all modules using "Module Scan", record the DTC's, and erase these DTC's prior to returning the vehicle to the customer. Erase any DTC's in the ECM only after all other modules have had their DTC's erased.
NOTE:
The following step is required by law when reprogramming a PCM and/or TCM.
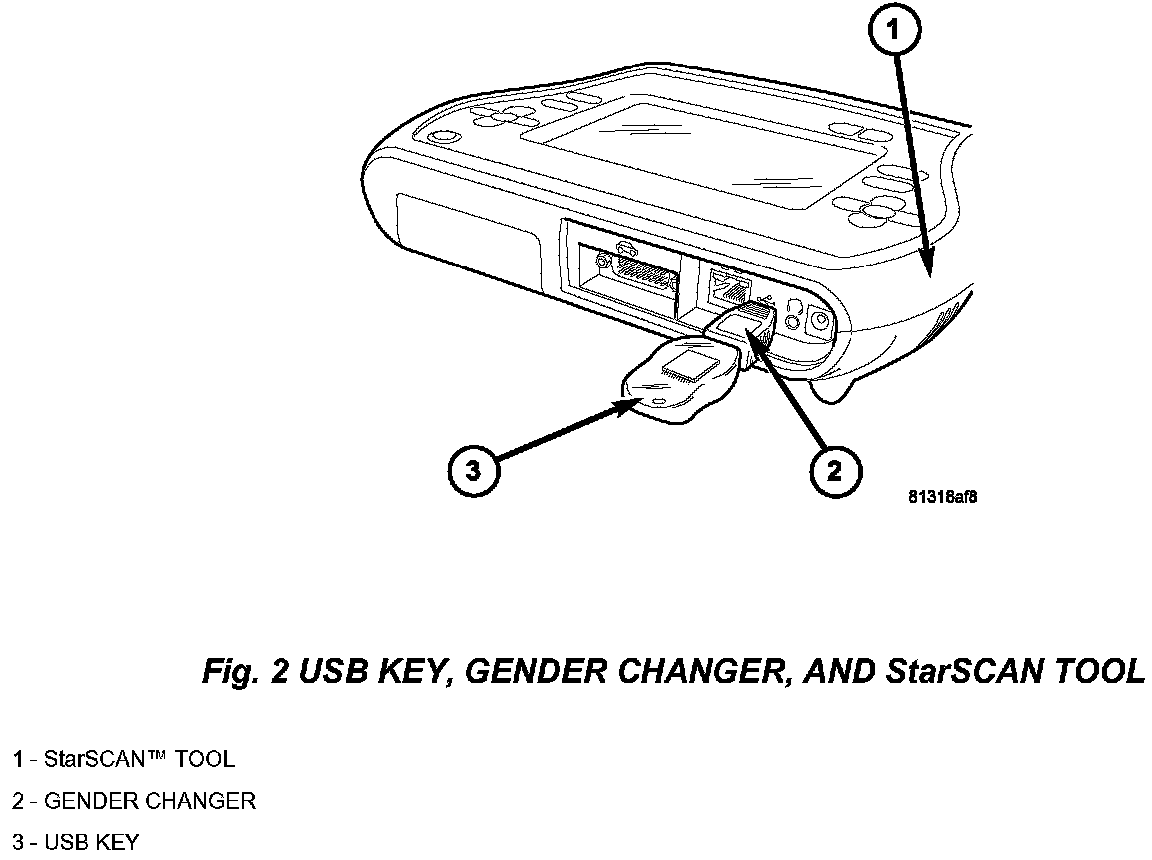
16. Type the necessary information on the "Authorized Software Update" label, p/n 04275086AB and attach near the VECI label(Fig. 2).
POLICY:
Reimbursable within the provisions of the warranty.

TIME ALLOWANCE

FAILURE CODE
Disclaimer:
This bulletin is supplied as technical information only and is not an authorization for repair.