Removal and Installation
INSTRUMENT PANELREMOVAL
CAUTION: Electronic modules are sensitive to static electrical charges. If exposed to these charges, damage may result.
All vehicles
1. If equipped with adjustable pedals, move the pedals to the full forward position.
2. If equipped, remove the front floor console.
Navigator only
3. Remove the driver air bag module.
Expedition only
4. Remove the steering wheel.
All vehicles
5. Remove the passenger air bag module.
6. If equipped, remove the RH instrument panel insulator.
- Disconnect the instrument panel insulator lamp.

7. Remove the LH and RH A-pillar lower trim panels.
1 Remove the scuff plate.
2 Remove the pin-type retainer.

8. Position the LH and RH door weatherstrip seals aside.

9. Remove the LH and RH assist handles.
1 Remove the covers.
2 Remove the bolts.

10. NOTE: Release the top attachments by pulling inboard first and then upward to release the lower hook.
Remove the LH and RH windshield side garnish mouldings.

11. Remove the instrument panel steering column cover.
1 Remove the screws.
2 Release the cover from the instrument panel.

12. Position the hood release and parking brake release handles aside.
1 Remove the bolts.
2 Position the release handles aside.

13. Remove the bolts and the steering column reinforcement panel.

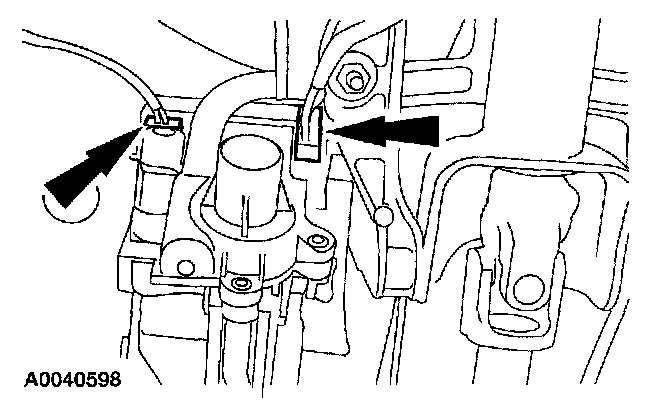
14. Loosen the bolt and disconnect the LH instrument panel bulkhead connector.

15. Disconnect the LH electrical connectors.

16. Remove the bolts and position the vehicle security module aside.

17. Remove the bolt and position the ground wires aside.
18. Disconnect the cruise control deactivator and the brake on/off switch electrical connectors.
19. If equipped, disconnect the adjustable pedal motor connector.
Expedition only

20. Remove the steering column shrouds.
1 Remove the screws.
2 Remove the upper and lower shrouds.

21. Disconnect the steering column shift cable.

22. Remove the screw and position the steering column shift cable bracket aside.
All vehicles

23. CAUTION: Secure the steering wheel to prevent any rotation or damage to the clockspring.
Remove the pinch bolt and separate the intermediate shaft from the steering column.

24. If equipped, remove the three pin-type retainers and the valance panel.

25. Disconnect the climate control head vacuum harness and the electrical connector.

26. If equipped, disconnect the electronic automatic temperature control (EATC) hose from the evaporator case.

27. NOTE: Expedition shown; Navigator similar.
Remove the RH instrument panel side finish panel.

28. Disconnect the RH instrument panel electrical connectors.
1 Disconnect the electrical connectors.
2 Remove the RH ground bolt.
3 Disconnect the in-line antenna connector.

29. Remove the instrument panel floor brace bolts.
Navigator only

30. Remove the bolts and position the floor console bracket aside.

31. NOTE: The LH brace is similar to Expedition; RH brace shown.
Position the carpet aside, remove the bolts and the instrument panel floor braces.

32. Remove the instrument panel defroster grille.
Expedition only

33. Position the carpet aside, remove the bolts and the instrument panel floor brace.

34. Remove the instrument panel cowl top bolts covers.
All vehicles

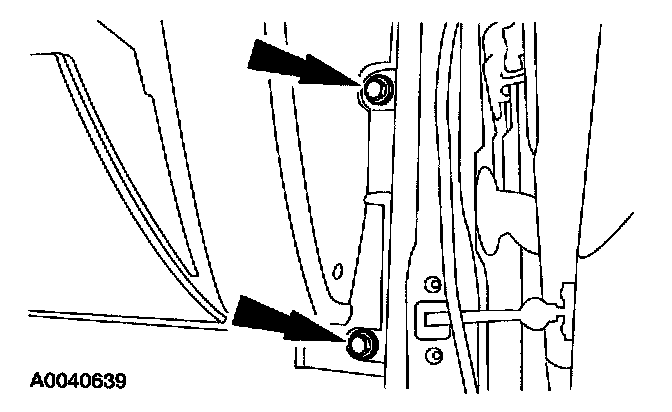
35. Remove the instrument panel bolts.

36. Remove the LH instrument panel bolts.
37. Remove the RH instrument panel bolts.
38. NOTE:
- This step requires an assistant.
- Two bullet connectors align the instrument panel to the bulkhead.
Remove the instrument panel.
INSTALLATION
CAUTION: Electronic modules are sensitive to static electrical charges. If exposed to these charges, damage may result.
All vehicles
1. NOTE: This step requires an assistant.
Align and position the instrument panel in the vehicle.

2. Install the RH instrument panel bolts.

3. Install the LH instrument panel bolts.

4. Install the instrument panel bolts.
Navigator only

5. Install the instrument panel defroster grille.

6. NOTE: The LH brace is similar to Expedition; RH brace shown.
Position the instrument panel floor braces and install the bolts.
- Position the carpet aside.

7. Position the floor console bracket and loosely install the bolts.
Expedition only

8. Install the instrument panel cowl top bolt covers.

9. Position the instrument panel floor braces and the install bolts.
- Position the carpet aside.
All vehicles

10. Install the instrument panel floor brace bolts.

11. Connect the RH instrument panel electrical connectors.
1 Connect the electrical connectors.
2 Install the RH ground wire and bolt.
3 Connect the in-line antenna connector.

12. NOTE: Expedition shown; Navigator similar.
Install the RH instrument panel side finish panel.

13. If equipped, connect the EATC hose to the evaporator case.

14. Connect the climate control head vacuum harness and the electrical connector.

15. If equipped, position the valance panel and install the three pin-type retainers.
Expedition only

16. Position the steering column shift cable bracket and install the screw.

17. Connect the steering column shift cable.

18. Install the steering column shrouds.
1 Position the upper and lower shrouds on the column.
2 Install the screws.
All vehicles

19. Connect the intermediate shaft to the steering column and install the pinch bolt.

20. Connect the cruise control deactivator and the brake on/off switch electrical connectors.
21. If equipped, connect the adjustable pedal motor harness electrical connector.

22. Install the RH ground wire and bolt.

23. Connect the two electrical connectors.

24. Connect the LH instrument panel electrical connectors and the bulkhead connector.
- Tighten the bolt.
- Insert the main wiring harness locators.

25. Position the steering column reinforcement panel and install the bolts.

26. Install the hood release and parking brake release handle.
1 Position the release handles.
2 Install the bolts.

27. Install the instrument panel steering column cover.
1 Position the cover on the instrument panel.
2 Install the screws.

28. NOTE: Make sure that the locator tabs on the windshield side garnish mouldings locate in the slots on the instrument panel.
Install the LH and RH windshield side garnish mouldings.

29. Install the LH and RH assist handles.
1 Position the assist handle.
2 Install the bolts.
3 Install the covers.

30. Install the LH and RH A-pillar lower trim panels.
1 Position the A-pillar lower trim panel.
2 Install the pin-type retainer.
3 Install the scuff plate.

31. Install the LH and RH door weatherstrip seals.
32. If equipped, install the RH instrument panel insulator.
- Connect the instrument panel insulator lamp.
Navigator only

33. Tighten the floor console bracket bolts.
All vehicles
34. Install the passenger air bag module.
Navigator only
35. Install the driver airbag module.
Expedition only
36. Install the steering wheel.
All vehicles
37. If equipped, install the floor console.