Cylinder Heads
Cylinder Head
Special Tool(s)
Disassembly
CAUTION: Cylinder head machining or milling is not authorized by the Ford Motor Company. Cylinder head flatness must be within 0.0254 mm (0.001 inch) across a 38.1 mm (1.5 inch) square area.
CAUTION: Place the cylinder head on a cardboard or wood surface to prevent damage to the joint face.

All cylinder heads
1. NOTE: The hydraulic lash adjusters must be reinstalled in their original locations. Record the hydraulic lash adjuster locations.
Remove the hydraulic lash adjusters

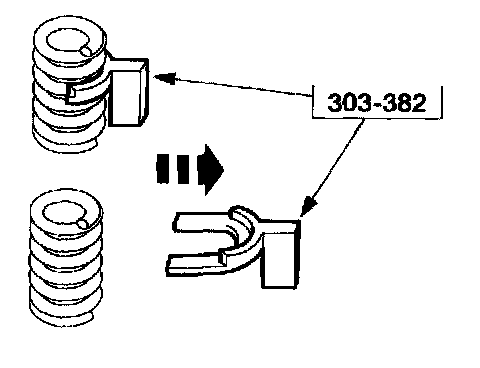
2. Install the special tool between the valve spring coils to prevent valve stem seal damage.

3. NOTE: Windsor engine shown; Romeo engine similar.
Use the special tool to compress the valve springs.
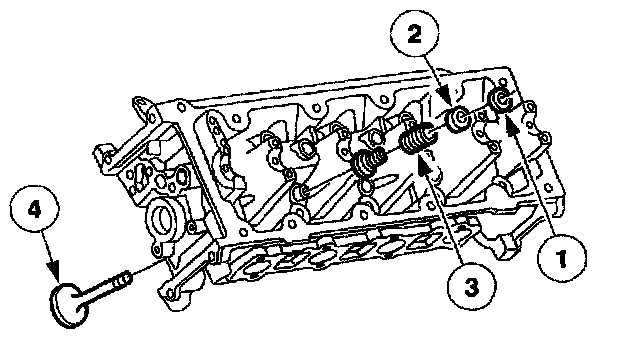
4. CAUTION: Keep the valves and valve spring retainer keys in order so they can be reinstalled in their original locations.
NOTE: Shown without camshaft for clarity.
Remove the valves.
1 Remove the valve spring retainer keys.
2 Remove the valve spring retainers.
3 Remove the valve springs.
4 Remove the valves.
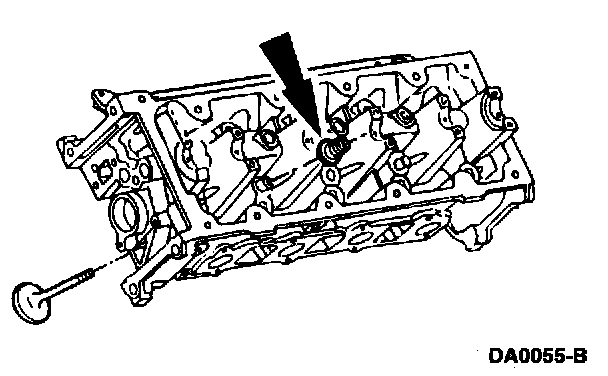
5. Remove the valve stem seals.

Romeo cylinder heads (4.6L)
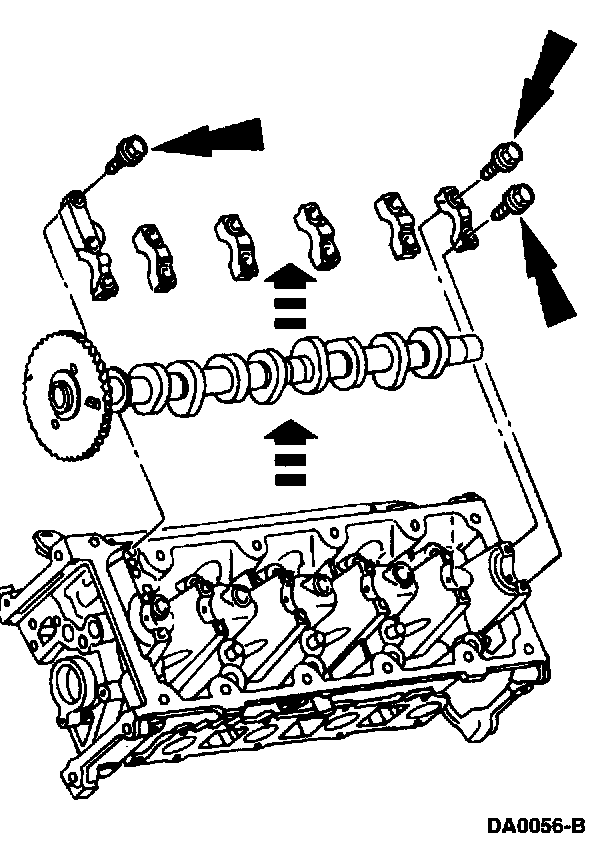
6. NOTE: The camshaft bearing caps must be reinstalled in their original locations. Record the camshaft bearing cap locations.
Remove the bolts, the bearing caps and the camshaft.

7. Clean and inspect the camshaft bearing caps.
^ One of the bearing caps contains an oil flow restriction groove. Make sure the groove is free of foreign material.
Windsor cylinder heads (5.4L)
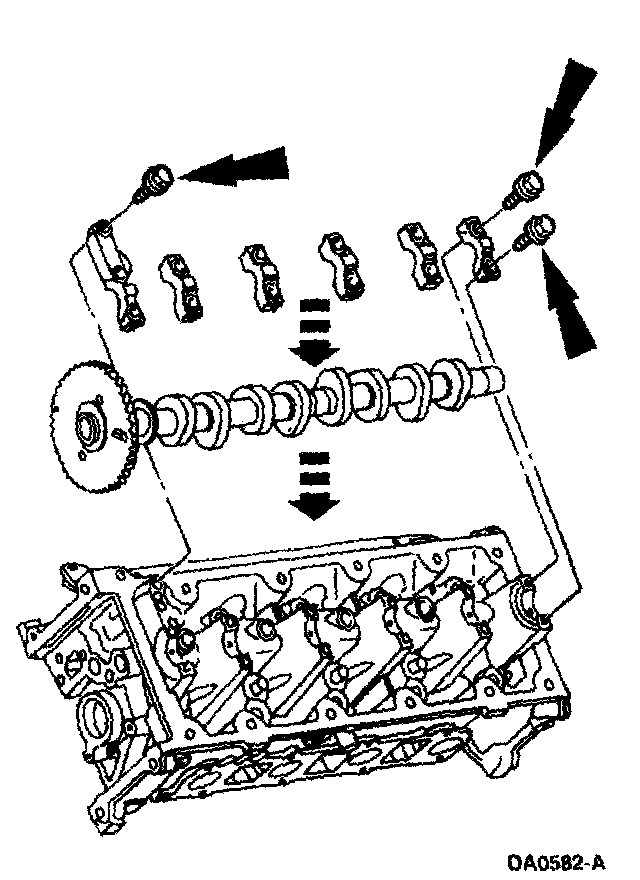
8. NOTE: The camshaft bearing caps must be reinstalled in their original locations. Record the camshaft bearing cap locations.
Remove the bolts, the bearing caps and the camshaft.

9. Clean and inspect the camshaft bearing caps.
^ One of the bearing caps contains an oil flow restriction groove. Make sure the groove is free of foreign material.
All cylinder heads
10. CAUTION: Do not use metal scrapers, wire brushes, power abrasive discs or other abrasive means to clean the sealing surfaces. These tools cause scratches and gouges that make leak paths. Use a plastic scraping tool to remove all traces of the head gasket.
CAUTION: Observe all warnings or cautions and follow all application directions contained on the packaging of the silicone gasket remover and the metal surface prep.
NOTE: If there is no residual gasket material present, metal surface prep can be used to clean and prepare the surfaces.
Clean the cylinder head sealing surfaces.
1 Remove any large deposits of silicone or gasket material with a plastic scraper.
2 Apply silicone gasket remover, following package directions, and allow to set for several minutes.
3 Remove the silicone gasket remover with a plastic scraper. A second application of silicone gasket remover may be required if residual traces of silicone or gasket material remain.
4 Apply metal surface prep, following package directions, to remove any remaining traces of oil or coolant, and to prepare the surfaces to bond with the new gasket. Do not attempt to make the metal shiny. Some staining of the metal surfaces is normal.
Assembly

All cylinder heads
1. Lubricate the camshaft journals with clean engine oil.
Romeo cylinder heads (4.6L)
2. Install the camshaft and the camshaft bearing caps in their original locations.
^ Lubricate the camshaft bearing caps with clean engine oil.
^ Position the camshaft bearing caps.
^ Install the bolts loosely.

3. Tighten the bolts in the sequence shown.
Windsor cylinder heads (5.4L)
4. Install the camshaft and the camshaft bearing caps in their original locations.
^ Lubricate the camshaft bearing caps with clean engine oil.
^ Position the camshaft bearing caps.
^ Install the bolts loosely.
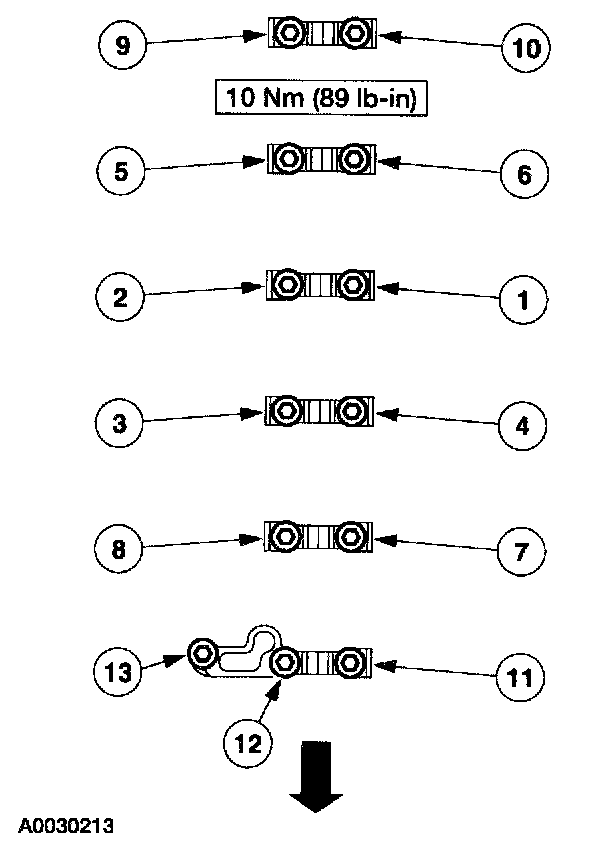
5. Tighten the bolts in the sequence shown.

All cylinder heads
6. NOTE: Lubricate the valve stems using clean engine oil.
Install the valves in the valve guides located in the cylinder head.
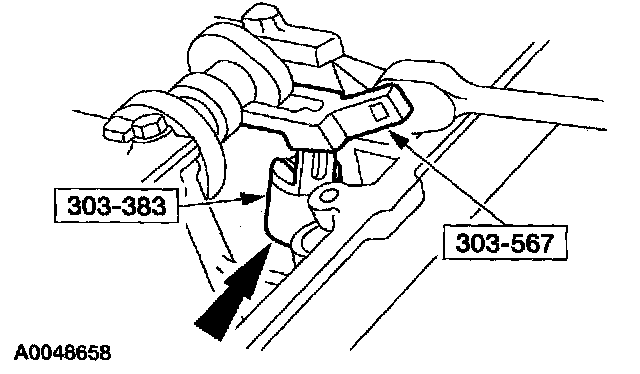
7. Use the special tools to install the valve stem seals.

8. Install the valve springs and the valve spring retainers onto the valves.
9. Install the special tool between the valve spring coils to prevent valve stem seal damage.

10. Use the special tool to compress the valve springs. Install the valve spring retainer keys.

11. NOTE: Lubricate the hydraulic lash adjusters using clean engine oil.
Install the hydraulic lash adjusters in their original locations.
12. Remove the special tool, unless the cylinder head is to be installed in-vehicle.