Installation
Engine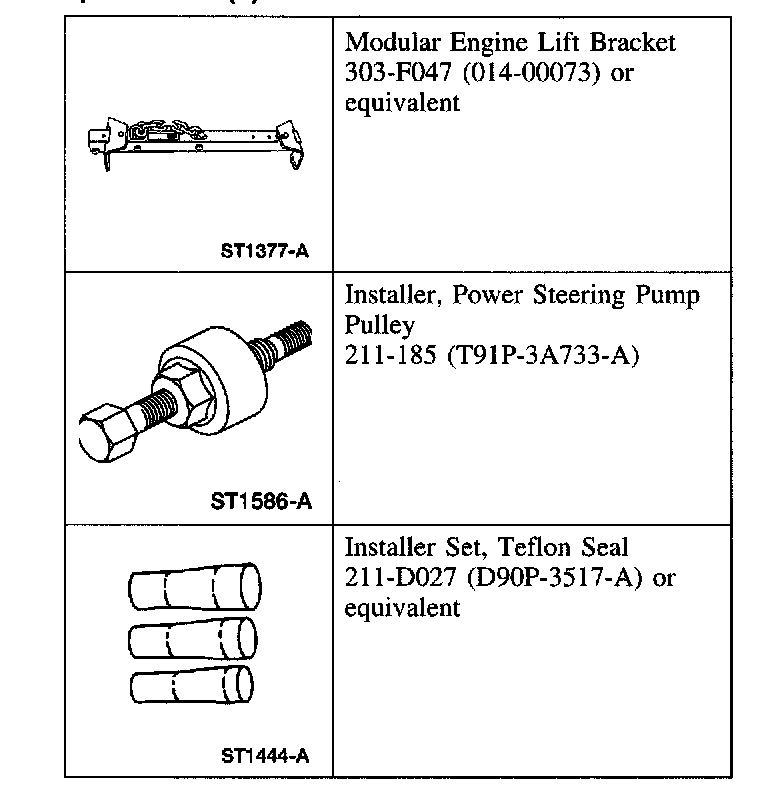
Special Tool(s)
Installation
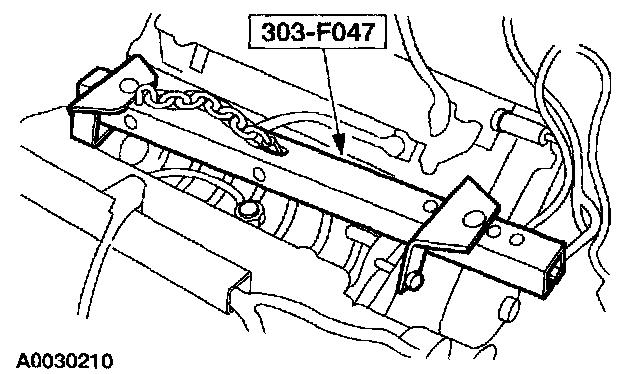
1. Position the engine in the vehicle.
2. Remove the special tool.
3. Remove the floor jack supporting the transmission.
4. Raise and support the vehicle.
5. Align the engine to the transmission.

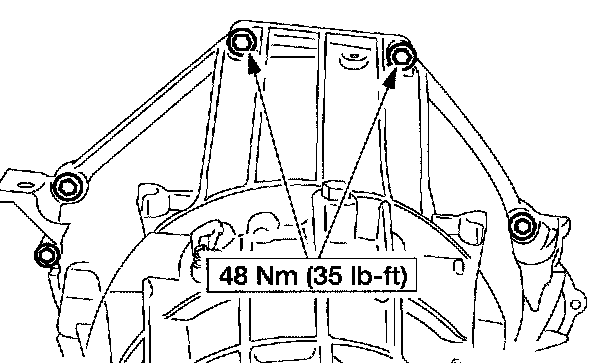
6. Install the lower five transmission-to-engine bolts.

7. Install the LH engine mount bolt.
8. Install RH engine mount nut.

9. Install new torque converter-to-flexplate nuts.

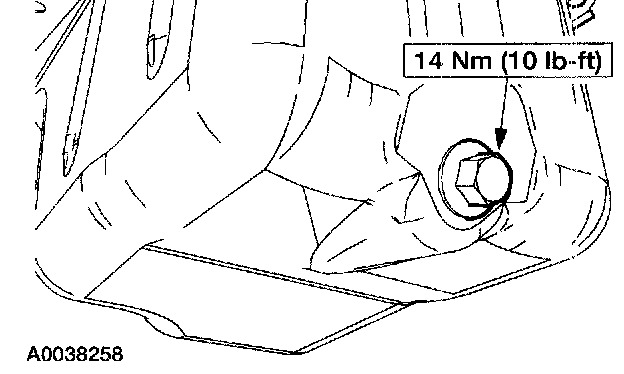
10. Install the cylinder block opening cover.
11. Install the flexplate inspection cover.

12. Install the shift cable end and the bracket.
13. Install the RH exhaust manifold-to-dual converter Y-pipe studs.
14. Position the dual converter Y-pipe and install the four nuts.
15. NOTE: RH is shown; LH is similar.
Connect the two Heated Oxygen Sensor (HO2S) electrical connectors.
16. NOTE: The bolt is accessed through the RH fender well.
Position the transmission fluid filler tube and install the bolt.
17. Install the starter motor.
18. Position the wiring harness bracket and install the bolt.

19. Position the A/C compressor and install the fasteners.

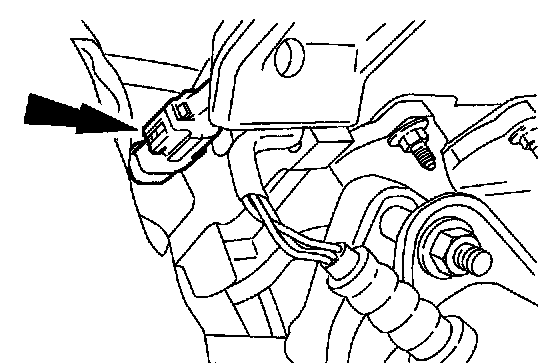
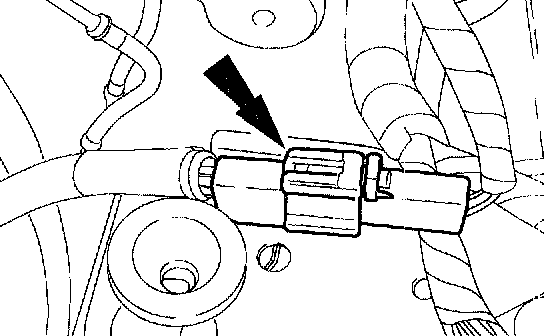
20. Attach the wiring harness retainer and connect the Crankshaft Position (CKP) sensor electrical connector.
21. Connect the A/C compressor electrical connector.
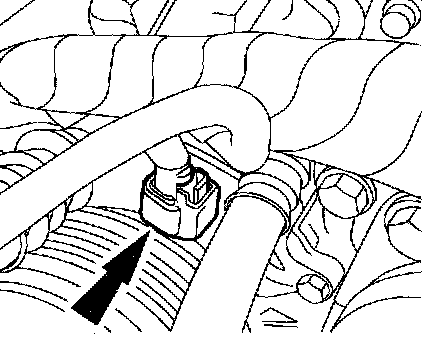
22. Position the exhaust manifold-to-Exhaust Gas Recirculation (EGR) valve tube and loosely install the lower fitting.
23. Connect the lower radiator hose and the degas bottle hose to the oil filter adapter.
24. Install a new oil filter.
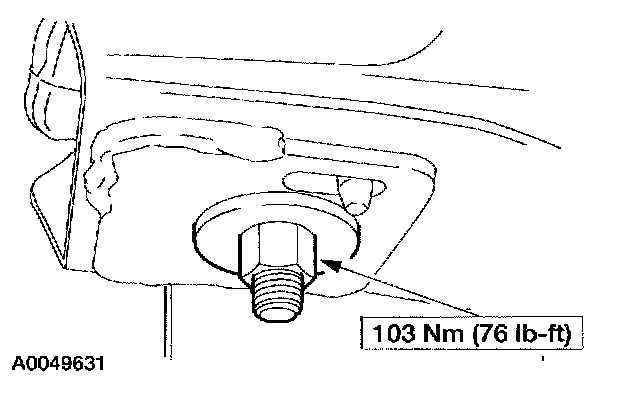
25. Install the drain plug.
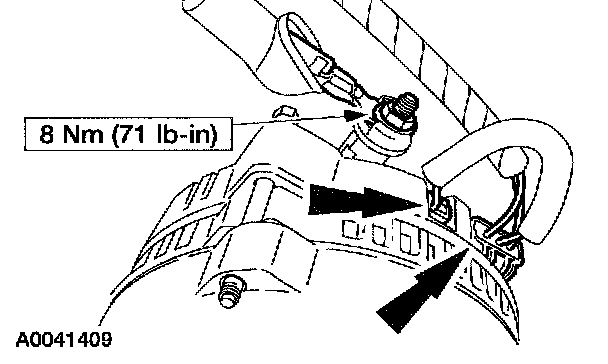
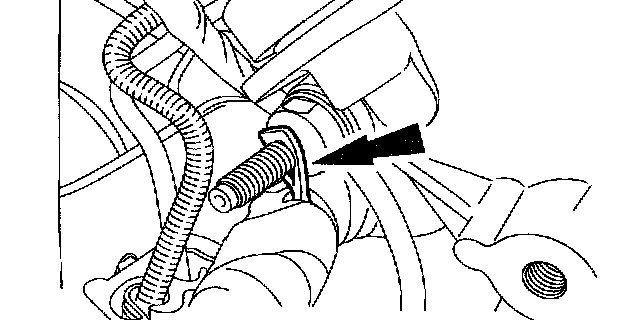
26. Connect the power steering pressure switch electrical connector.
27. Lower the vehicle.
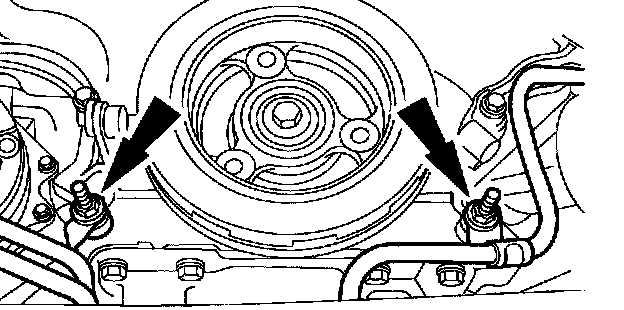
28. Position the power steering pump and install the three bolts.

29. Using the special tool, install a new seal on the power steering pump pressure hose fitting.
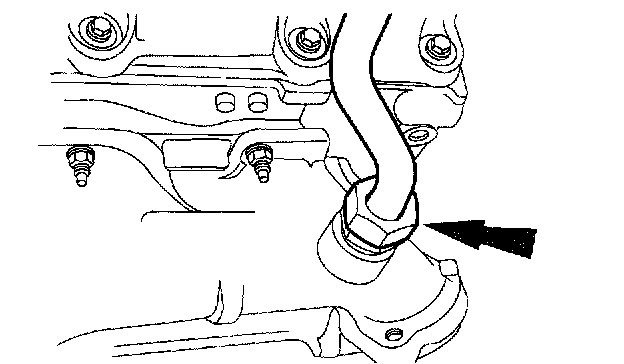
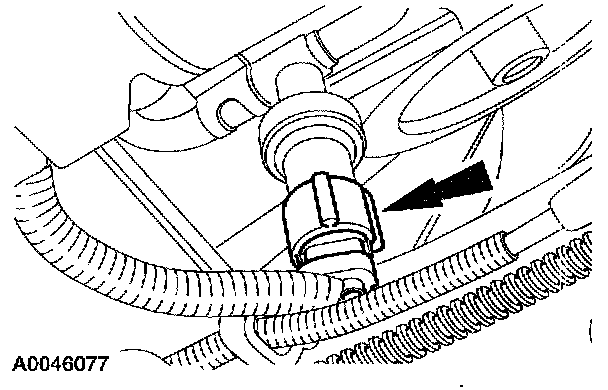
30. Connect the power steering pump pressure hose.
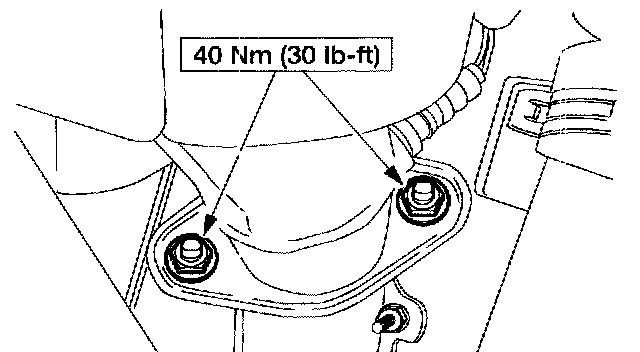
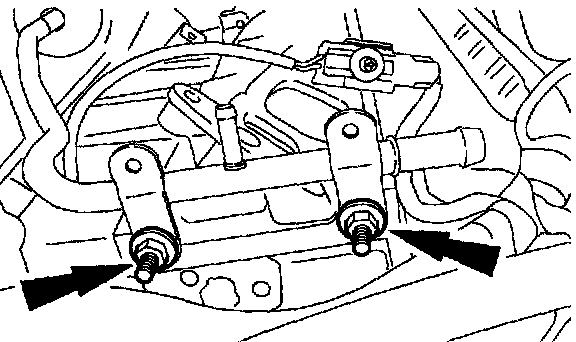
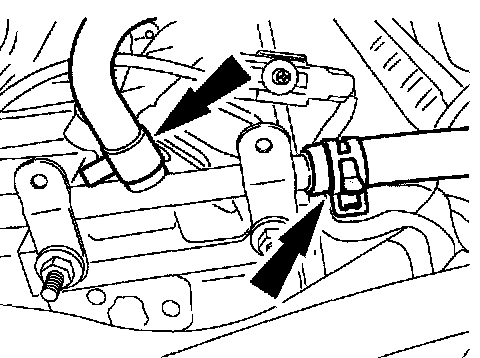
31. Position the transmission cooler tube and the power steering hose brackets. Install the nuts.
^ On 4.6L engine, tighten the nuts to 11 Nm (8 ft. lbs.).
^ On 5.4L engine, tighten the nuts to 40 Nm (30 ft. lbs.).
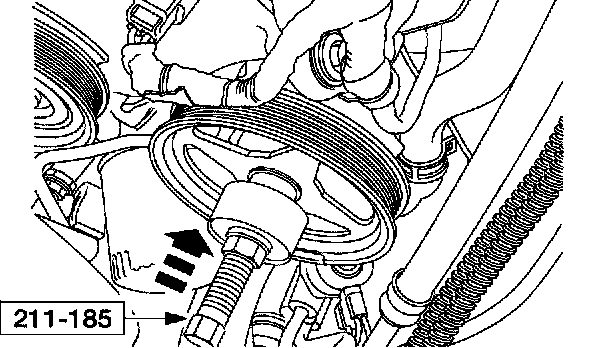
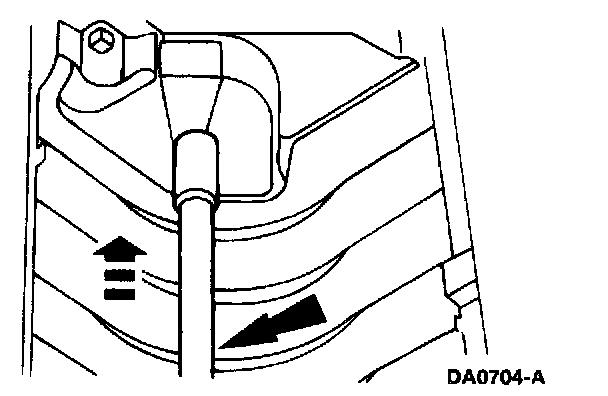
32. Using the special tool, install the power steering pump pulley.

33. Position the power steering reservoir and install the two lower bolts.
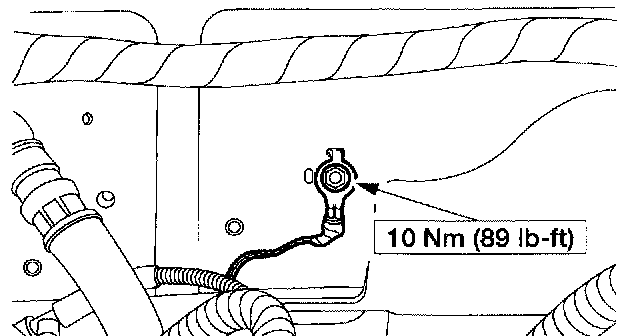
34. Connect the generator electrical connections and position the generator aside.
35. Install the wiring harness retainer on the front cover stud.
36. NOTE: On 4x4 vehicles, it may be necessary to reposition and secure the transfer case vent hose, after the transmission-to-engine bolts are installed.
Install the wiring harness bracket and the upper two transmission-to-engine bolts.
37. NOTE: Do not reuse the O-ring seal.
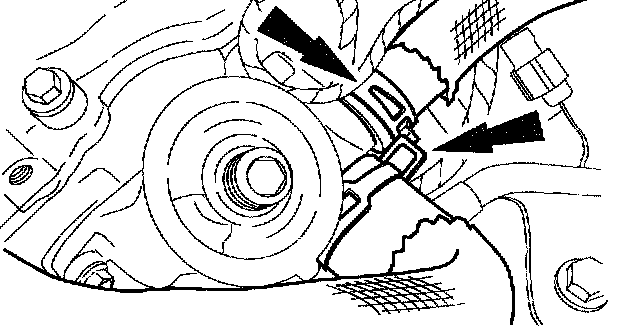
Install the new O-ring seal and the heater outlet tube.
^ Lubricate the O-ring seal with engine coolant.
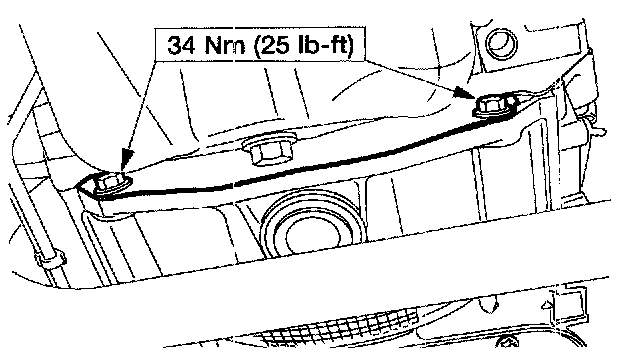
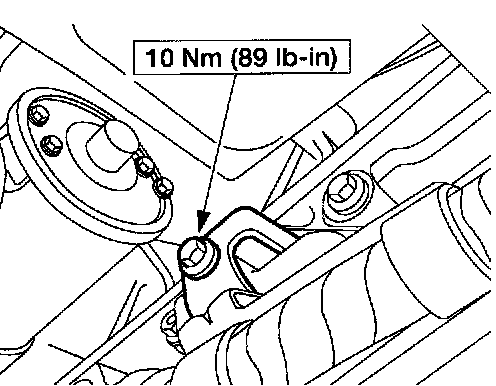
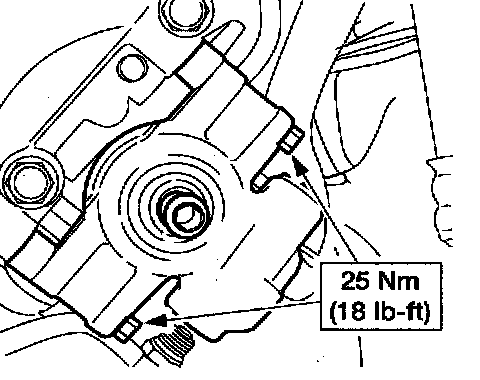
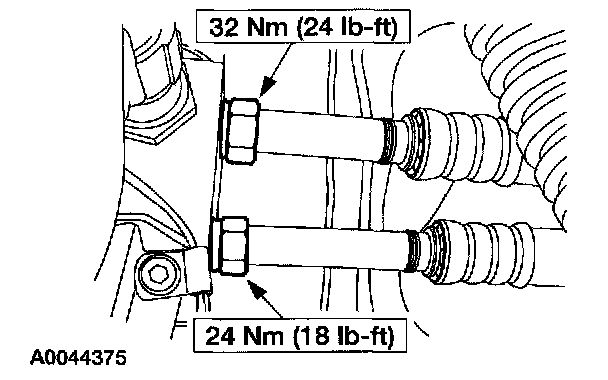
38. Install the lower (inboard) heater outlet tube stud and tighten both studs.
^ On 4.6L engine, tighten the studs to 25 Nm (18 ft. lbs.).
^ On 5.4L engine, tighten the studs to 40 Nm (30 ft. lbs.).
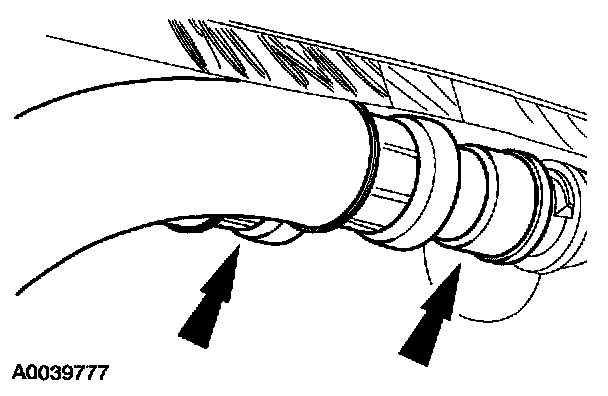
39. Connect the hoses to the heater outlet tube.
40. Install the wiring retainers on the heater outlet tube bracket.
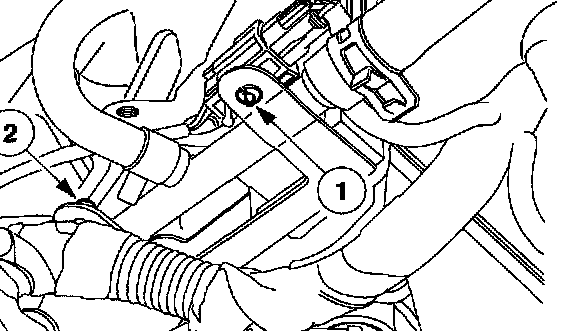
1 Install the knock sensor electrical connector retainer, 5.4L only.
2 Install the engine harness routing clip.
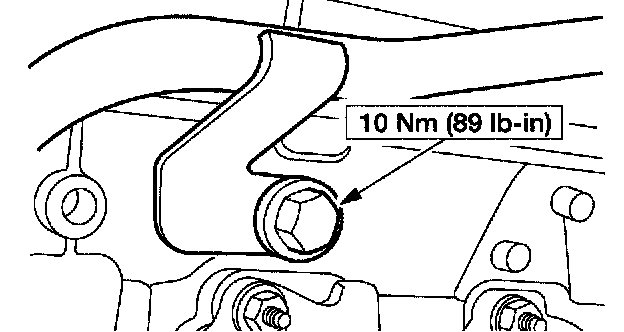
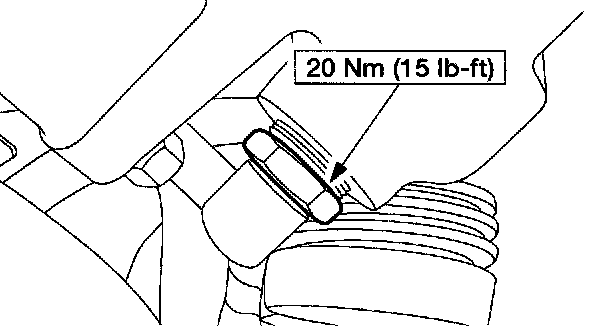
41. Install the cable routing bracket on the heater outlet tube mounting studs.
^ On 4.6L engine, tighten the nuts to 10 Nm (89 inch lbs.).
^ On 5.4L engine, tighten the nuts to 28 Nm (21 ft. lbs.).
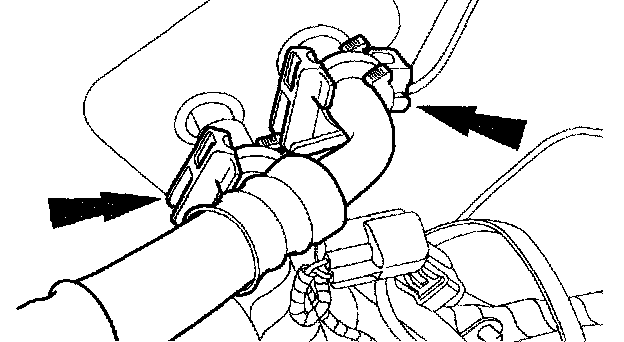
42. Connect the evaporator tubes to the evaporator.
43. Connect the evaporator tubes to the manifold.
44. Connect the two heater hoses at the heater core.
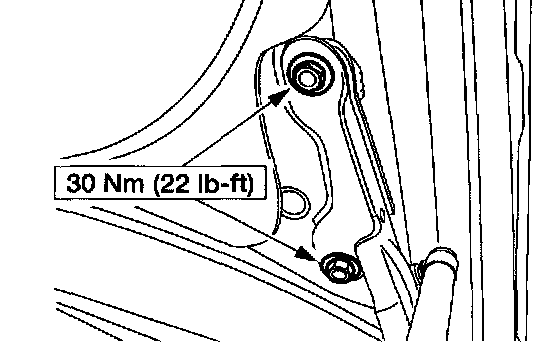
45. Position the ground wire and install the bolt.
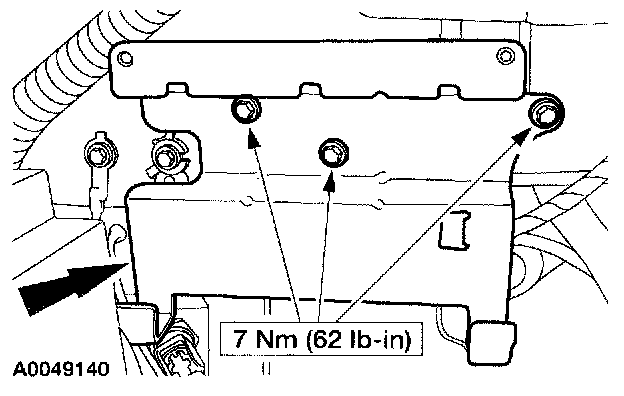
46. Position the Powertrain Control Module (PCM) mounting bracket and install the bolts.
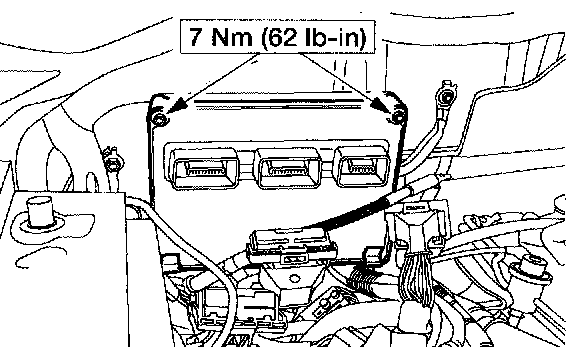
47. Position the PCM and install the bolts.
48. Connect the engine wiring harness electrical connector.
49. Connect the PCM electrical connectors.
50. Install the A/C condenser core.
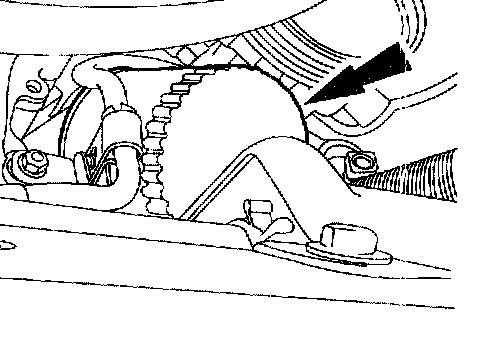
51. Install the radiator.
52. Position the engine Air Cleaner (ACL) in the vehicle and connect the Mass Air Flow (MAF) sensor electrical connector.
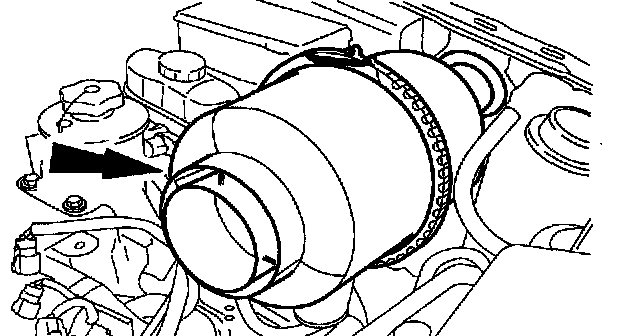
53. Install the ACL.
54. Install the hood.
55. Install the intake manifold.
56. Fill all fluids to the correct levels.
57. Start the engine and check for leaks. Stop the engine and recheck the fluid levels.
58. Recharge the A/C system.
59. If equipped, turn on the air suspension switch.