Direct Clutch Assembly and Intermediate Brake Drum
Direct Clutch Assembly and Intermediate Brake Drum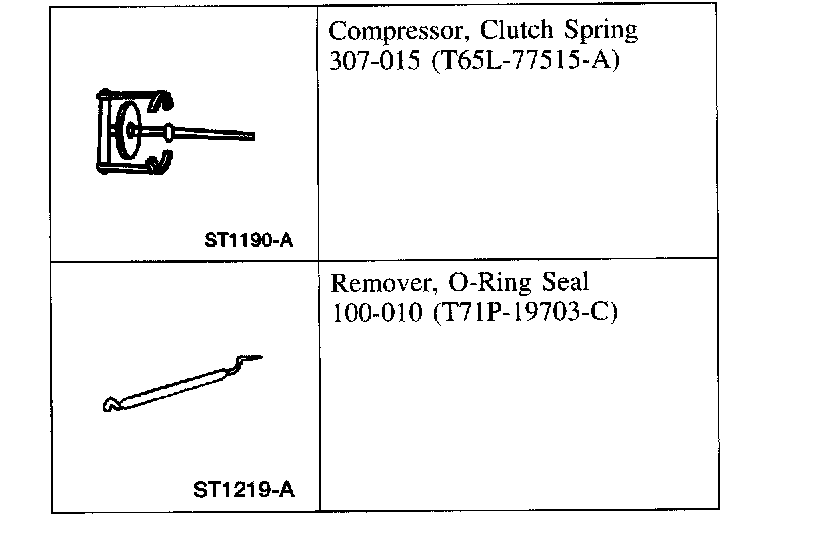
Special Tool(s)

Direct Clutch Assembly and Intermediate Brake Drum, Disassembled View l
Disassembly

1. Remove the intermediate One-Way Clutch (OWC) outer race, and inspect for damage.

2. Remove the top end cap and the intermediate OWC. Inspect the sprays, cage, and top end cap for excessive wear or damage.

3. Remove the bottom end cap and inspect for damage.

4. Remove the No. 7 intermediate OWC thrust washer.

5. Remove the direct clutch pressure plate retaining ring.

6. NOTE: Tag the parts for identification during installation.
Remove the direct clutch pressure plate and the clutch pack.

7. CAUTION: Do not fully compress the return springs or the spring may break.
Using the special tool, remove the direct clutch return spring retaining ring. Remove the tool.

8. Remove the direct clutch return spring assembly.

9. Remove the direct clutch piston.

10. Using the special tool, remove the direct clutch piston inner and outer seals.
11. Inspect the clutch cylinder thrust surfaces, piston bore, and clutch plate splines for scores, burrs or wear. Install a new clutch cylinder if it is badly scored or damaged.
12. Check the fluid passage in the clutch cylinder for obstructions. Clean out all fluid passages. Inspect clutch piston for scores and install new if necessary. Inspect the check balls for freedom of movement.
13. Check the clutch release spring for distortion and cracks. Install a new spring if it is distorted or cracked.
14. Inspect the friction clutch plates, steel clutch plates, and clutch pressure plate for worn or scored surfaces. Install new parts that are scored, buried or burnt.
15. Check the clutch plates for flatness and wear on the clutch hub splines. Discard any plate that does not slide freely on the splines or is not flat.
16. Check the clutch hub thrust surfaces for scores and the clutch hub splines for wear. Install new parts that are worn.
Assembly
NOTE: Soak the clutch plates for 15 minutes in clean automatic transmission fluid.

1. NOTE: The seal lip must face downward.
Install the direct clutch piston inner seal.

2. NOTE: The seal lip must face downward.
Install the direct clutch piston outer seal.

3. Inspect the direct clutch piston check ball.
^ Check for freedom of movement and correct seating.
^ Clean the direct clutch piston with solvent if necessary.
^ Install a new direct clutch piston if damaged.

4. NOTE: The piston should rotate freely in the drum.
Install the direct clutch piston.

5. NOTE: Make sure the protrusions on the bottom of the direct clutch return spring assembly are correctly engaged with the lugs on the direct clutch piston.
Install the direct clutch return spring assembly.

6. CAUTION: Do not fully compress the return springs or damage to spring may occur.
Using the special tool, install the direct clutch return spring retaining ring. Remove the tool.

7. CAUTION: Mixing or using friction plates without the grooves will cause shift concerns and can cause damage.
NOTE: Soak the clutch plates for 15 minutes in clean automatic transmission fluid.
NOTE: The direct clutch friction plates have lube grooves in the friction material.
NOTE: The number of plates are model dependent.
Alternately install the steel and the friction clutch plates, beginning with a steel plate and ending with the direct clutch pressure plate.

8. Install the selective direct clutch pressure plate retaining ring.

9. Check the stack-up clearance.
1 Using a feeler gauge, check the stack-up clearance in three places, 120 degrees apart.
2 If the clearance is not to specification, install the correct selective direct clutch pressure plate retaining ring and recheck the clearance.

10. Install the No. 7 intermediate one-way clutch thrust washer. Make sure the tabs on the No. 7 intermediate one-way clutch thrust washer are aligned with the notches in the intermediate brake drum.

11. NOTE: The top and bottom end caps are identical.
Install the bottom end cap.

12. NOTE: The lip on the intermediate one-way clutch must face upward.
Install the intermediate one-way clutch over the inner race and install the top end cap.

13. NOTE: The shoulder on the outer race must face upward.
NOTE: When installed correctly, the outer race must rotate counterclockwise.
Install the intermediate one-way clutch outer race.