Main Control Valve Body- Disassembly and Assembly
Main Control Valve Body- Disassembly and Assembly
Special Tool(s)
Part 1 Of 3:

Part 2 Of 3:

Part 3 Of 3:

Upper, Lower, Accumulator and Solenoid Bodies, Disassembled View
Disassembly
NOTE: If main control is being replaced, refer to the correct parts. The main control is model-dependent.
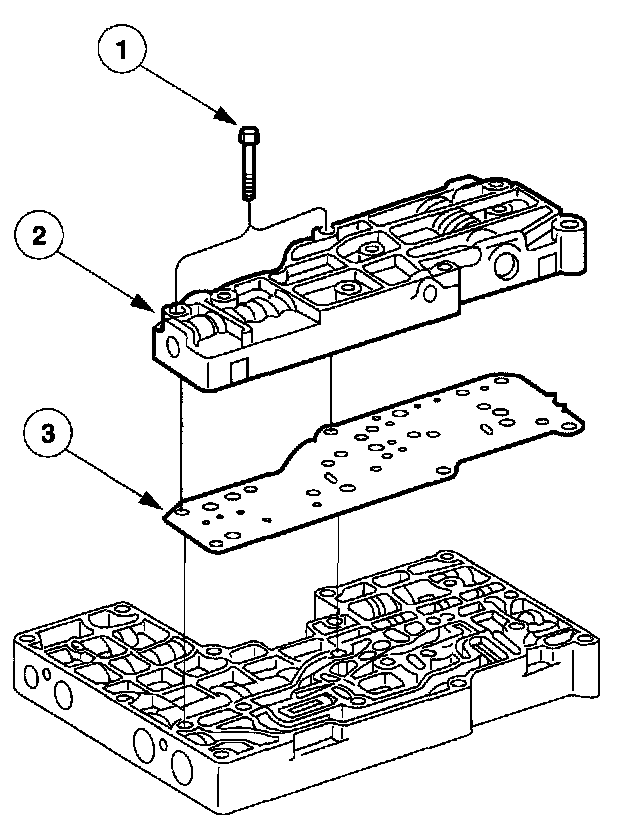
1. Remove the lower control valve body.
1 Remove the bolts.
2 Remove the lower control valve body.
3 Remove the control valve body separator plate.

2. CAUTION: Note the location of the check balls prior to removal. If the check balls are not installed in their correct location, shift problems will occur.
Remove the check balls.
1 Remove two small check balls.
2 Remove two large check balls.

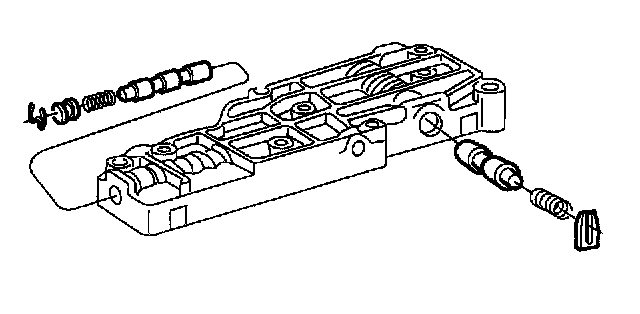
3. Remove the control valves and springs from the lower main control valve body. Inspect the valves for nicks and burrs. If the valves are damaged the main control valve body will need to be replaced.
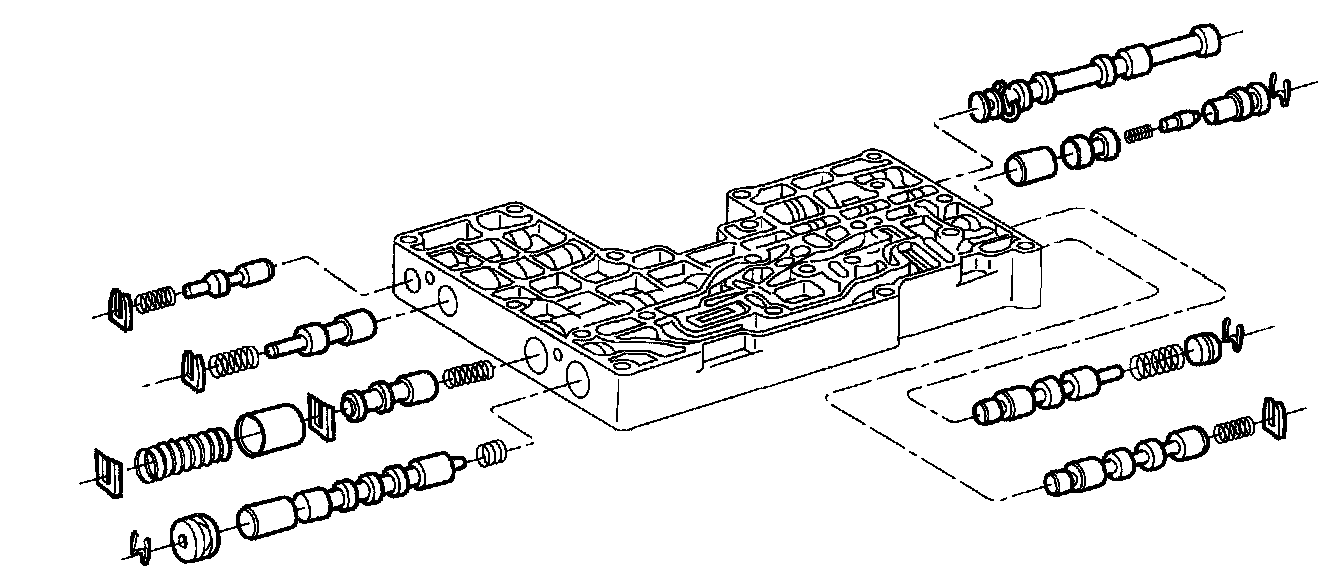
4. Remove the control valves and springs from the upper main control valve body. Inspect the valves for nicks and burrs. If the valves are damaged, the main control valve body will need to be replaced.
5. Inspect all valves, valve sleeves and valve bores for scores, nicks or burrs. Check all fluid passages for obstructions. Inspect all mating surfaces for burrs and scores.
6. Inspect all springs for distortion. Check all valves and plungers for free movement in their respective bores. When dry all the components must fall from their own weight in their respective bores.
7. Roll the valves on a flat surface to check for bent or out-of-round condition.
Assembly

1. Install the control valves and springs from the lower main control valve body.
2. Install the control valves and springs from the upper main control valve body.

3. Install the check balls.

4. Using the special tools, install the lower control valve body.
1 Install the special tools.
2 Install the control valve body separator plate.
3 Install the lower control valve body.
4 Install the bolts.