Part 2
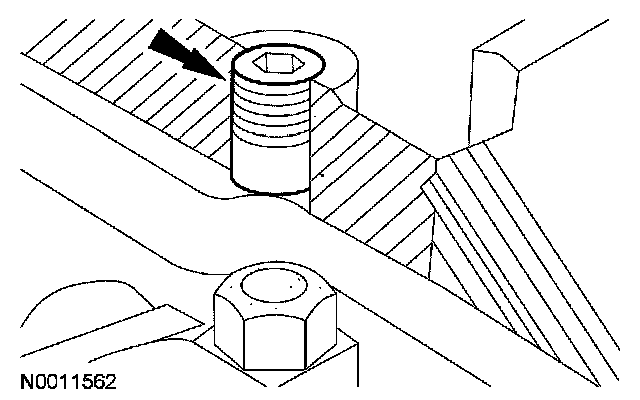
51. CAUTION: Failure to back off the set screws can result in damage to the cylinder block cradle.Back the set screws off until they are below the cylinder block cradle boss.
52. Position the lower block cradle and a new gasket.

53. Install and hand-tighten the 20 bolts and 2 nuts.
54. Install and hand-tighten the bolts.
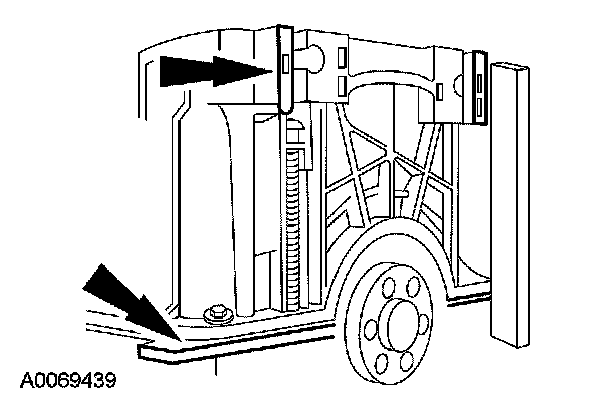
55. NOTE: The lower block cradle to the cylinder block alignment must be within a maximum mismatch of 0.25 mm (0.01 inch) lower block cradle underflush or 0.05 mm (0.00196 inch) lower block cradle protrusion.
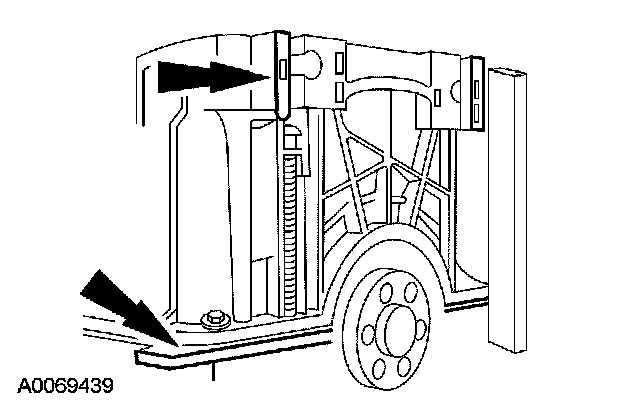
Using a straightedge, align the transmission face of the lower block cradle with the rear face of the cylinder block.
56. Tighten the 20 bolts and the 2 nuts.
- Tighten the bolts with washers and both nuts to 10 Nm (89 inch lbs.).
- Tighten the bolts without washers to 14 Nm (10 ft. lbs.).
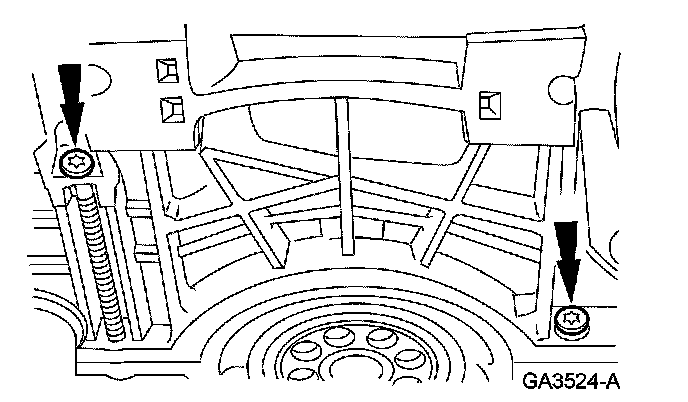
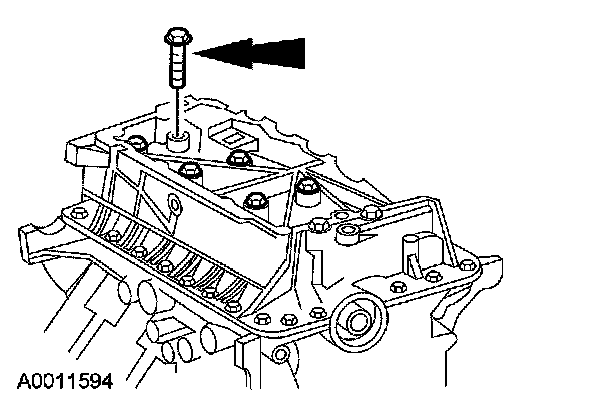
57. Install the 2 block cradle bolts.
- Tighten to 10 Nm (89 inch lbs.).
58. Tighten the lower block cradle inserts to 3 Nm (27 inch lbs.).

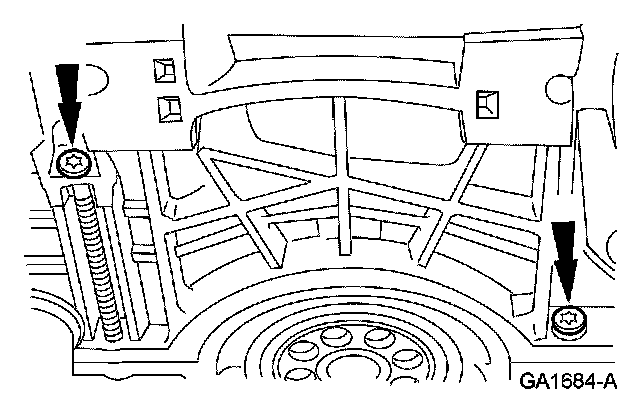
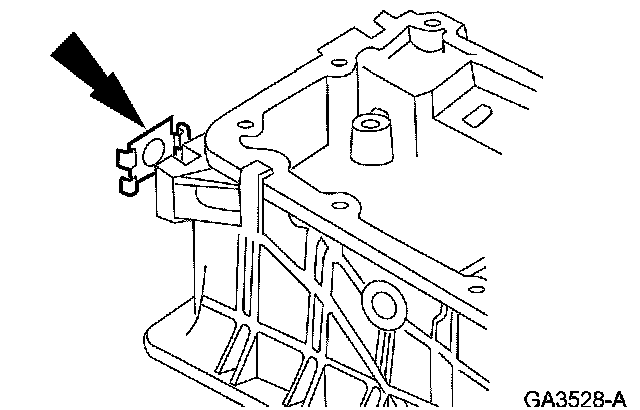
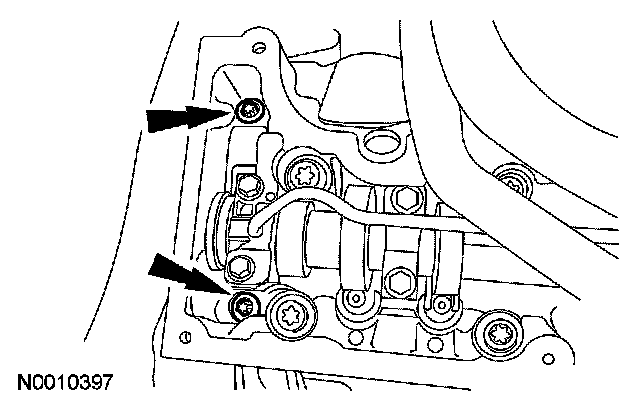
59. Install new seals on the 2 silver bolts and loosely install them in the cylinder block cradle.

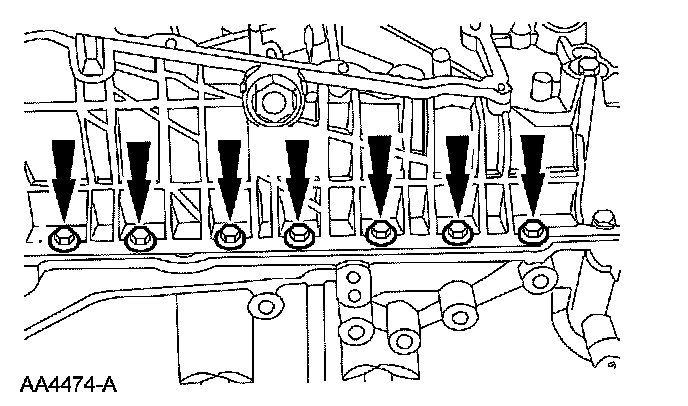
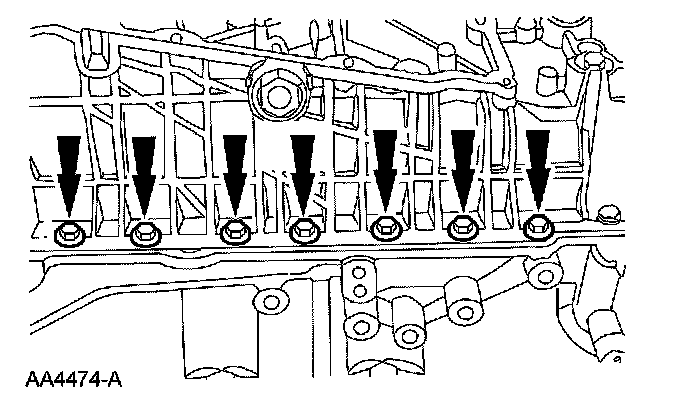
60. Loosely install the 6 remaining lower block cradle bolts.
61. Tighten the cylinder block cradle bolts in 2 stages.
- Stage 1: Tighten to 15 Nm (11 ft. lbs.).
- Stage 2: Tighten to 34 Nm (25 ft. lbs.).

62. NOTE: Assemblies that measured out of specification must have the entire assembly procedure repeated.
Measure the step between the rear face of the cylinder block and the transmission face of the lower block cradle.
63. Repair all assemblies that exceed underflush specification by installing shims on 1 or both sides of the cylinder block cradle.
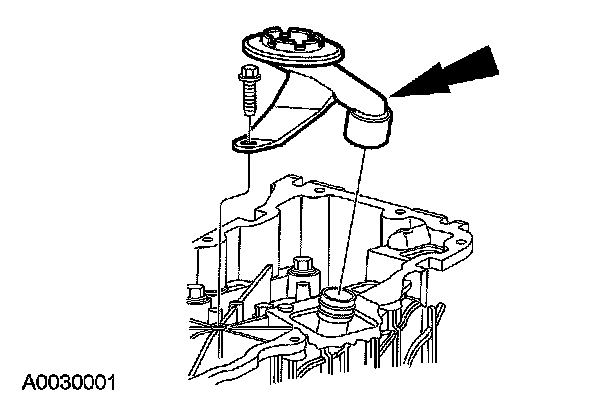
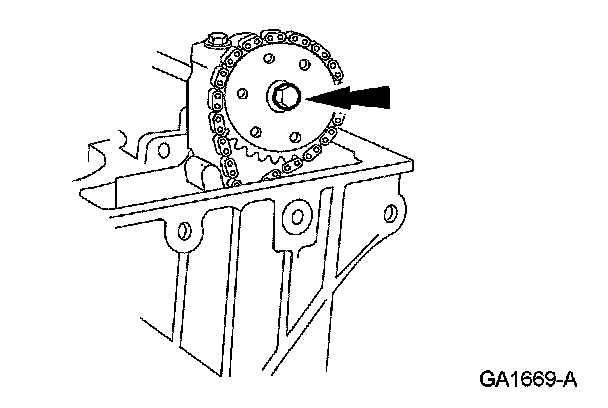
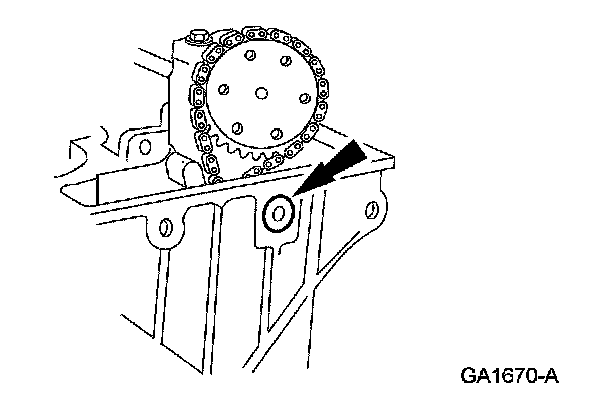
64. Install the oil pump screen and pickup tube and the bolt.
- Tighten to 10 Nm (89 inch lbs.).
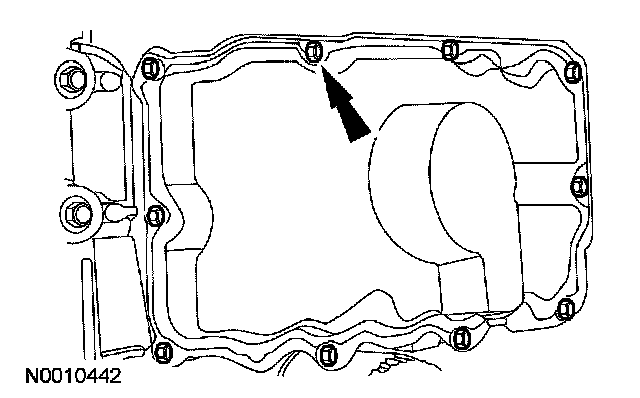
65. Install the gasket, oil pan and the 10 bolts.
- Tighten to 11 Nm (8 ft. lbs.).
66. Inspect and install new oil filter adapter O-ring seals if necessary.
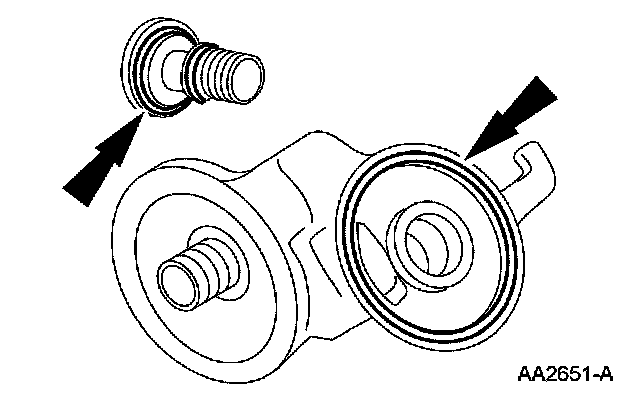
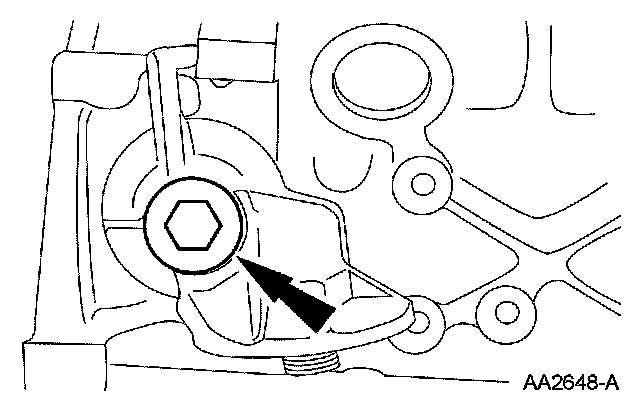
67. Install the oil filter adapter and the bolt.
- Tighten to 57 Nm (42 ft. lbs.).
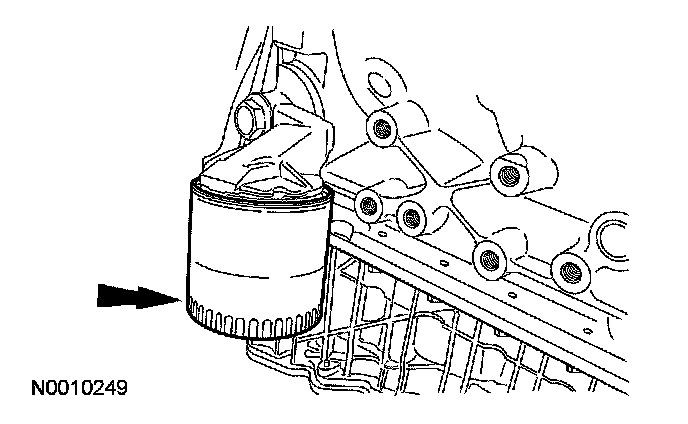
68. Install a new oil filter.
- Tighten until the oil filter seal is flush with the adapter and the tighten an additional 270 degrees.
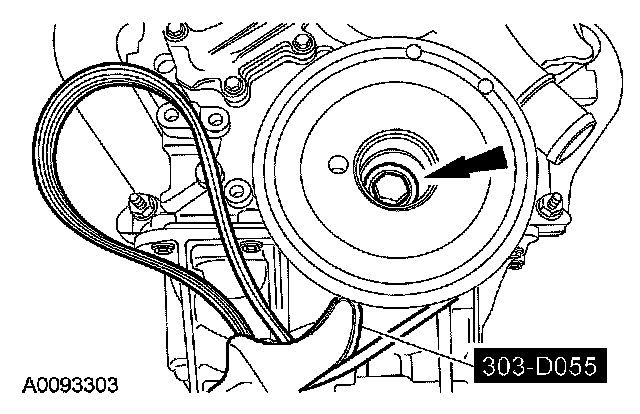
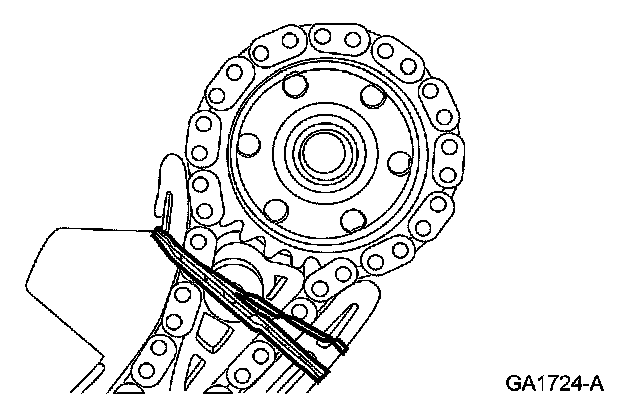
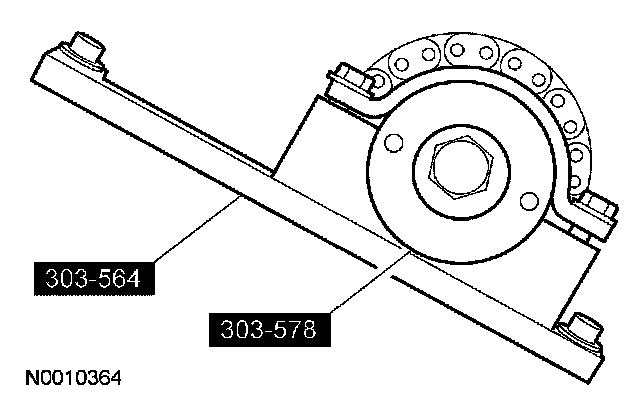
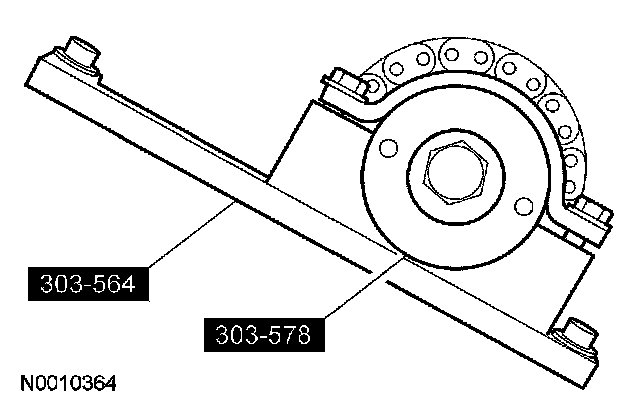
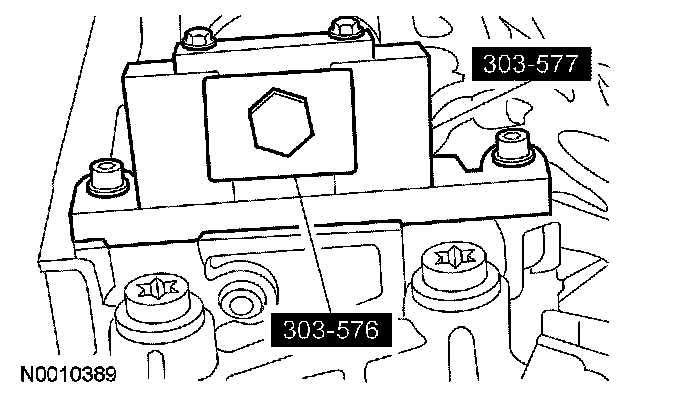
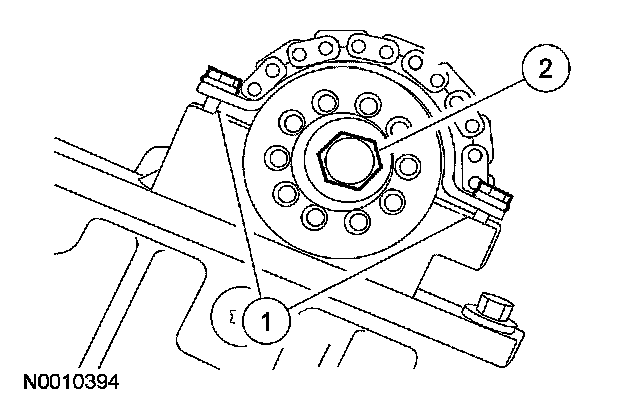
69. Using the special tool, install the crankshaft pulley.
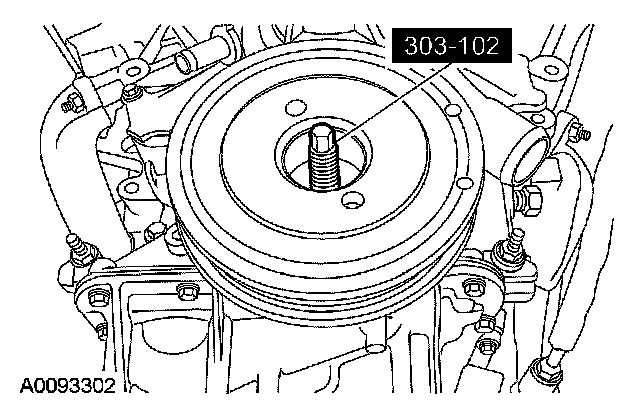
70. CAUTION: A new bolt must be used each time it is removed.
Using the special tool, tighten the bolt in 2 stages.
- Stage 1: Tighten to 50 Nm (37 ft. lbs.).
- Stage 2: Rotate an additional 90 degrees.
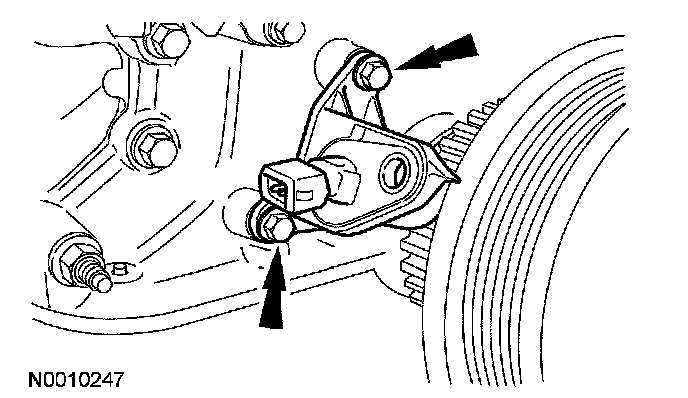
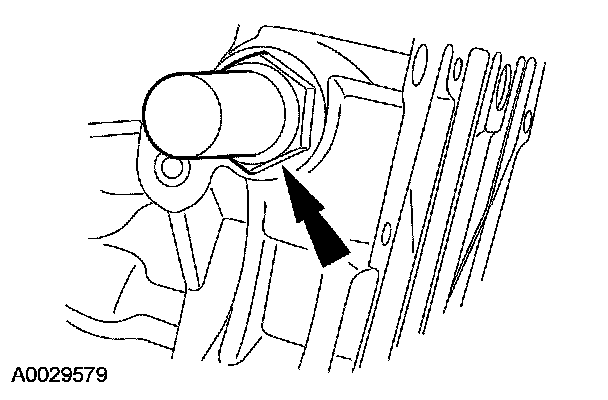
71. Position the crankshaft position (CKP) sensor and install the 2 bolts.
- Tighten to 10 Nm (89 inch lbs.).
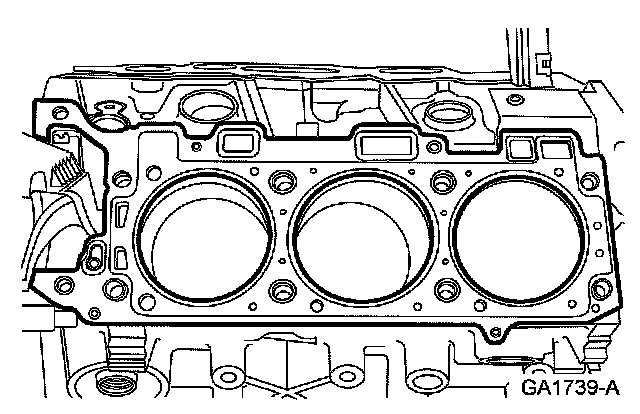
72. NOTE: LH side shown, RH side similar.
Position the cylinder head gaskets.
73. CAUTION: To avoid damage to the timing chain cassette, an assistant will be required to help position the cylinder head in the vehicle.
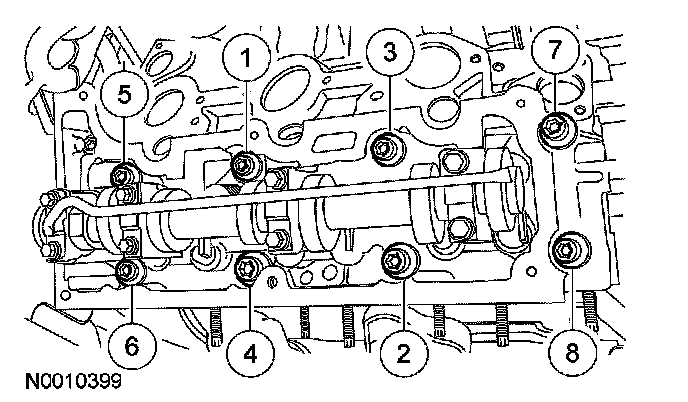
NOTE: New cylinder head bolts must be installed. They are a torque-to-yield design and cannot be reused.
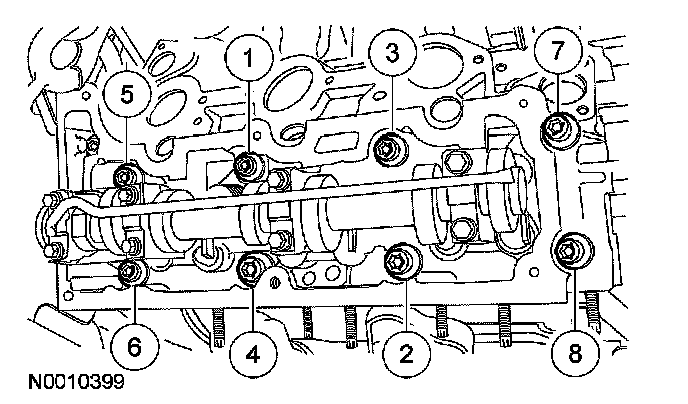
Position the RH cylinder head. Install 8 new M12 bolts and tighten in the sequence shown in 2 stages.
- Stage 1: Tighten to 12 Nm (9 ft. lbs.).
- Stage 2: Tighten to 25 Nm (18 ft. lbs.).
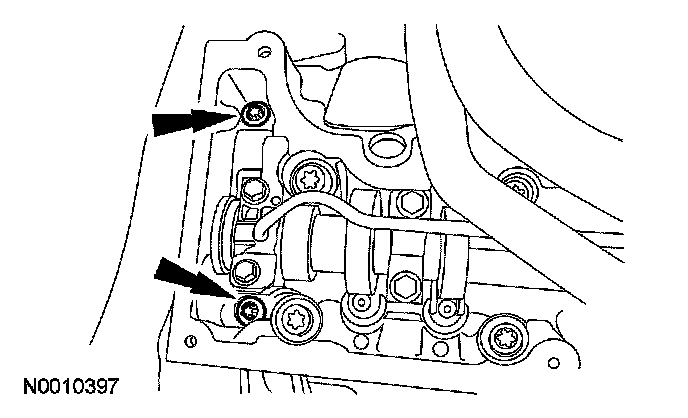
74. Install 2 new M8 bolts.
- Tighten to 32 Nm (24 ft. lbs.).
75. Tighten the 8 M12 bolts in the sequence shown in 2 stages.
- Stage 1: Tighten 90 degrees.
- Stage 2: Tighten an additional 90 degrees.
76. Position the RH cassette and camshaft sprocket.

77. CAUTION: The camshaft sprocket must turn freely on the camshaft. DO NOT tighten the bolt.
Install and hand-tighten the RH rear camshaft sprocket bolt.
78. Install the RH cassette bolt.
- Tighten to 10 Nm (89 inch lbs.).

79. CAUTION: To avoid damage to the timing chain cassette, an assistant will be required to help position the cylinder head in the vehicle.
NOTE: New cylinder head bolts must be installed. They are a torque-to-yield design and cannot be reused.
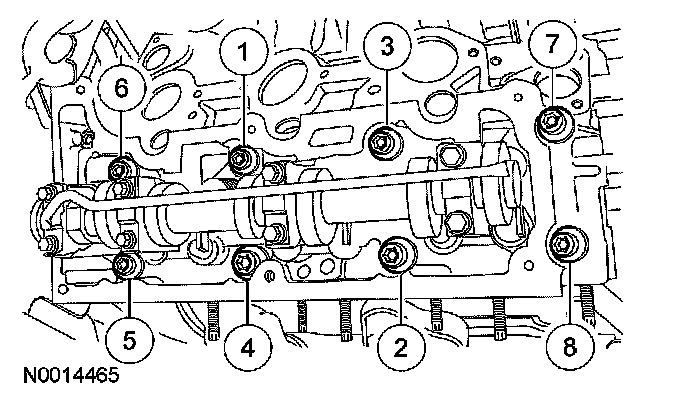
Position the LH cylinder head. Install 8 new M12 bolts and tighten in the sequence shown in 2 stages.
- Stage 1: Tighten to 12 Nm (9 ft. lbs.).
- Stage 2: Tighten to 25 Nm (18 ft. lbs.).
80. Install 2 new M8 bolts.
- Tighten to 32 Nm (24 ft. lbs.).
81. Tighten the 8 M12 bolts in the sequence shown in 2 stages.
- Stage 1: Tighten 90 degrees.
- Stage 2: Tighten an additional 90 degrees.

82. Position the LH cassette and camshaft sprocket.
83. CAUTION: The camshaft sprocket must turn freely on the camshaft. DO NOT tighten the bolt.
Install and hand-tighten the LH camshaft sprocket bolt.
84. Install the LH cassette bolt.
- Tighten to 12 Nm (9 ft. lbs.).
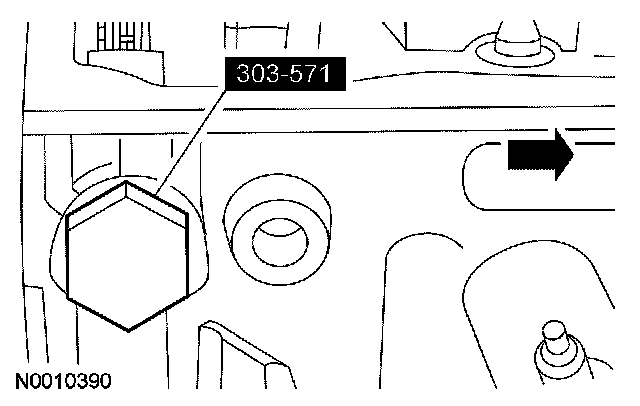
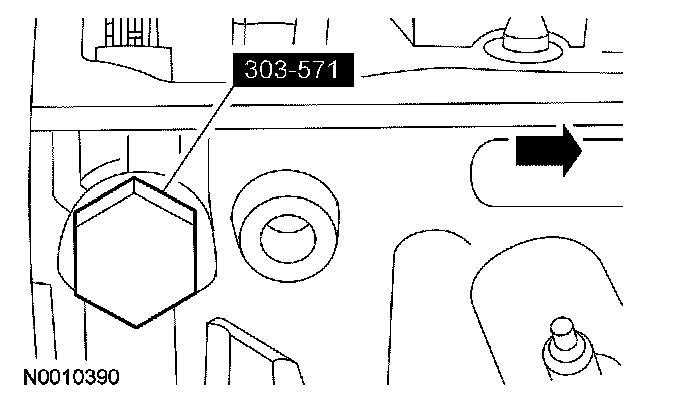
85. Turn the crankshaft one revolution clockwise.
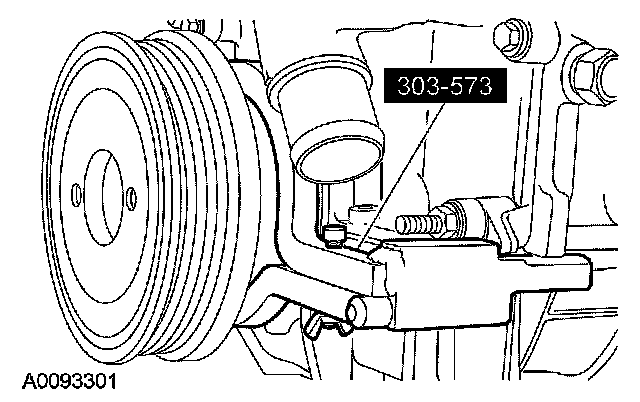
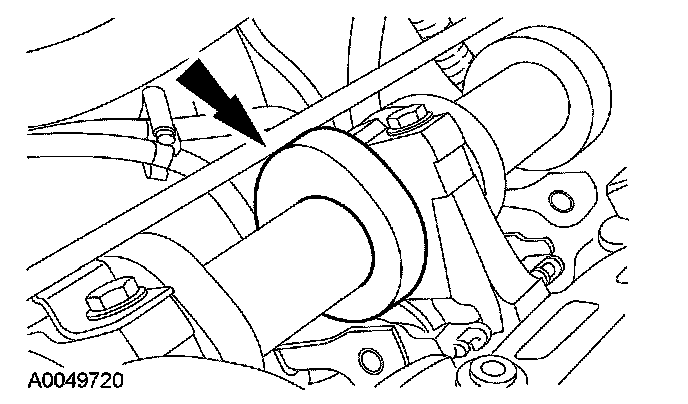
86. NOTE: The special tool must be installed on the damper and should contact the engine block, this positions the engine at top dead center (TDC).
Install the special tool.
87. NOTE: Camshaft timing slots are off-center.
NOTE: Position the camshaft timing slots below centerline of camshaft to correctly fit the special tools.
Install the special tools on the front of the RH cylinder head.

88. NOTE: Leave the top 2 special tool clamp bolts loose.
Install the special tools on the rear of the RH cylinder head.
89. Install the special tool.
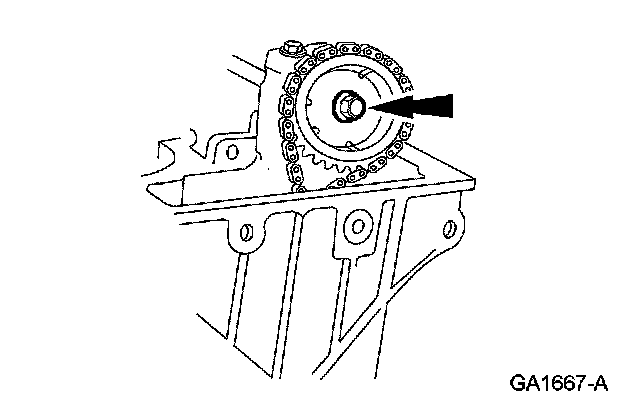
90. CAUTION: The right-hand camshaft sprocket bolt is a left-hand threaded bolt.
Tighten the bolts.
1. Tighten the special tool top 2 clamp bolts to 10 Nm (89 inch lbs.).
2. Tighten the camshaft bolt to 85 Nm (63 ft. lbs.).

91. Remove the special tool and install the RH camshaft tensioner.
- Tighten to 44 Nm (32 ft. lbs.).
92. NOTE: Do not tighten the special tool top 2 clamp bolts. Camshaft sprocket must rotate freely.
Install the special tools on the front of the LH cylinder head.
93. NOTE: Camshaft timing slots are off-center.
NOTE: Position the camshaft timing slots below centerline of camshaft to correctly fit the special tools.
Install the special tools on the rear of the LH cylinder head.
94. Install the special tool.

95. Tighten the bolts.
1. Tighten the special tool top 2 clamp bolts to 10 Nm (89 inch lbs.).
2. Tighten the camshaft bolt to 85 Nm (63 ft. lbs.).
96. Install the LH camshaft tensioner.
97. Rotate the crankshaft until the cam lobe is in the up position.
98. NOTE: Lubricate the roller followers with clean engine oil.
Using the special tool, install the roller followers in their original positions.

99. Position the RH engine mount bracket and install the 4 bolts.
- Tighten to 80 Nm (59 ft. lbs.).
