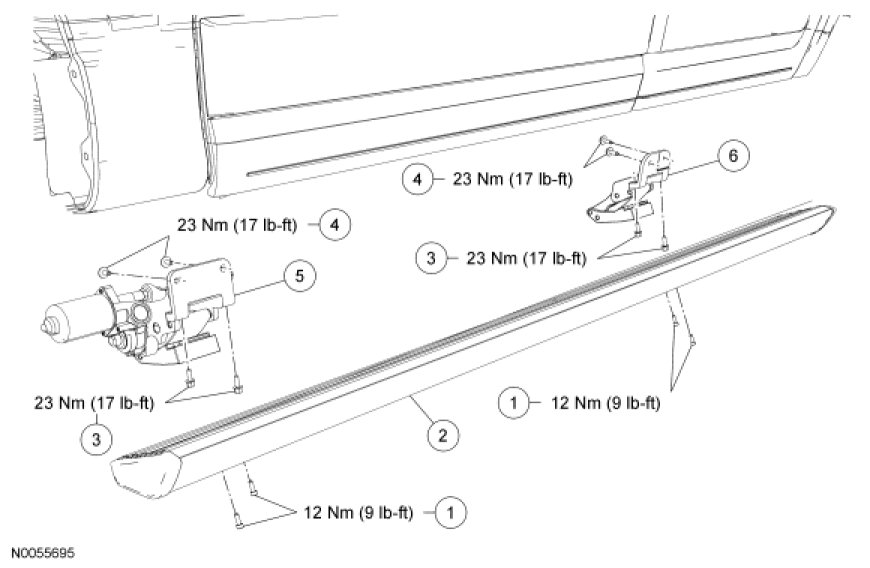
Power Running Board (PRB) Bracket
Power Running Board (PRB) Bracket
NOTE: Expedition/Navigator shown, Expedition EL/Navigator L similar.
NOTE: LH shown, RH similar.
Removal and Installation
All brackets
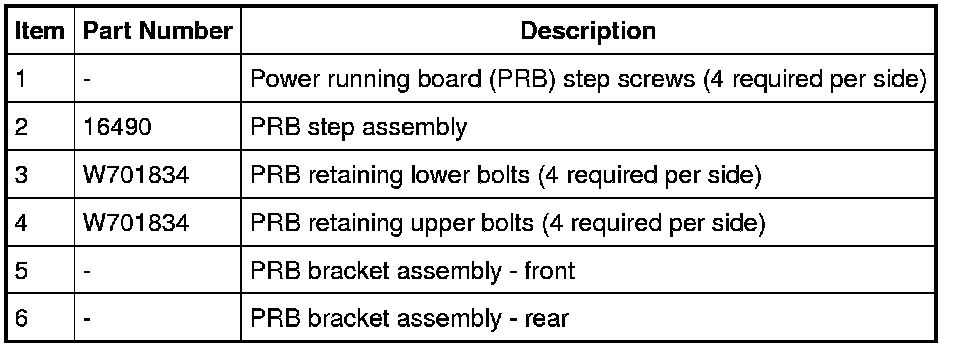
1. Remove the power running board (PRB) step. For additional information, refer to Power Running Board (PRB) Step Power Running Board (PRB) Step.
Front bracket
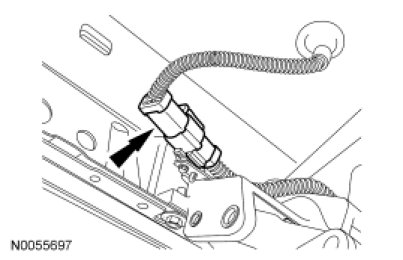
2. NOTE: The PRB motor is part of the front bracket assembly.
Disconnect the PRB motor electrical connector.
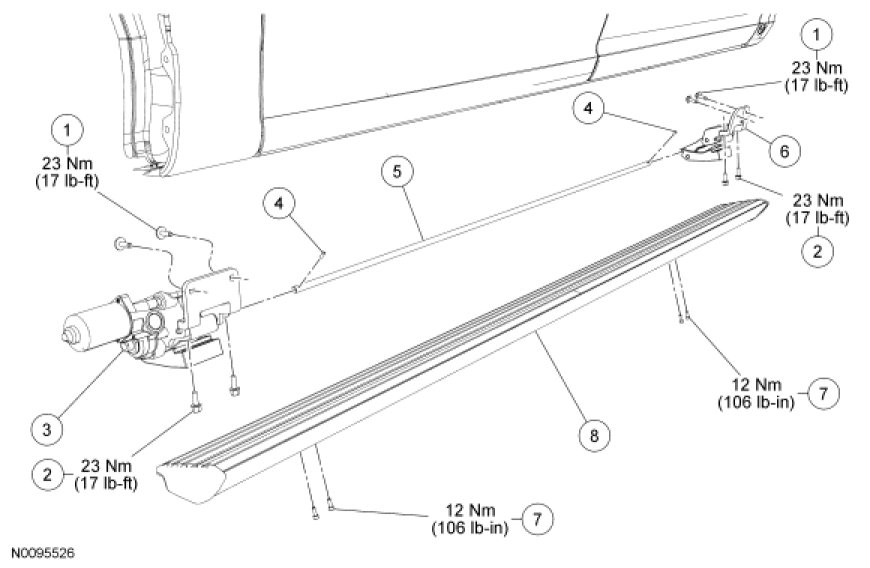
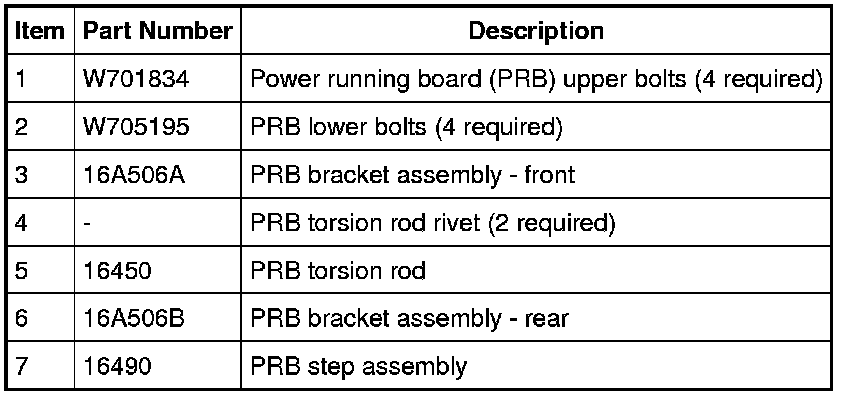
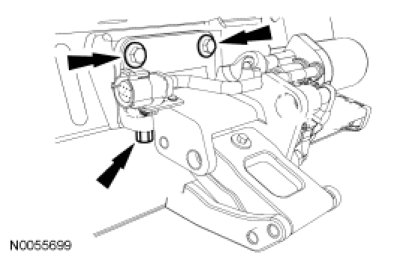
3. NOTE: Expedition EL/Navigator L are equipped with a torsion assist rod. A rivet will need to be drilled out prior to removal of the power running board (PRB) bracket.
NOTE: Only 3 bolts shown.
Remove the PRB front bracket 2 upper and 2 lower bolts and the front bracket assembly.
- To install, tighten to 23 Nm (17 lb-ft).
Rear bracket
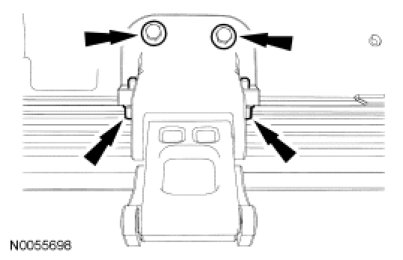
4. NOTE: Expedition EL/Navigator L are equipped with a torsion assist rod. A rivet will need to be drilled out prior to removal of the power running board (PRB) bracket.
Remove the PRB rear bracket 2 upper and 2 lower bolts and the rear bracket assembly.
- To install, tighten to 23 Nm (17 lb-ft).
All brackets
5. To install, reverse the removal procedure.