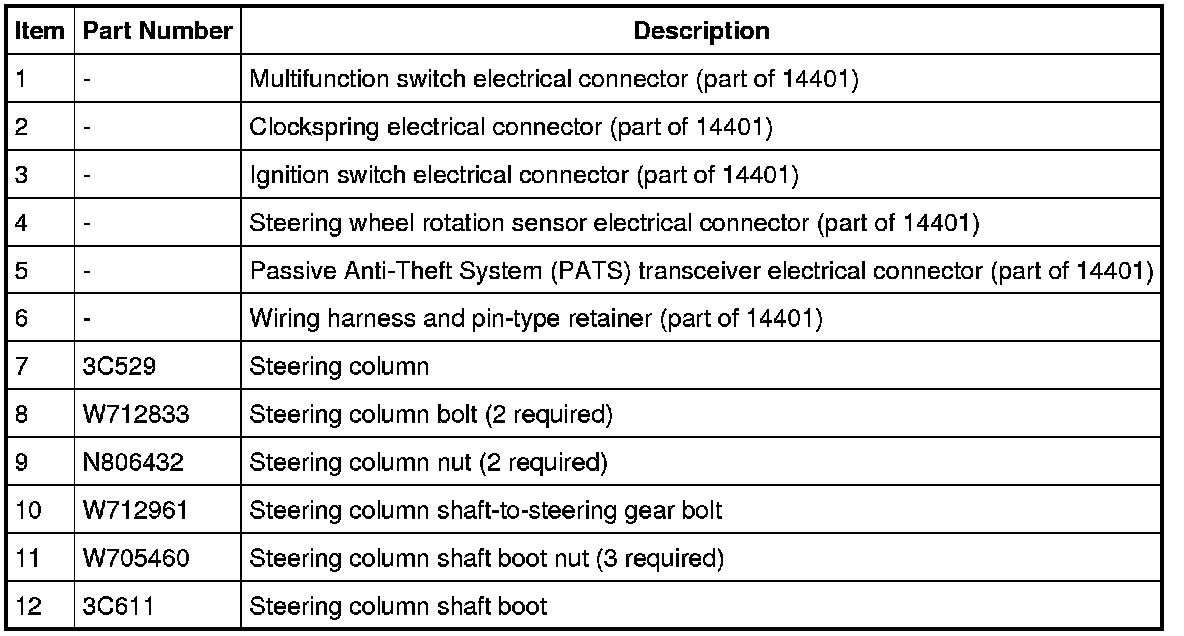
Steering Column
Steering Column
Removal and Installation
NOTICE: Do not allow the steering wheel to rotate while the steering column shaft is disconnected or damage to the clockspring may result. If there is evidence that the steering wheel has rotated, remove and recenter the clockspring. For additional information, refer to Supplemental Restraint System Service and Repair.
NOTE: The steering column and steering column shaft are one assembly and can not be separated.
1. With the vehicle in NEUTRAL, position it on a hoist. For additional information, refer to Jacking and Lifting Service and Repair.
2. Remove the steering wheel. For additional information, refer to Steering Wheel Removal and Replacement.
3. Remove the steering column shrouds. For additional information, refer to Steering Column Shroud.
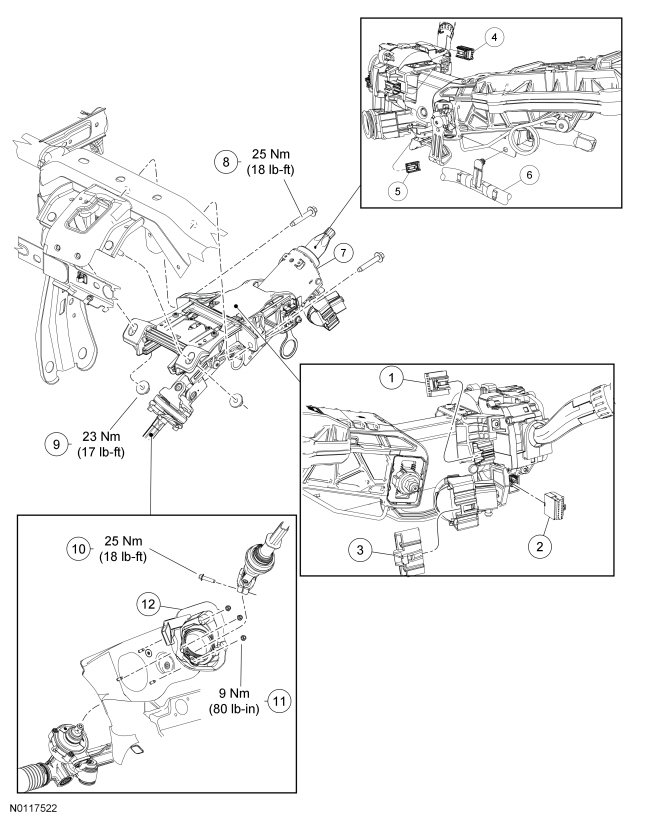
4. Disconnect the 4 multifunction switch electrical connectors.
- Disconnect the Passive Anti-Theft System (PATS) transceiver and multifunction switch electrical connectors.
- Disconnect the clockspring and steering wheel rotation sensor electrical connectors.
5. Disconnect the ignition switch electrical connector.
6. Disconnect the wiring harness from the steering column.
- Release the pin-type retainers.
7. Remove the 2 steering column nuts.
- To install, tighten to 23 Nm (17 lb-ft).
8. Remove the 2 steering column bolts.
- To install, tighten to 25 Nm (18 lb-ft).
9. Remove the 3 steering column shaft boot nuts.
- To install, tighten to 9 Nm (80 lb-in).
10. Remove the steering column shaft-to-steering gear bolt and the steering column.
- To install, tighten to 25 Nm (18 lb-ft).
11. To install, reverse the removal procedure.