Engine - Cold Start-Up Ticking Noises
TSB 12-1-1701/25/12
3.5/3.7L - COLD ENGINE STARTUP TICKING NOISE -
BUILT ON OR BEFORE 5/1/2011
FORD:
2011-2012 Mustang
2011 Edge, Explorer, F-150
LINCOLN:
2011 MKX
This article supersedes TSB 11-11-15 to update the vehicle model lines.
ISSUE
Some 2011 Edge, MKX, Explorer, F-150 and 2011-2012 Mustang vehicles, equipped with a 3.5L or a 3.7L engine and built on or before 5/1/2011 may exhibit a cold startup ticking noise coming from the engine. The noise is present under the left hand (LH) valve cover and may last up to ten minutes.
ACTION
Follow Service Procedure steps to correct the concern.
SERVICE PROCEDURE
1. Check vehicle build date.
a. If vehicle build date is on or before 5/1/2011, proceed to Step 2.
b. If vehicle build date is on or after 5/2/2011, do not continue with this article. Perform normal diagnostics. Refer to Workshop Manual (WSM), Section 303-00.
2. Remove LH valve cover. Refer to WSM, Section 303-01.
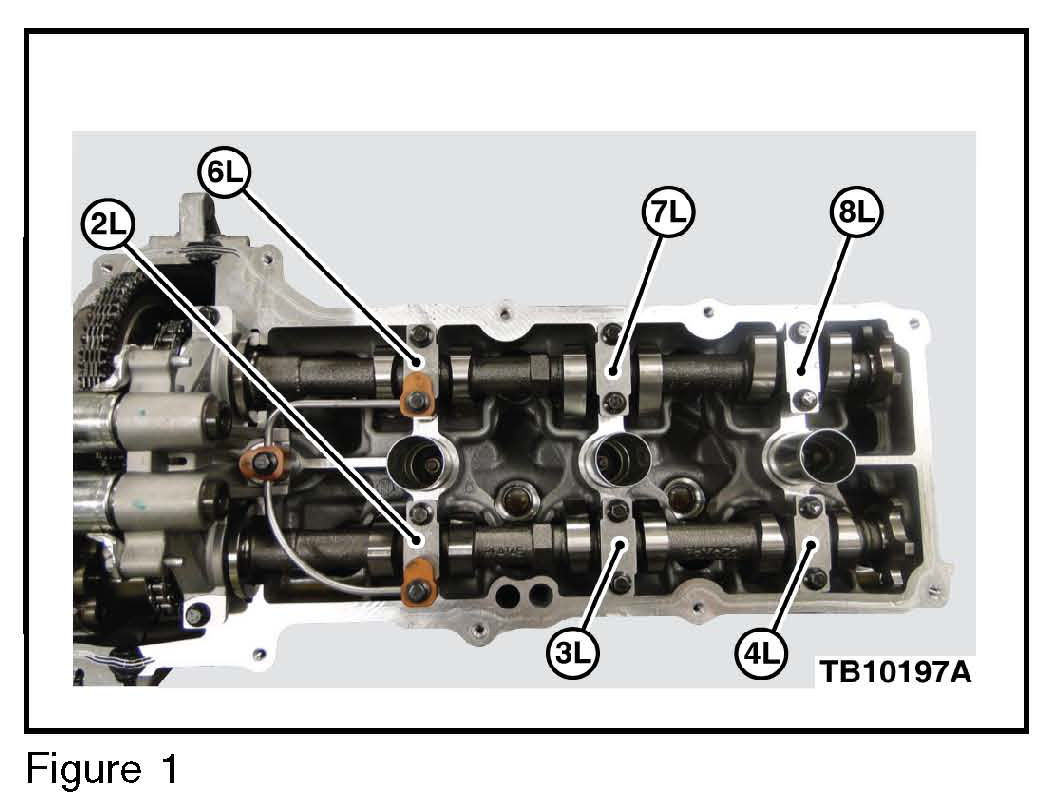
3. Remove camshaft caps 2L and 6L. (Figure 1)
NOTE
THE CAMSHAFT CAPS HAVE NUMBERS AND ARROWS STAMPED ON THE TOP SURFACE FOR IDENTIFICATION.
4. Rotate crankshaft so number 4 cylinder exhaust camshaft lobe is pointing up.
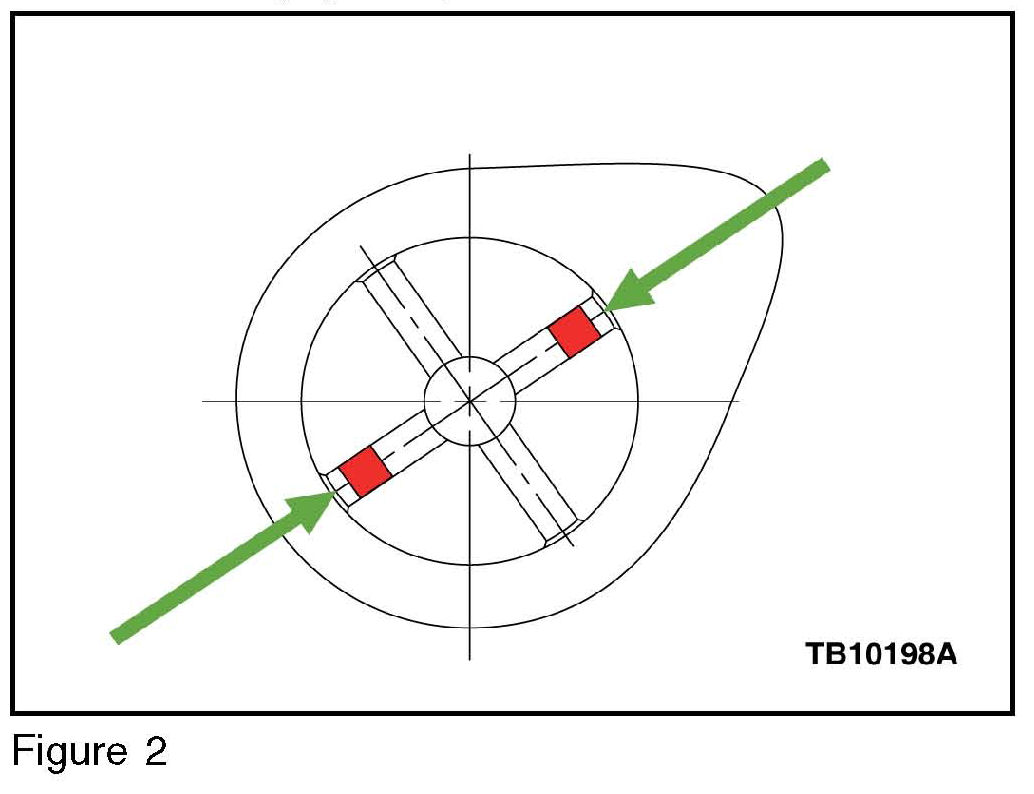
5. Use the pin gage provided in the service kit, determine the correct color cup plug to be installed. (Figure 2)
a. If the gage pin will not fit into the hole, install the natural cup plug.
b. If the gage pin fits into the hole, install the blue cup plug.
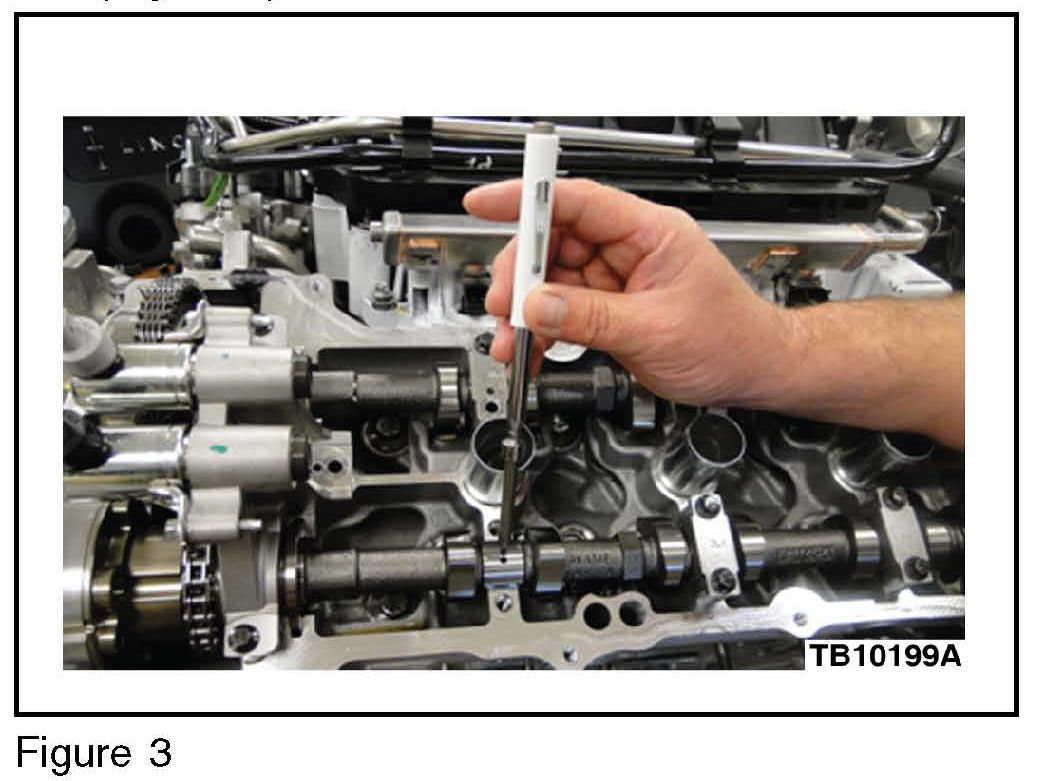
6. Using the tool provided in the service kit, install the appropriate color cup plug into the oil feed hole in camshaft journal 2L. A pen magnet may be used on the opposite side of the tool to hold the plug to the tool and position in the hole. (Figure 3)
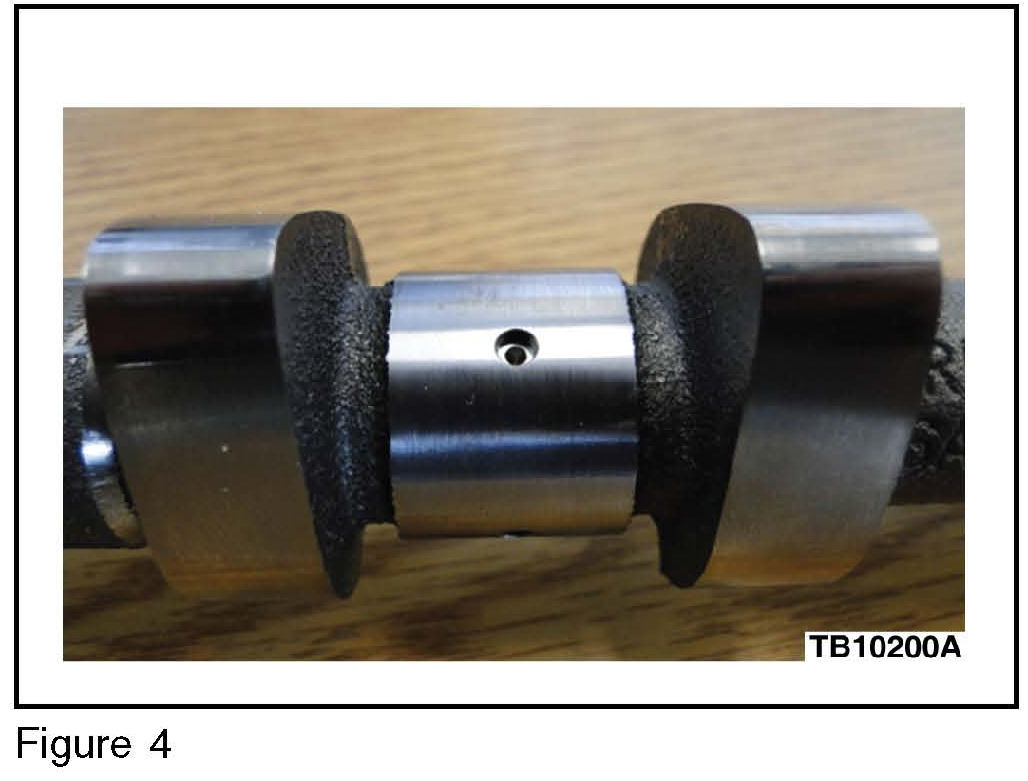
7. Gently tap the cup plug into the camshaft oil feed hole. The plug should be countersunk below the surface of the journal. (Figure 4)
8. Rotate crankshaft until number 4 cylinder exhaust camshaft lobe is pointing down.
9. Repeat Steps 5 - 7.
10. Using Motorcraft(R) Metal Brake Parts Cleaner, clean the camshaft(R) caps.
11. Using fine sandpaper or crocus cloth, sand the top of the camshaft caps to remove any raised burrs and ensure flat surface.
12. Using tool 303-1597, cut deeper grooves into camshaft caps.
a. Install camshaft cap (top side down) into fixture.
b. Cut grooves into both sides of cap. About 15 saw strokes per side. The cut should go completely across the camshaft caps and be consistent in depth.
c. Rotate tool and repeat Step 12b.
d. Use compressed air to remove cutting debris.
13. Lubricate camshaft cap bearing sur[ace with clean engine oil.
14. Install camshaft caps 2L and 6L. Tighten bolts to 8 N.m (71 lb-in) then an additional 45 degrees.
15. Remove camshaft caps 3L and 7L.
16. Repeat steps 10-13 for camshafl caps 3L and 7L.
17. Install camshaft caps 3L and 7L. Tighten bolts to 8 N.m (71 lb-in) then an additional 45 degrees.
18. Remove camshafl caps 4L and 8L.
19. Repeat steps 10-13 for camshaft caps 4L and 8L.
20. Install camshaft caps 4L and 8L. Tighten bolts to 8 N.m (71 lb-in) then an additional 45 degrees.
21. Install LH Valve Cover. Refer to WSM, Section 303-01.
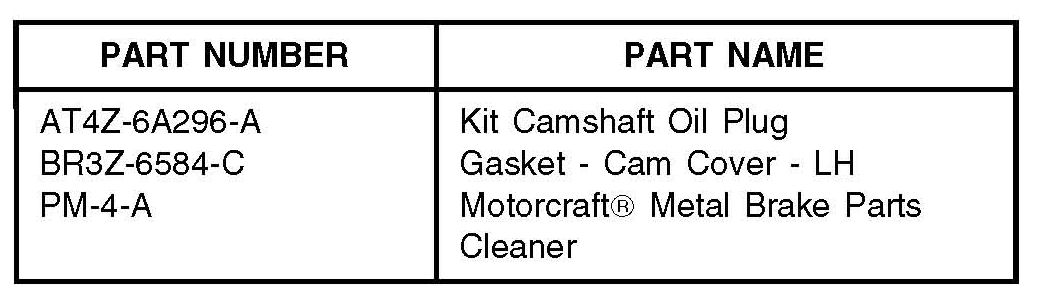
Parts Block
WARRANTY STATUS: Eligible Under Provisions Of New Vehicle Limited Warranty Coverage Warranty/ESP coverage limits/policies/prior approvals are not altered by a TSB. Warranty/ESP coverage limits are determined by the identified causal part and verified using the OASIS part coverage tool.
OPERATION DESCRIPTION TIME
120117A 2011 Edge, MKX, And 1.8 Hrs.
Explorer: Install Cup Plugs
And Adjust Groove Depth
In The Camshaft Caps
Following The Service
Procedure (Do Not Use
With Any Other Labor
Operations)
120117A 2011 - 2012 Mustang 3.7L: 2.0 Hrs.
Install Cup Plugs And
Adjust Groove Depth In
The Camshaft Caps
Following The Service
Procedure (Do Not Use
With Any Other Labor
Operations)
120117A 2011 F-150 3.7L: Install 1.9 Hrs.
Cup Plugs And Adjust
Groove Depth In The
Camshaft Caps Following
The Service Procedure (Do
Not Use With Any Other
Labor Operations)
DEALER CODING
CONDITION
BASIC PART NO. CODE
6050 42

Disclaimer