Tool - Piston Pin Replacement
90honda05Model Applicable To
1983
PRELUDE ALL
File Under Bulletin No.
83-011
SPECIAL Issue Date
TOOLS MAY 1983
PISTON PIN REPLACEMENT
These tools are used to modify existing piston pin removal/installation tools - T/N 07973- 6570001 or 07973-6570002 - for use with the new Prelude piston.
^ Piston Base Head H/C 1484773, T/N 07973-SB00100
^ Pilot Collar H/C 1484799, T/N 07973-SB00200
^ Piston Pin Driver H/C 1484807, T/N 07973-SB00300 (Unlike previous piston pin drivers, the new Prelude pin driver is non-adjustable; it has a fixed length and needs no adjustment).
^ Piston Pin Base Insert H/C 1484815, T/N 07973-SB00400
USE WITH:
A hydraulic press and T/N 07973-6570001 or T/N 07973-6570002.
HOW TO USE:
1. Remove the Piston Base Head and Base. Insert from the Piston Base. Then, install the new Base Insert and the Base Head, using the longer screws provided.
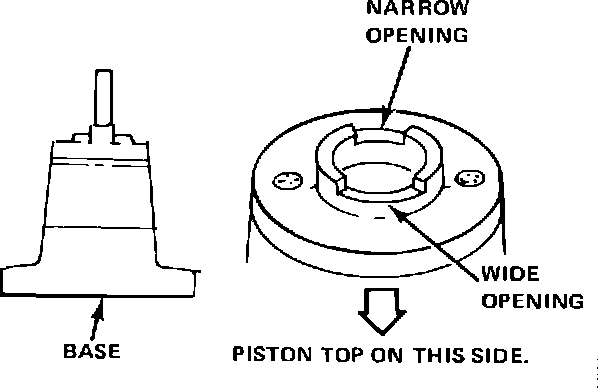
2. Set the modified Piston Base into the hydraulic press. The Piston Base Head has two lugs on it; position the base so that the wider opening between the lugs will be towards the piston top.
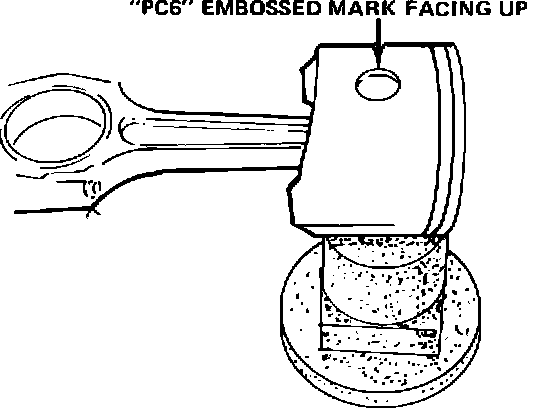
3. Position the assembled piston and connecting rod over the base so that the "PC6" mark is facing up.
4. Center the pilot collar on the end of the piston pin, then insert the driver into the collar and use the press to drive out the old piston pin.
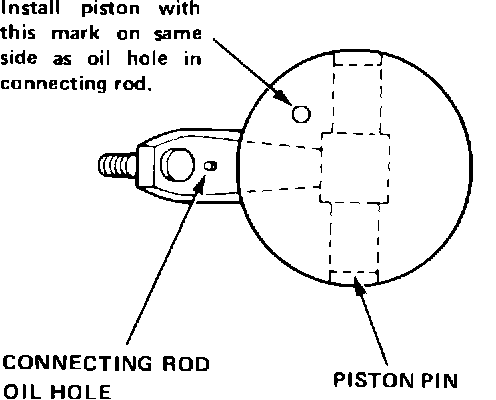
5. Use the pilot collar as an assembly guide to keep the connecting rod and new piston together, then place them over the base. Again, the "PC6" must face up and the wide opening in the lugs on the base head must face towards the top of the piston. In
addition, the connecting rod and piston must be assembled as shown below.
6. Place a new piston pin into the piston by hand, then press it into place with the driver. When the driver bottoms out, the pin is installed to the correct depth.