Disassembly and Assembly
Fig. 15 Front Pin Sliding Disc Brake Caliper. 1989-91 Prelude S:

Fig. 16 Front Pin Sliding Disc Brake Caliper. 1989-91 Prelude Si:

Fig. 20 Pad Spring:
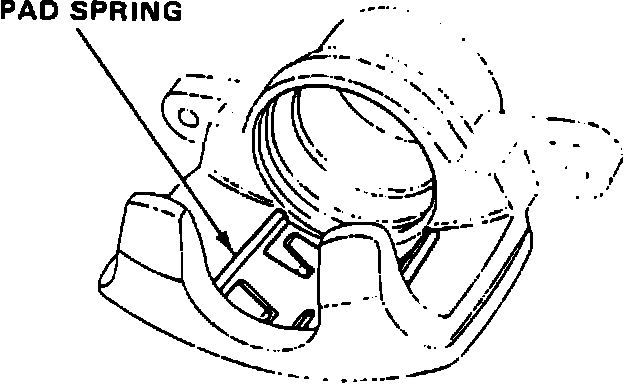
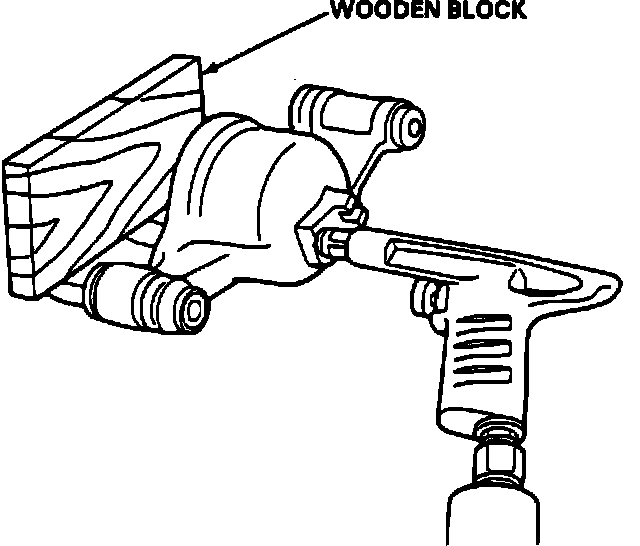
Fig. 21 Removing Caliper Piston:
DISASSEMBLY
1. Refer to Figs. 15 and 16 when overhauling calipers.
2. Remove caliper assembly from vehicle as described under REMOVAL/INSTALLATION.
3. Remove pad spring from caliper body, if equipped, Fig. 20.
4. Place a wooden block or shop rag in caliper opposite piston, then carefully remove piston from caliper by applying air pressure through brake line hole with a OSHA approved 30 psi nozzle, Fig. 21.
5. Remove boot clip, if equipped, then piston boot and piston seal.
ASSEMBLY
Ensure dirt or other foreign matter is not allowed to contaminate brake fluid. Do not mix different types of brake fluid as they might not be compatible.
1. Clean piston and caliper bore with brake fluid, then inspect for wear or damage.
2. Apply brake cylinder grease to a new piston seal and install seal in cylinder groove.
3. Install piston boot, then boot retaining clip, if equipped.
4. Lubricate caliper cylinder and piston with brake fluid, then install piston in cylinder with dished end facing in.
5. Install pad spring in caliper housing, if equipped.
6. Install caliper assembly as described under REMOVAL/INSTALLATION.