Piston Ring: Service and Repair
Piston Ring Installation:
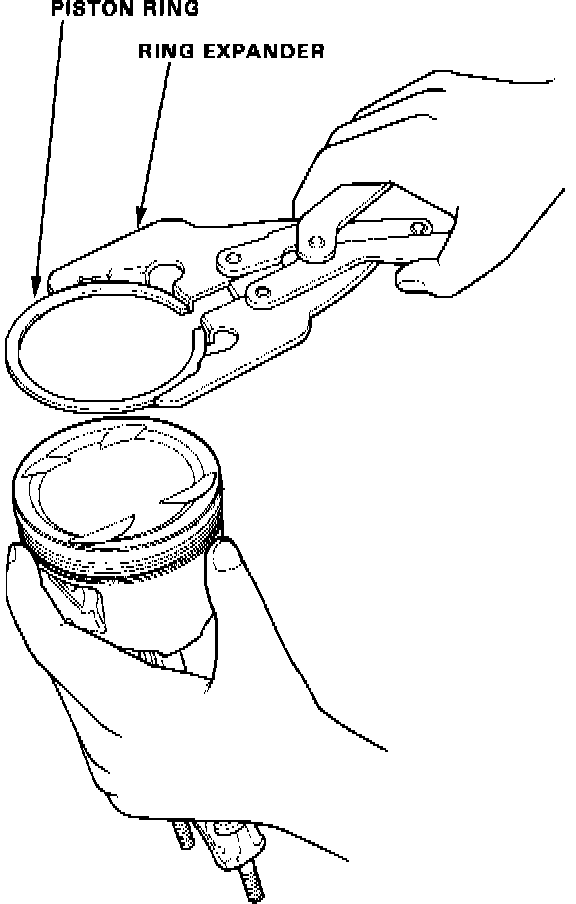
REPLACEMENT
1. Using a ring expander, remove the old piston rings.
2. Clean all ring grooves thoroughly.
NOTE:
- Use a squared-off broken ring or ring groove cleaner with blade to fit piston grooves.
- Top and 2nd ring grooves are 1.2 mm (0.05 in) wide and the oil ring groove is 2.8 mm (0.11in) wide.
- File down blade if necessary.
CAUTION: Do not use a wire brush to clean the ring lands, or cut ring lands deeper with cleaning tool.
Ring Identification:
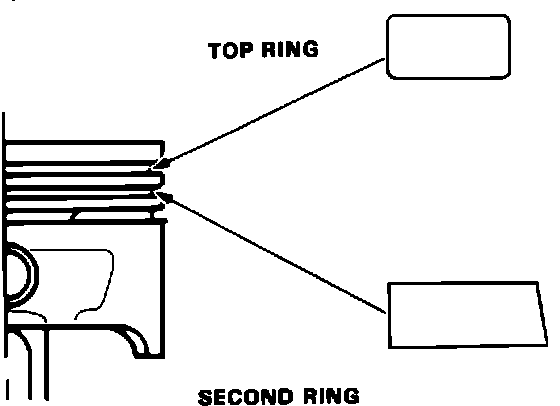
Ring Installation Order:
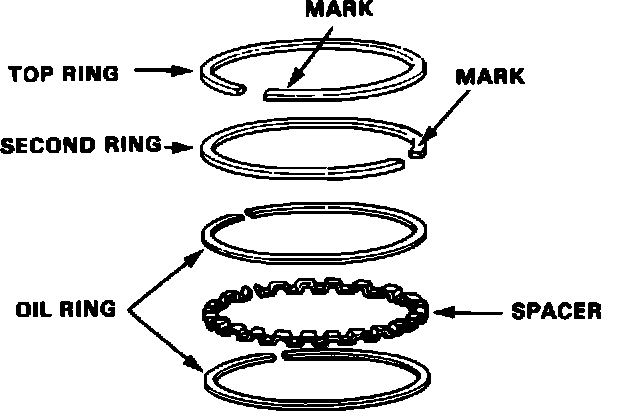
3. Install new rings in the proper sequence and position. Do not use old piston rings.
NOTE: If the piston is to be separated from the connecting rod, do not install new rings yet.
- Identify top and second rings by the chamfer on the edge. Make sure they are in their proper grooves on the piston.
- The manufacturing marks must be facing upward.
- Rotate the rings in their grooves to make sure they do not bind.
NOTE: After installing a new set of rings, measure the ring-to-groove clearances.
Ring End Gap Position:
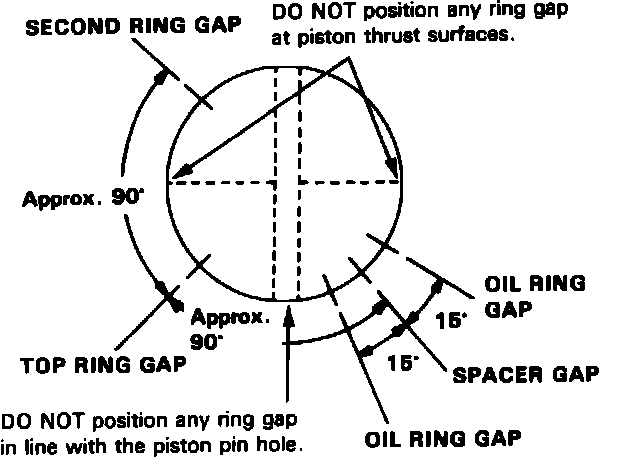
ALIGNMENT
Position the ring end gaps as shown.