Body - Trunk Difficult To Close
Bulletin No.94-038
Issue Date
NOV 14, 1994
Model
1994
ACCORD
Applicable To
ALL
File Under
BODY
Trunk Difficult to Close
SYMPTOM
The trunk lid is hard to close.
PROBABLE CAUSE
The trunk lid is out of adjustment.
CORRECTIVE ACTION
Add washers between the trunk latch and trunk lid, and adjust the striker.
1. Remove the three trunk latch mounting bolts.
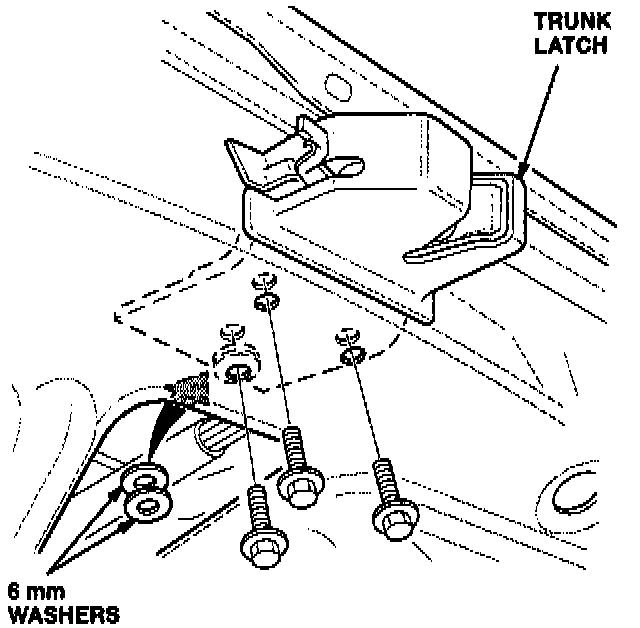
2. Insert two 6 mm washers (see PARTS INFORMATION) between the trunk lid and trunk latch. Stack the washers and position them to go around the upper mounting bolt.
3. Install the mounting bolts. Tighten the two lower mounting bolts first, then tighten the upper mounting bolt (the one with the added washers).
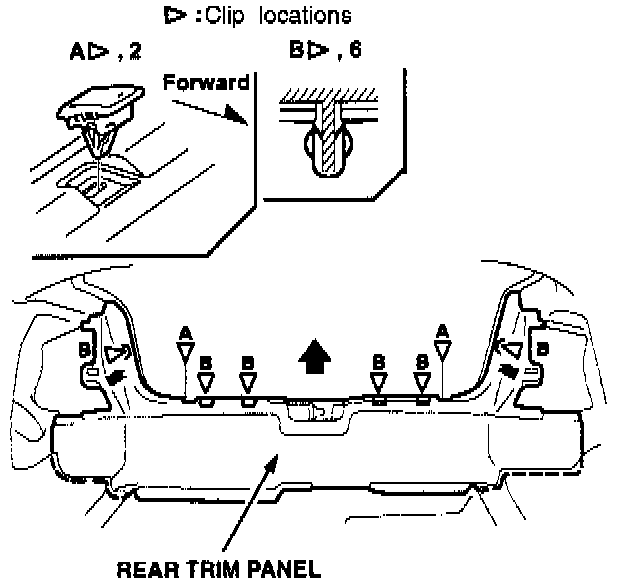
4. Remove both taillight access covers. Remove the two trim clips, then remove the rear trim panel.
5. Screw in the two trunk lid rubber stops as far as they will go.

6. Check the alignment of the striker with the trunk latch. Lower the rear seat-back so you can get into the trunk. Have an assistant slowly close the trunk. The striker should be centered in the latch as the trunk closes. Adjust the striker horizontally as necessary.
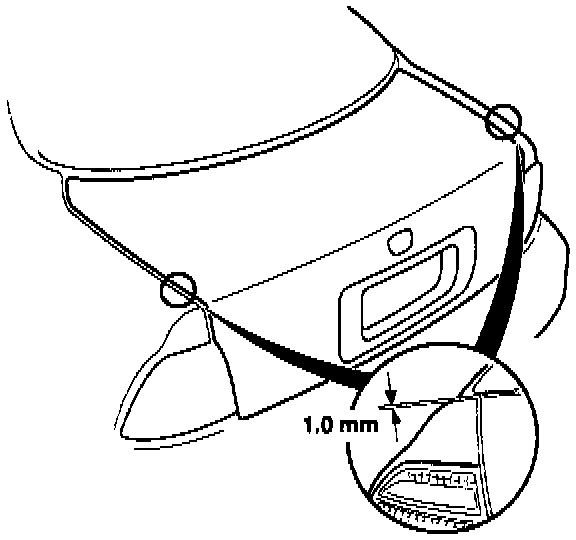
7. Close the trunk lid fully. Check the alignment of the trunk lid to the rear fenders. It should sit 1 mm above the fenders. It should not sit below the fenders.
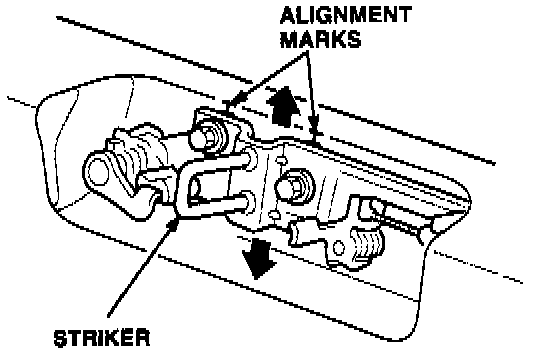
8. If necessary, adjust the striker vertically. Use the alignment marks on the body to make sure the striker is not cocked.
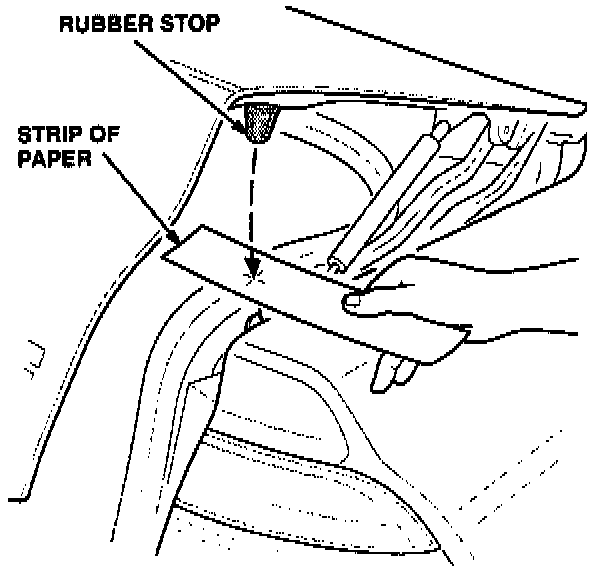
9. Screw the trunk lid rubber stops out 1/2 turn. Insert a strip of paper between the rubber stop and the body. Close the trunk fully.
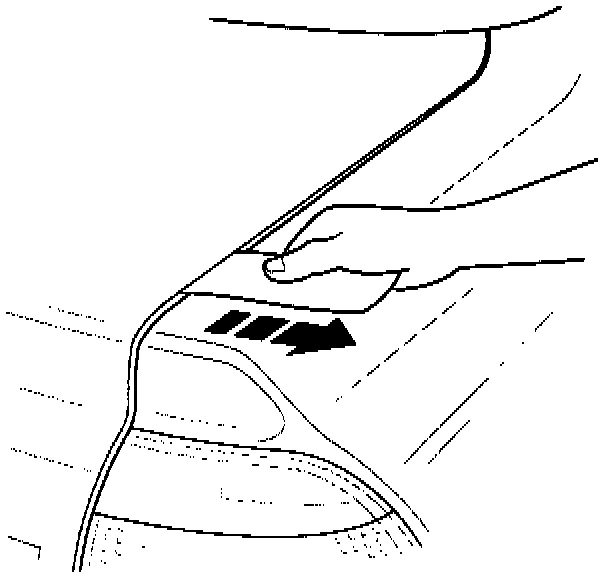
10. Pull on the paper strip. If you can pull it out, repeat steps 9 and 10 until you cannot pull out the paper strip without opening the trunk. At that point, open the trunk and screw the rubber stops in 1/2 turn.
11. Remove the retaining clips from the rear trim panel and install them in the body. Then, reinstall the rear trim panel.
12. Reinstall the two rear trim clips. Reinstall the taillight access covers.
PARTS INFORMATION
6 mm Washer (2 required):
P/N 94101-06800, H/C 0345900
WARRANTY CLAIM INFORMATION
In warranty:
The normal warranty applies.
Out of warranty:
Any repair performed after warranty expiration may be eligible for goodwill consideration by the District Service Manager or your Zone Office. You must request consideration, and get a decision, before starting work.
Operation number: 823009
Flat rate time: 0.5 hour
Failed part: P/N 68500-SV4-A00ZZ
H/C 4321535
Defect code: 082
Contention code: B01