Expansion Valve: Service and Repair
1. Disconnect battery ground cable and discharge A/C system using refrigerant recovery equipment.2. Disconnect receiver and suction lines from evaporator and plug lines.
3. Remove glove box and frame.
4. Disconnect electrical connector from thermostat switch.
Fig. 22 Removing Evaporator Housing Supports:
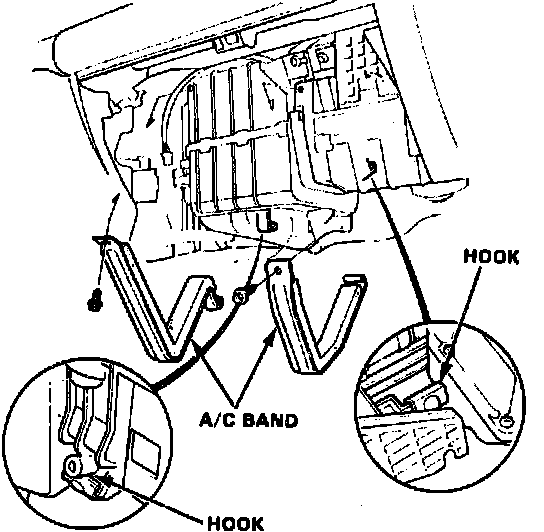
5. Remove self-tapping screws and bands, Fig. 22.
Fig. 23 Evaporator Housing Removal:
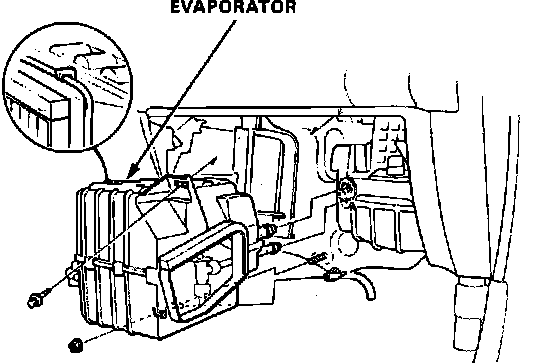
6. Remove mounting bolts and evaporator housing, Fig. 23.
7. Remove evaporator sensor from the evaporator fins.
8. Separate housings, then remove evaporator cover.
9. The expansion valve can be removed after the evaporator has been lifted out of the case.
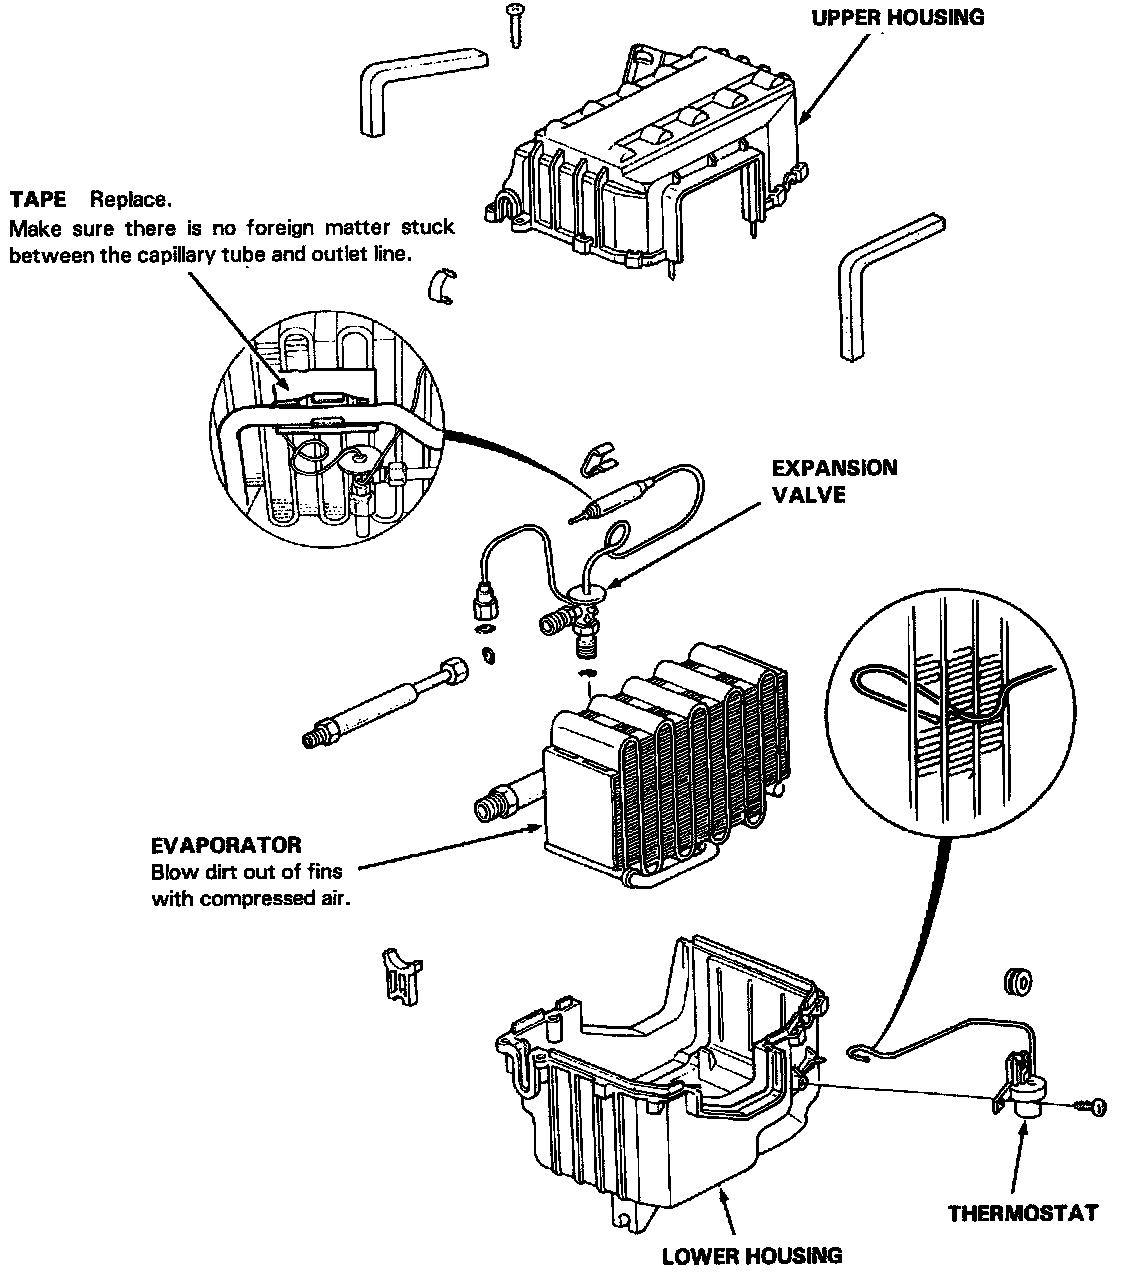
9. Reverse procedure to install, noting the following:
a. Use new O-rings when installing expansion valve and connecting refrigerant lines.
b. Install expansion valve and secure valve sensor against suction line with tape.
c. Reinstall evaporator sensor in its original location.
d. Ensure there is no air leakage in the evaporator housing.