Shift Interlock Solenoid: Service and Repair
Shift Lock Solenoid ReplacementSRS components are located in this area. Review the SRS component locations, precautions, and procedures in the SRS section before performing repairs or service.
1. Remove the steering column covers.
2. Shift the transmission into H position.
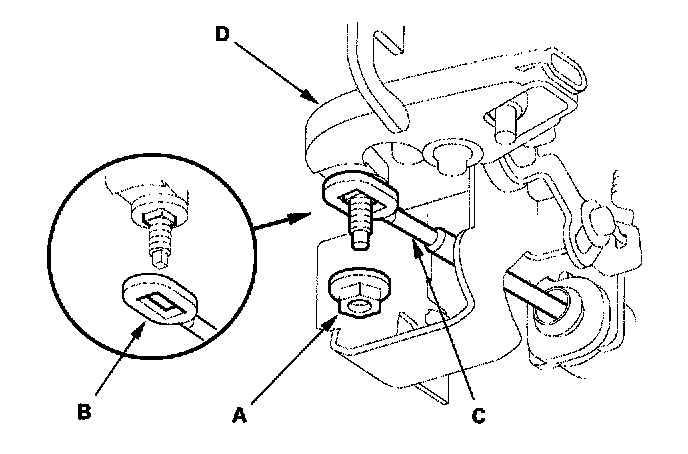
3. Remove the nut (A) securing the shift cable end (B), then separate the shift cable (C) from the shift lever assembly (D).
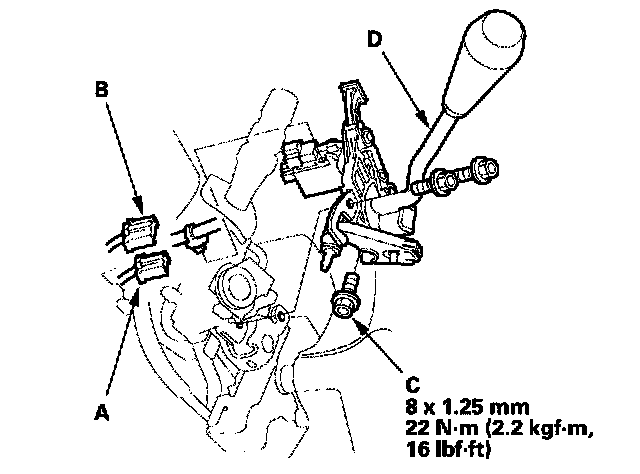
4. Disconnect the shift lock solenoid connector (A) and the park pin switch connector (B).
5. Remove the three bolts (C) securing the shift lever assembly, then remove the shift lever assembly (D).
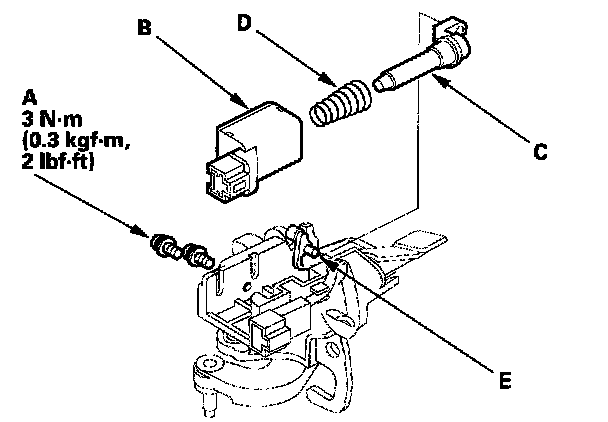
6. Remove the screws (A) securing the shift lock solenoid (B), then remove the shift lock solenoid.
7. Install the shift lock solenoid plunger (C) and plunger spring (D) in the new shift lock solenoid.
8. Install the shift lock solenoid by aligning the joint of the shift lock solenoid with the tip of the shift lock extension (E), then tighten the screws.
9. Install the shift lever assembly.
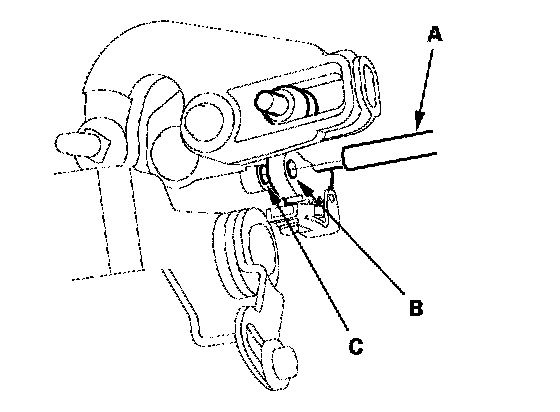
10. Insert a 6.0 mm (0.24 inch) pin (A) into the positioning hole (B) on the detent plate through the positioning hole (C) on the control bracket.
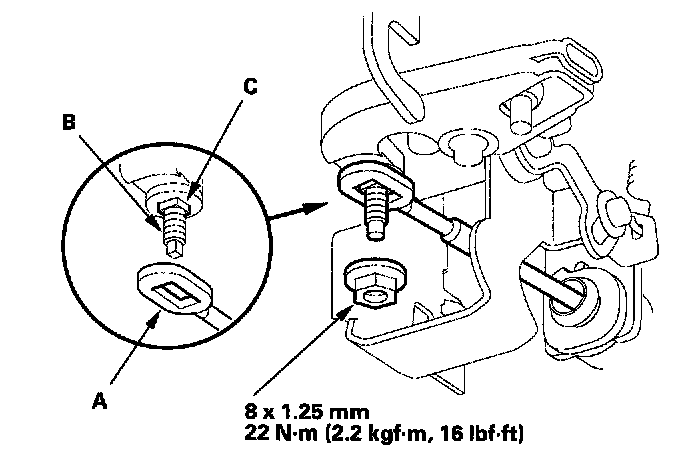
11. Install the shift cable end (A) to the mounting stud (B), by aligning its flat surfaces with the square shape (C) at the bottom of the stud.
12. Install and tighten the nut to the specified torque.
13. Remove the 6.0 mm (0.24 inch) pin that was installed to hold the shift lever.
14. Connect the shift lock solenoid connector and park pin switch connector.
15. Move the shift lever to each gear, and verify that the A/T gear position indicator follows the A/T gear position switch,
16. Push the shift lock release, a and verify that the shift lock lever releases.