Shift Cable: Service and Repair
Shift Cable ReplacementSRS components are located in this area. Review the SRS components locations, precautions, and procedures in the SRS section before performing repairs or service.
1. Raise the front of the vehicle, and make sure it is securely supported.
2. Set the parking brake, and block the rear wheels securely.
3. Remove the steering column covers.
4. Shift the transmission into [N] position.
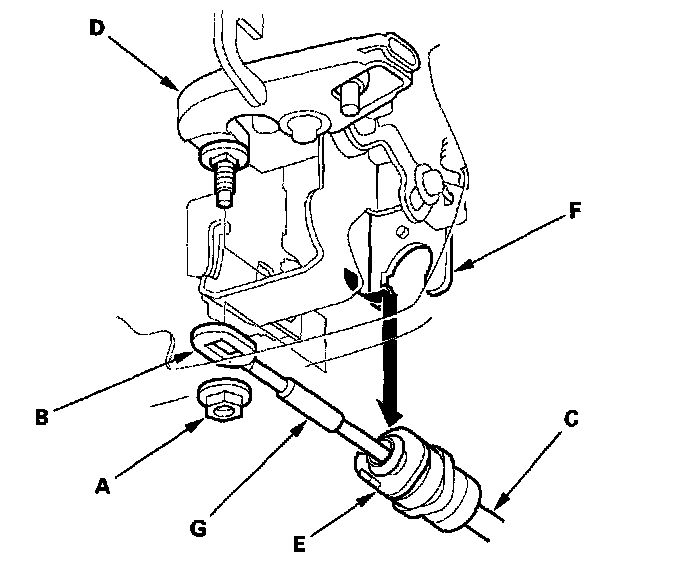
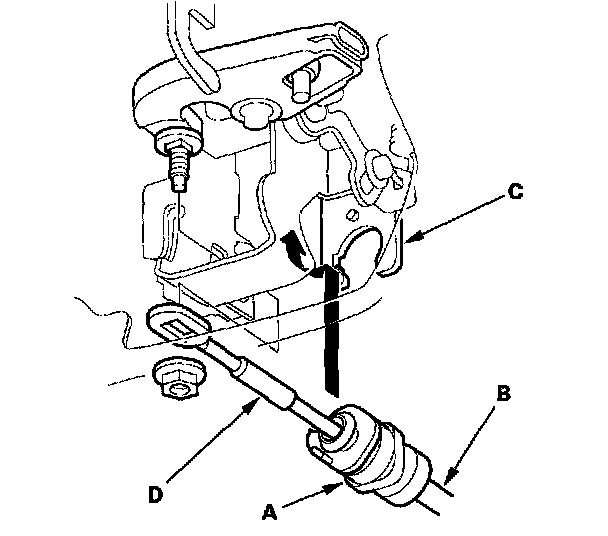
5. Remove the nut (A) securing the shift cable end (B), then separate the shift cable (C) from the shift lever assembly (D).
6. Rotate the socket holder (E) on the shift cable counterclockwise a quarter turn, then slide the holder to remove the shift cable from the shift cable bracket (F).
NOTE: Do not remove the shift cable by twisting the shift cable guide (G).
7. Remove the shift cable guide bracket (A) and grommet (B).
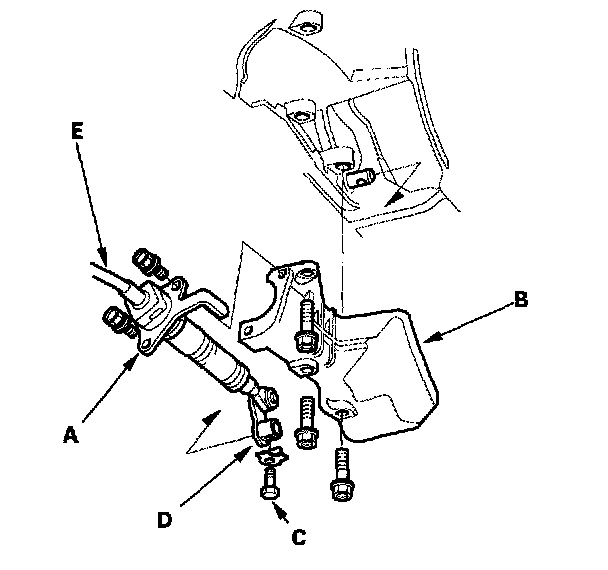
8. Remove the bolts securing the shift cable holder (A), then remove the shift cable cover (B).
NOTE: To prevent damage to the control lever joint, remove the bolts securing the shift cable holder before removing the bolts securing the shift cable cover.
9. Remove the lock bolt (C) securing the control lever (D), then remove the shift cable (E) with the control lever.
10. Insert the new shift cable through the grommet hole, then install the shift cable guide bracket.
11. Verify that the transmission is in [N] position on the control shaft.
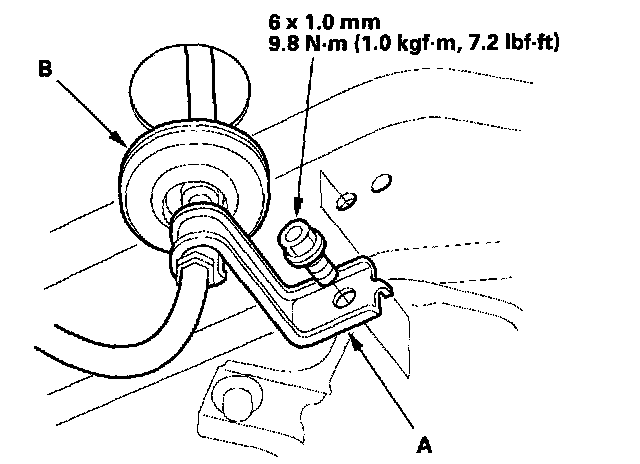
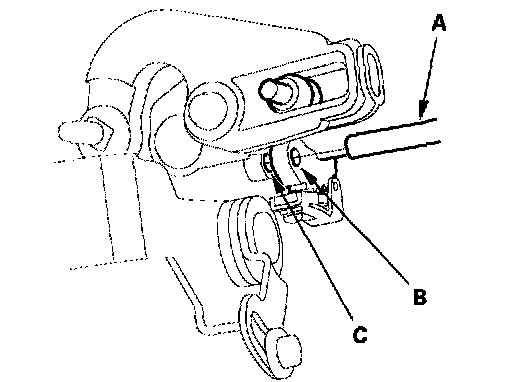
12. Install the control lever (A) with the shift cable (B) on the control shaft (C). Do not bend the shift cable excessively.
13. Install the lock bolt (D) with a new lock washer (E), then bend the lock washer tab against the bolt head.
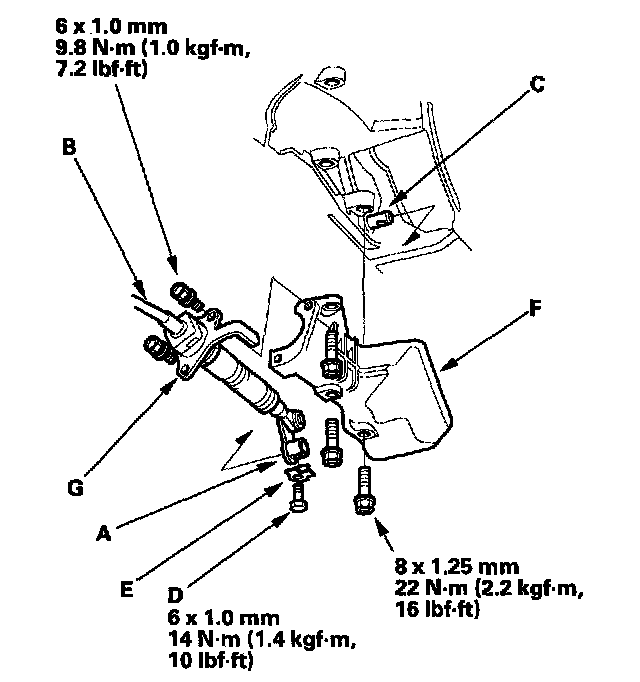
14. Install the shift cable cover (F), then install the shift cable holder (G) on the shift cable cover.
NOTE: To prevent damage to the control lever joint, be sure to install the shift cable holder after installing the shift cable cover to the torque converter housing.
15. Rotate the socket holder (A) on the shift cable (B) counterclockwise a quarter turn, then slide the holder to install the shift cable on the shift cable bracket (C). Rotate the socket holder clockwise a quarter turn to secure the shift cable.
NOTE: Do not install the shift cable by twisting the shift cable guide (D).
16. Turn the ignition switch ON (II), and verify that the [N] position indicator light comes on.

17. If necessary, push the shift cable until it stops, then release your hand. Pull the shift cable back two steps so that the shift lever position is in [N].
18. Insert a 6.0 mm (0.24 inch) pin (A) into the positioning hole (B) on the detent plate through the positioning hole (C) on the control bracket.
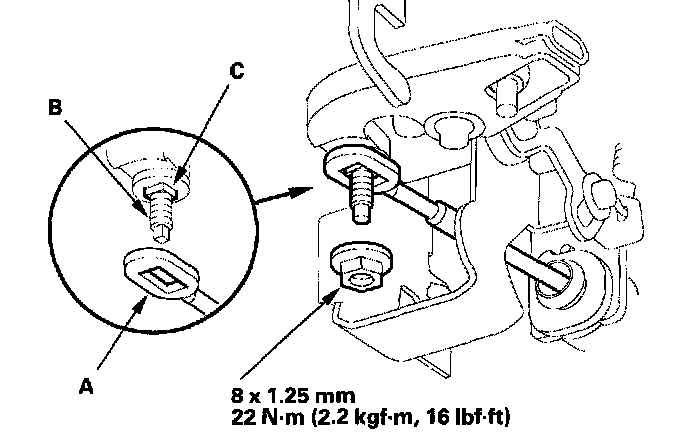
19. Install the shift cable end (A) to the mounting stud (B), by aligning its flat surfaces with the square shape (C) at the bottom of the stud.
20. Install and tighten the nut to the specified torque.
21. Remove the 6.0 mm (0.24 inch) pin that was installed to hold the shift lever.
22. Move the shift lever to each gear and verify that the A/T gear position indicator follows the A/T gear position switch.
23. Start the engine, and check the shift lever operation in all gears.