Transmission Removal
Transmission RemovalSpecial Tools Required
^ Engine hanger plate EQS00BRSX0 *
^ Engine support hanger, A & Reds AAR-T-12566 *
^ Subframe adapter EQS02C000011 *
* Available through the Honda Tool and Equipment Program 1-888-424-6857.
NOTE: Use fender covers to avoid damaging painted surfaces.
1. Make sure you have the anti-theft code for the radio, then write down the customer's radio station presets. Disconnect the negative cable from the battery first, then disconnect the positive cable from the battery. Remove the battery.
2. Remove the air cleaner housing.
3. Remove the air intake duct.
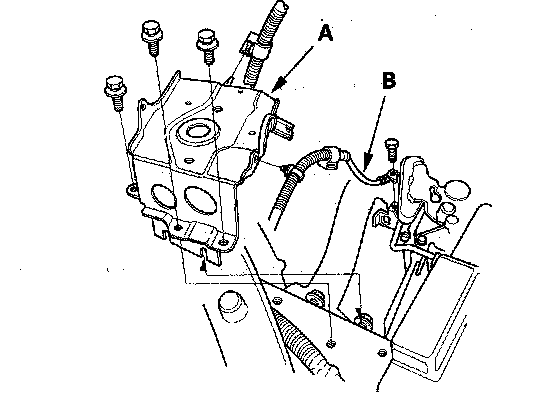
4. Remove the battery base (A).
5. Disconnect the transmission ground cable (B).
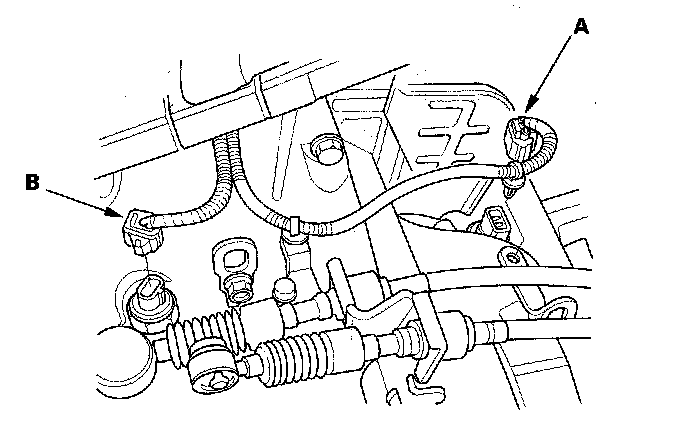
6. Disconnect the vehicle speed sensor (VSS) connector (A) and the back-up light switch connector (B).
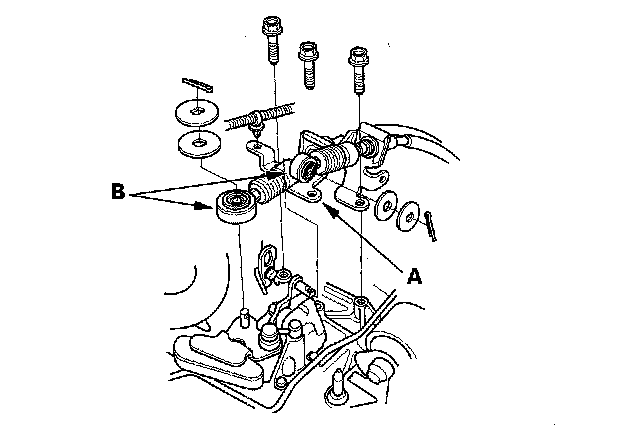
7. Remove the cable bracket (A), then disconnect the cables (B) from the top of the transmission housing. Carefully remove both cables and the bracket together to avoid bending the cables.
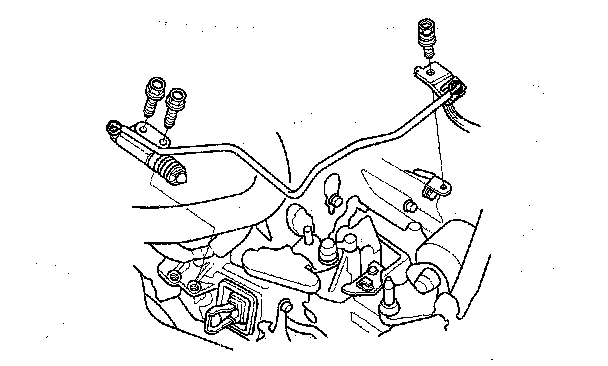
8. Carefully remove the slave cylinder without bending the clutch line. Do not press the clutch pedal once the slave cylinder has been removed.
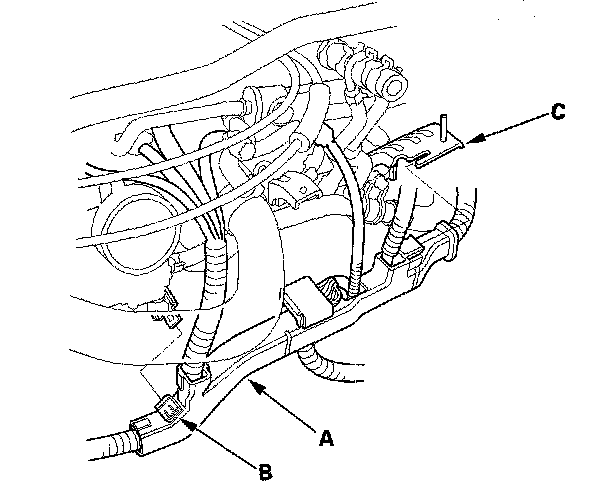
9. Remove the engine wire harness cover (A) by lifting up on the lock tab (B), then slide the harness forward off the air cleaner housing mounting bracket (C).
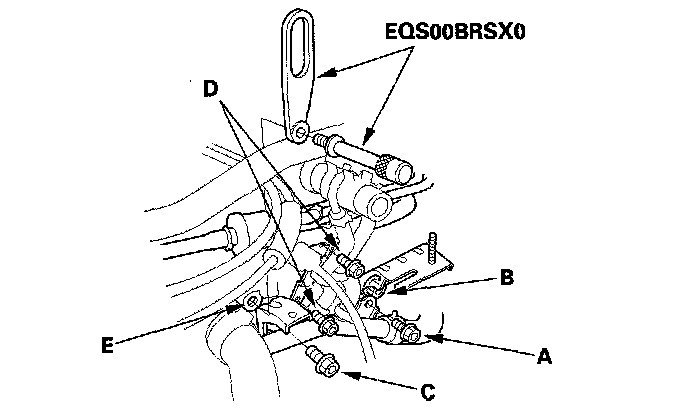
10. Remove the water pipe mounting bolt (A), and lower the water pipe slightly. Loosen the air cleaner housing bracket mounting bolt (B), and remove the mounting bolt (C).
11. Remove the brake booster and the evaporative emission (EVAP) line bracket mounting bolts (D), and attach the engine hanger plate (EQS00BRSX0) to the threaded hole (E) in the cylinder head.
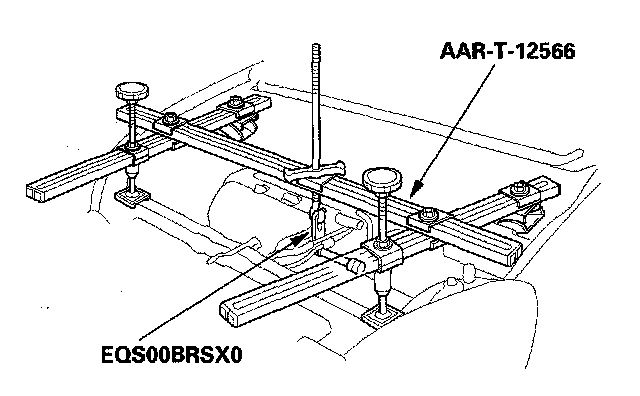
12. Install the engine support hanger (AAR-T-12566) to the vehicle, and attach the hook to the engine hanger plate (EQS00BRSX0).
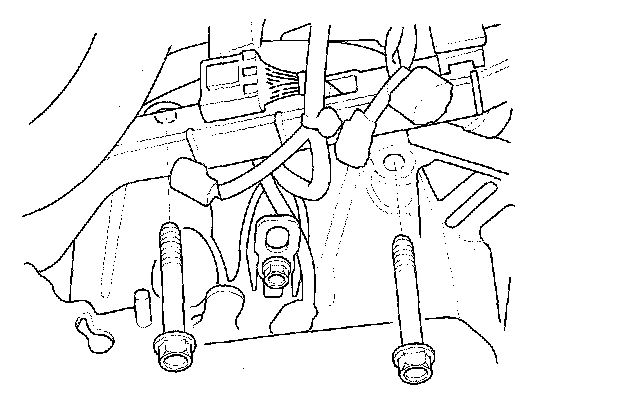
13. Remove the two transmission upper mounting bolts.
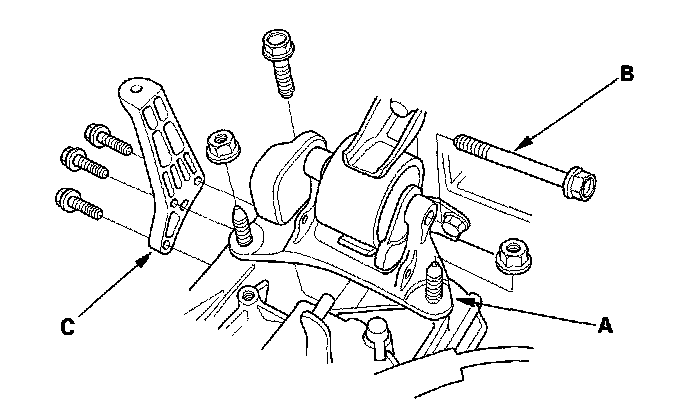
14. Remove the transmission mount bracket (A) and the transmission mounting bolt (B).
15. Remove the air cleaner bracket (C).
16. Raise the vehicle, and make sure it is securely supported.
17. Drain the transmission fluid. Reinstall the drain plug using a new drain plug washer.
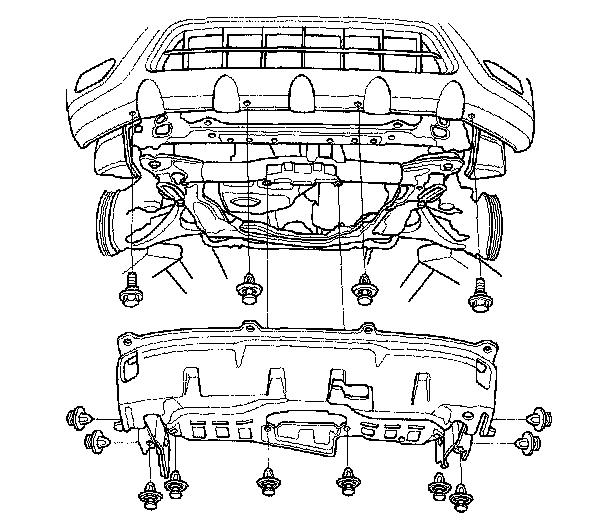
18. Remove the splash shield.
19. Remove the driveshafts.
20. Remove the intermediate shaft.
21. 4WD model: Remove the propeller shaft.
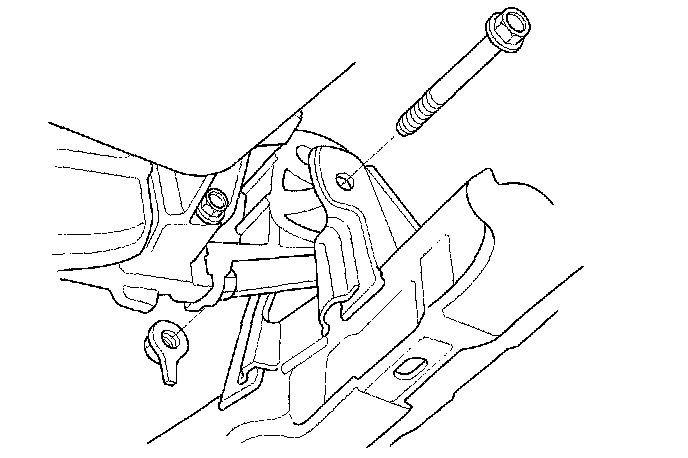
22. Remove the front engine mount bracket mounting bolt.
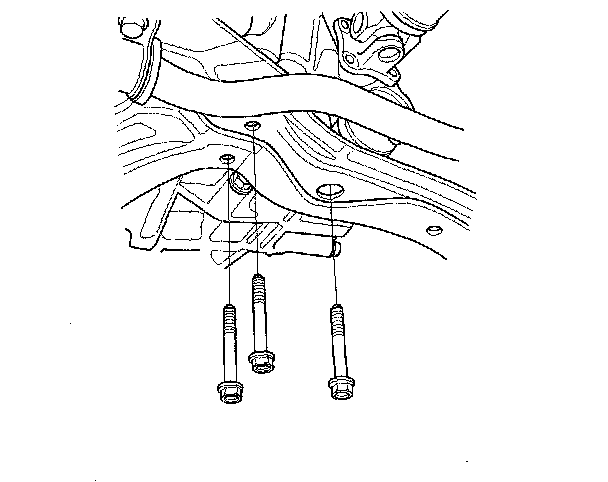
23. Remove the three bolts securing the transmission rear mount.
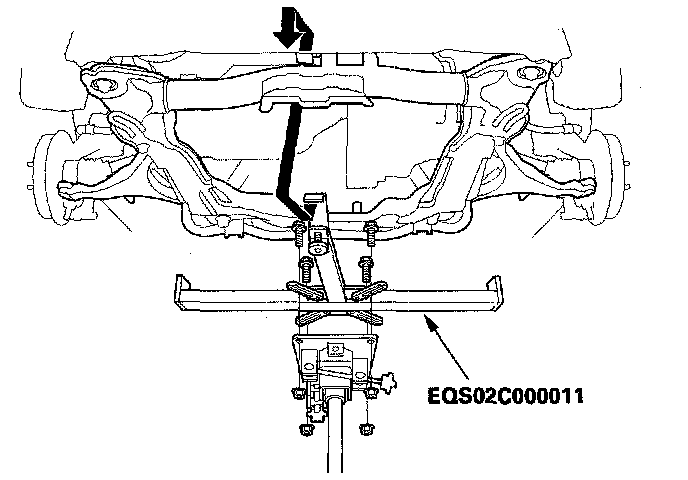
24. Support the front suspension subframe with the subframe adapter (EQS02C000011) and a jack.
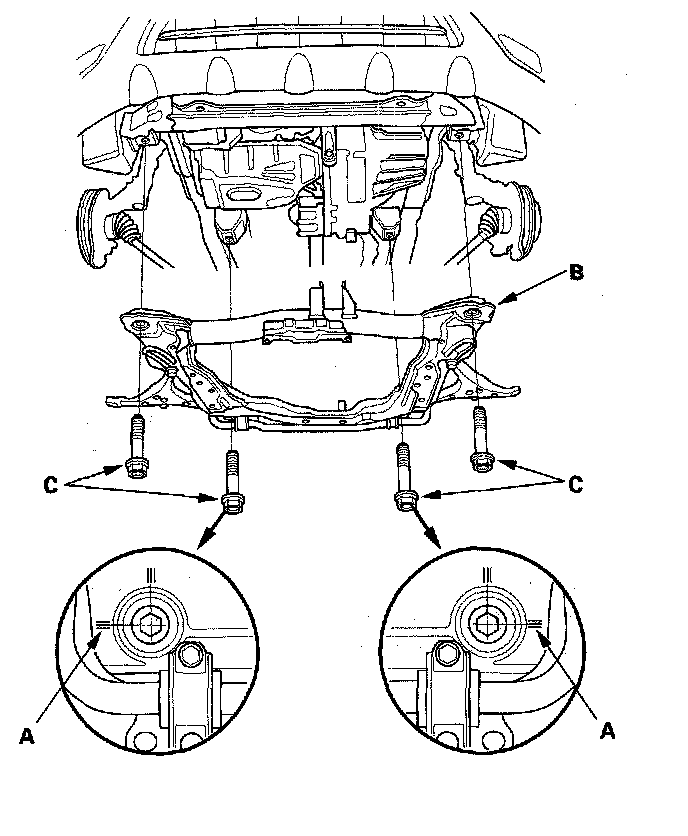
25. Make reference marks (A) on the front suspension subframe (B) and mounting bolts (C), then remove the front suspension subframe.
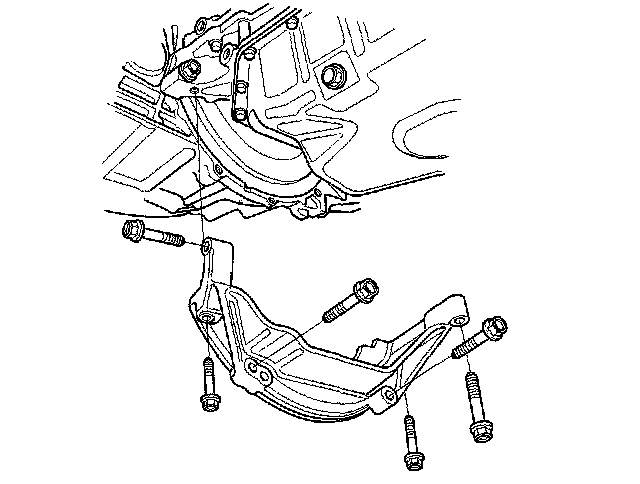
26. Remove the clutch cover.
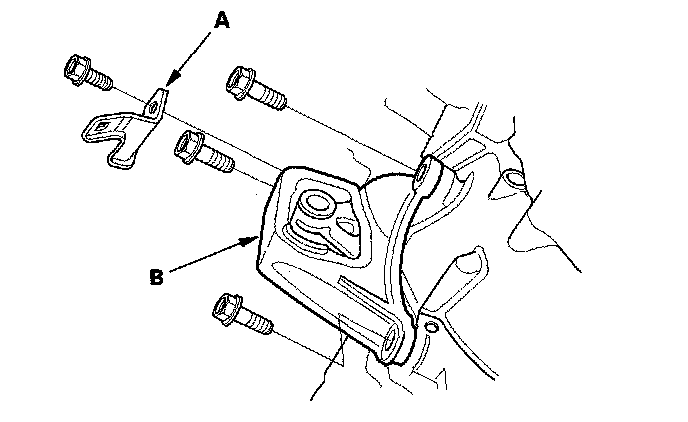
27. Remove the harness clamp (A).
28. Remove the front engine mount (B).
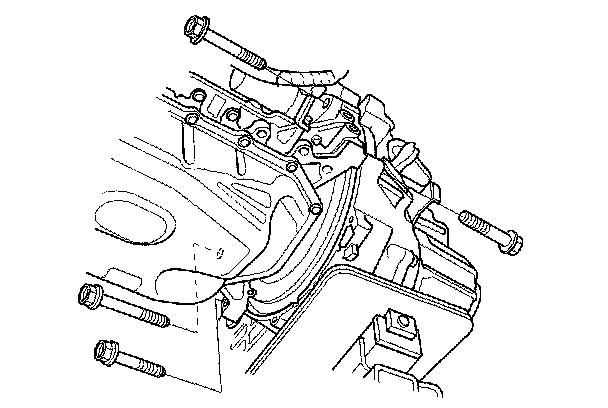
29. Place the transmission jack under the transmission, and remove the four transmission lower mounting bolts.
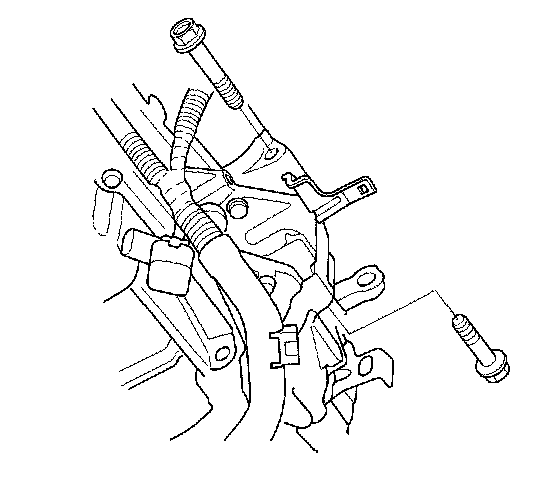
30. Remove the two transmission lower mounting bolts.
31. Pull the transmission away from the engine until the transmission mainshaft clears the clutch pressure plate, then lower the transmission on the transmission jack.
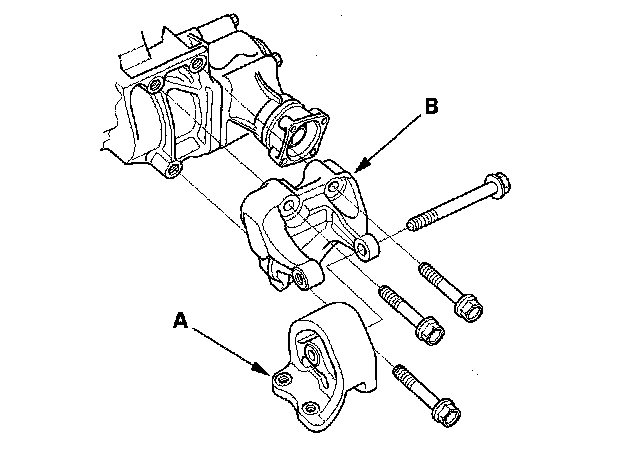
32. Remove the transmission rear mount (A) and the transmission rear mount bracket (B).
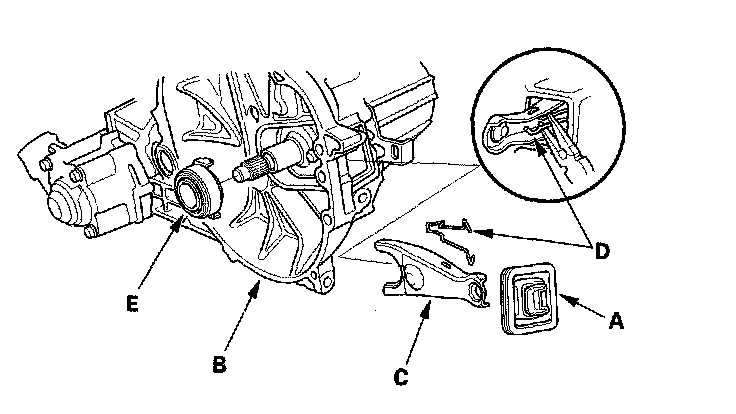
33. Remove the release fork boot (A) from the clutch housing (B).
34. Remove the release fork (C) from the clutch housing by squeezing the release fork set spring (D) with pliers. Remove the release bearing (E).