Warm Up TWC
Warm Up TWC Removal/InstallationFRONT
1. Remove the engine cover.
2. Remove the No. 2 the ignition coil and the ignition coil heat insulator.
3. Remove the front A/F sensor (Sensor 1) and the front secondary HO2S (Sensor 2).
4. Remove the exhaust pipe A mounting nuts (front WU-TWC side).
5. Remove the EGR pipe.
6. Remove the A/C condenser fan assembly and the radiator upper bracket/cushion.
7. Carefully remove the front WU-TWC.
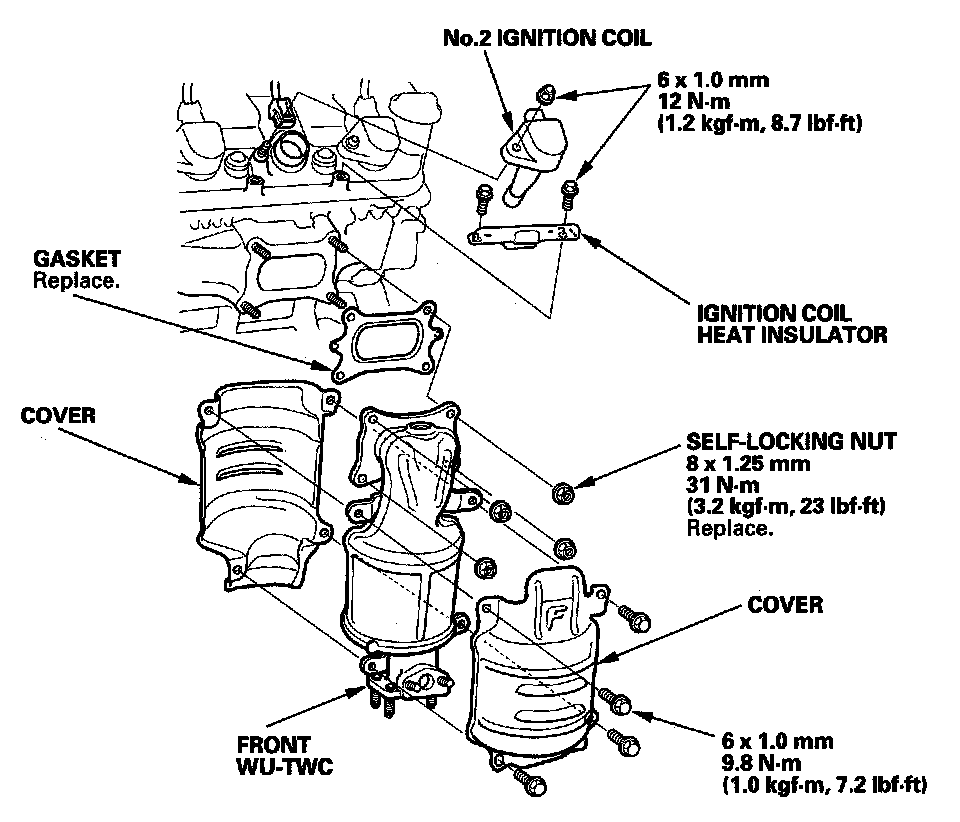
8. Carefully install the front WU-TWC with a new gasket and new self-locking nuts. Tighten the nuts in a crisscross pattern in two or three steps.
9. Install the parts in the reverse order of removal.
REAR
1. Remove the strut brace.
2. Remove the P/S feed hose clamp.
3. Remove the cowl cover.
4. Remove the No. 4 ignition coil and the ignition coil heat insulator.
5. Remove the rear A/F sensor (Sensor 1) and the rear secondary HO2S (Sensor 2).
6. Remove the exhaust pipe A mounting nuts (rear WU-TWC side).
7. Carefully remove the rear WU-TWC.
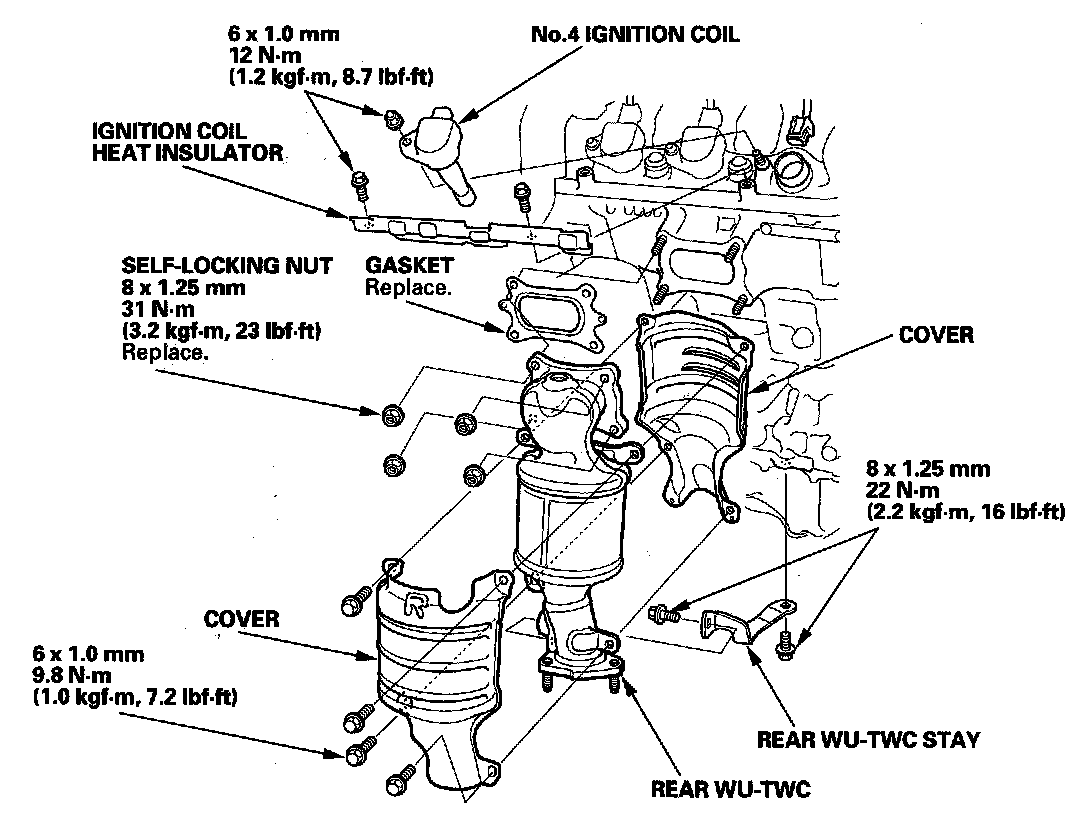
8. Carefully install the rear WU-TWC with a new gasket and new self-locking nuts. Tighten the nuts in a crisscross pattern in two or three steps.
9. Install the parts in the reverse order of removal.