Differential
Backlash Inspection1. Remove the final driven gear from the differential carrier.
2. Install both axles into the differential assembly (A), and place the axles on V-blocks (B).
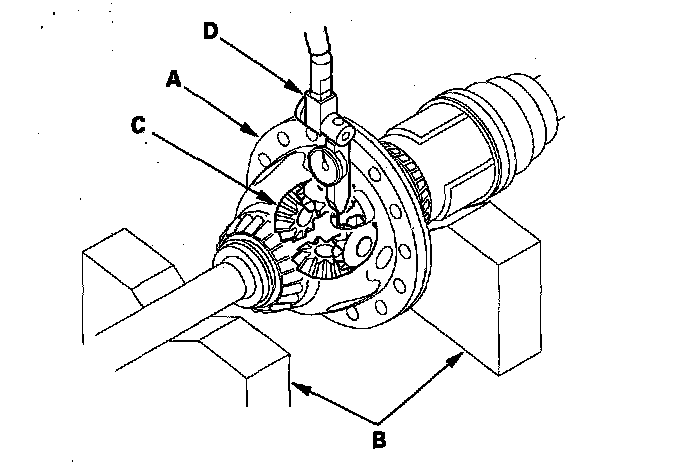
3. Measure the backlash of the pinion gears (C) using a dial indicator (D).
Standard: 0.05 - 0.15 mm (0.002 - 0.006 in.)
4. If the backlash is out of standard, replace the differential carrier.
5. Install the final driven gear and transfer drive gear on the differential carrier.
Differential Carrier and Final Driven Gear Replacement
NOTE: Inspect and adjust the carrier bearing preload whenever the differential carrier is replaced.
1. Remove the final driven gear (A) from the differential carrier (B).
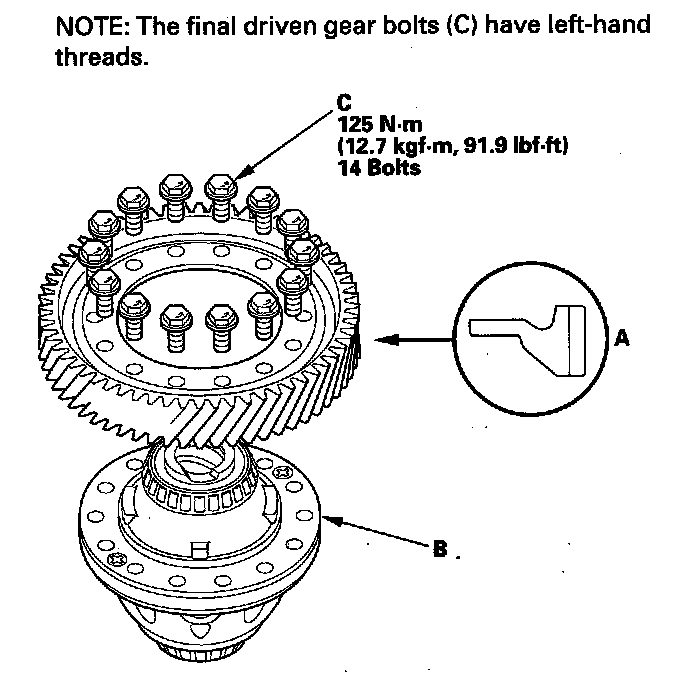
2. Install the final driven gear with the chamfered side on the inner bore facing the differential carrier.
3. Install the bolts, and tighten them to 125 Nm (12.7 kgf.m, 91.9 lbf-ft) in a crisscross pattern in two or more steps.
Carrier Bearing Replacement
Special Tools Required
Attachment, 45 x 55 mm 07MAD-PR90100
NOTE:
^ The bearing and outer race should be replaced as a set.
^ Inspect and adjust the bearing preload whenever the bearing is replaced.
^ Check the bearing for wear and rough rotation. If the bearing is OK, removal is not necessary.
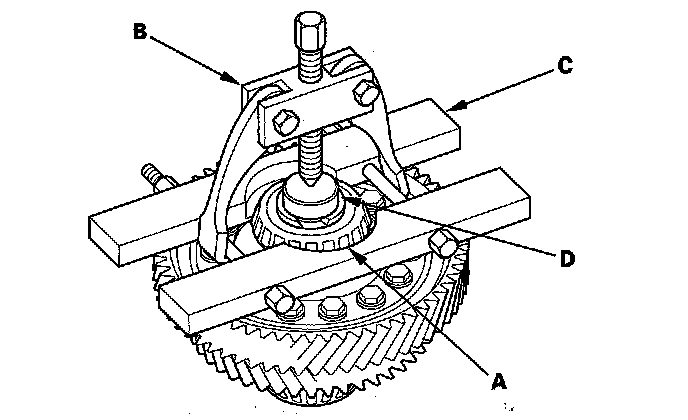
1. Remove the carrier bearing (A) with a commercially available bearing puller (B), the bearing separator (C), and the stepper adapter (D).
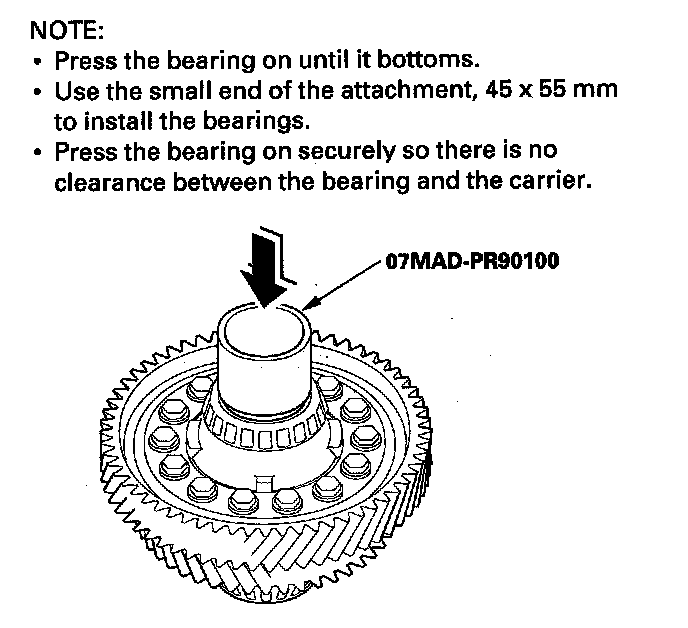
2. Install a new carrier bearing using the attachment, 45 x 55 mm and a press.
Oil Seal Replacement
Special Tools Required
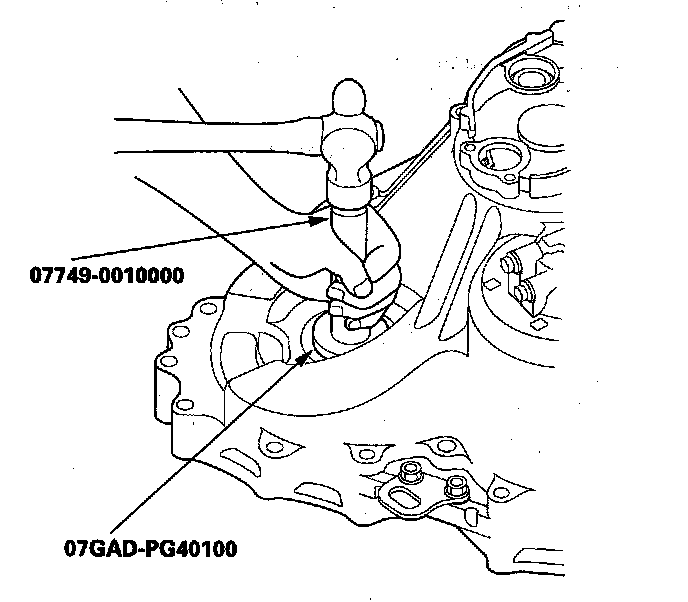
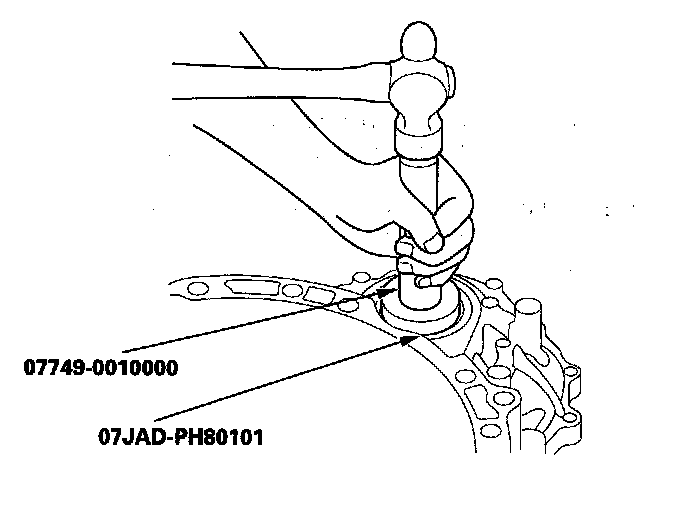
^ Driver 07749-0010000
^ Oil seal driver attachment 07GAD-PG40100
^ Oil seal driver attachment 07JAD-PH80101
1. Remove the oil seal from the transmission housing.
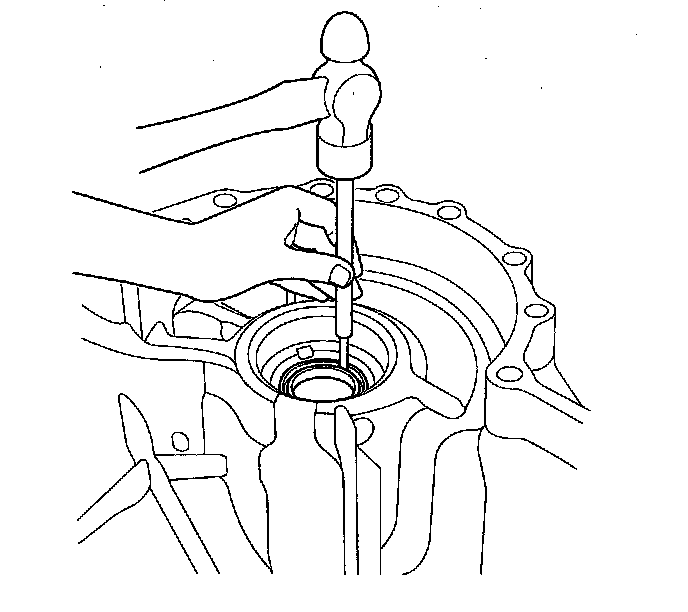
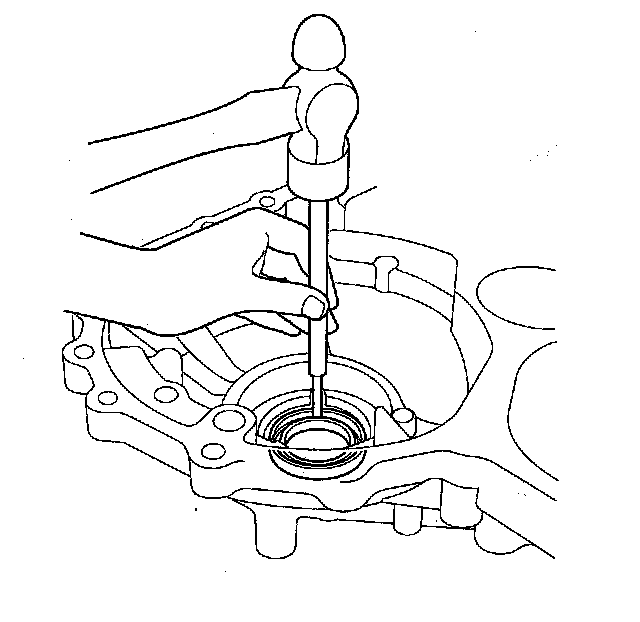
2. Remove the oil seal from the torque converter housing.
3. Install a new oil seal flush with the transmission housing using the driver and the oil seal driver attachment.
4. Install a new oil seal in the torque converter housing using the driver and the oil seal driver attachment.
Carrier Bearing Outer Race Replacement
Special Tools Required
^ Driver 07749-0010000
^ Attachment, 83 mm 07HAD-SG00100
^ Attachment, 78 x 90 mm 07GAD-SD40101 or 07GAD-SD40100
NOTE:
^ Replace the bearing with a new one whenever the outer race is replaced.
^ Do not use shim(s) on the torque converter housing side.
^ Adjust the preload after replacing the bearing and the outer race.
^ Coat all parts with ATF during installation.
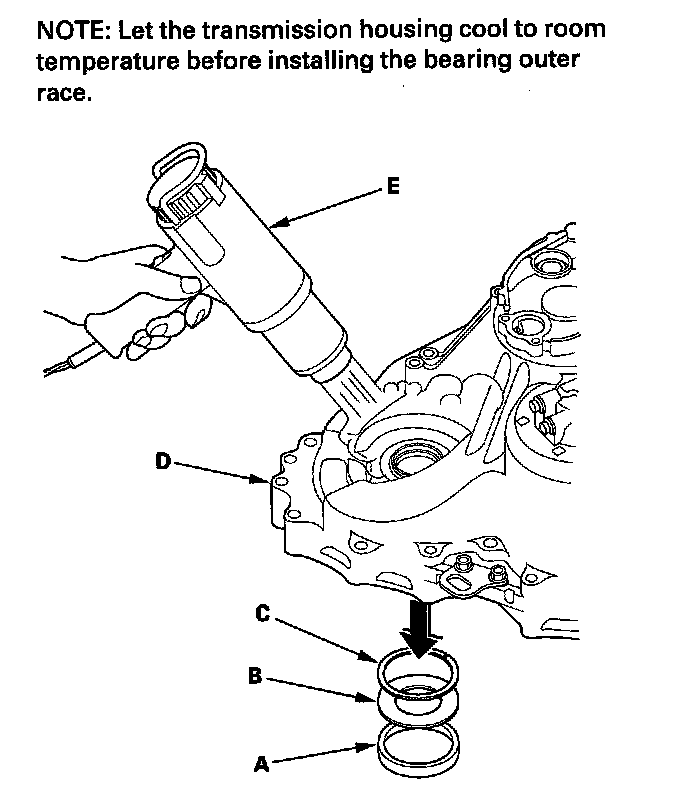
1. Remove the bearing outer race (A), the spacer (B), and the 85 mm thrust shim (C) from the transmission housing (D) by heating the transmission housing to about 212°F (100°C) using a heat
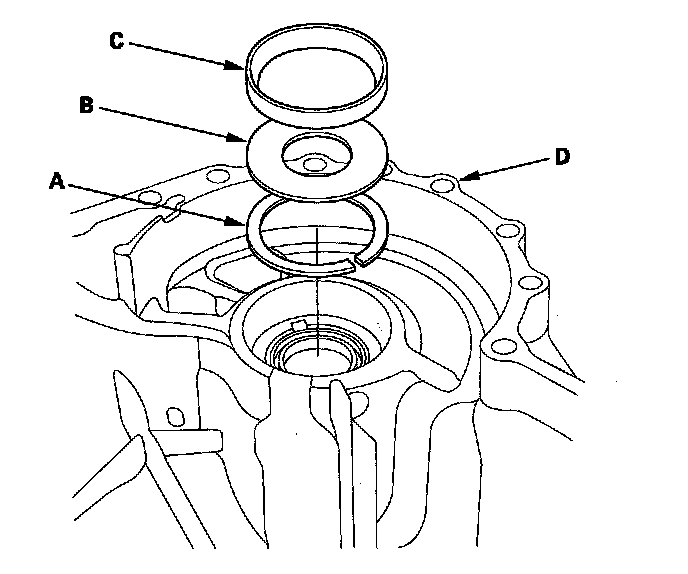
2. Install the 85 mm thrust shim (A), the spacer (B), and the outer race (C) in the transmission housing (D).
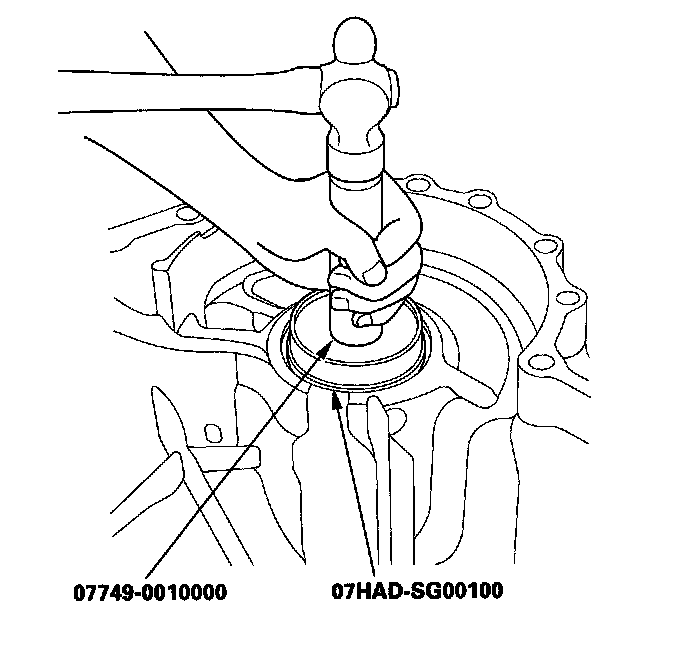
3. Using the driver and the attachment, 83 mm drive the outer race securely in the transmission housing so there is no clearance between the outer race, the spacer, the shim, and the transmission housing.
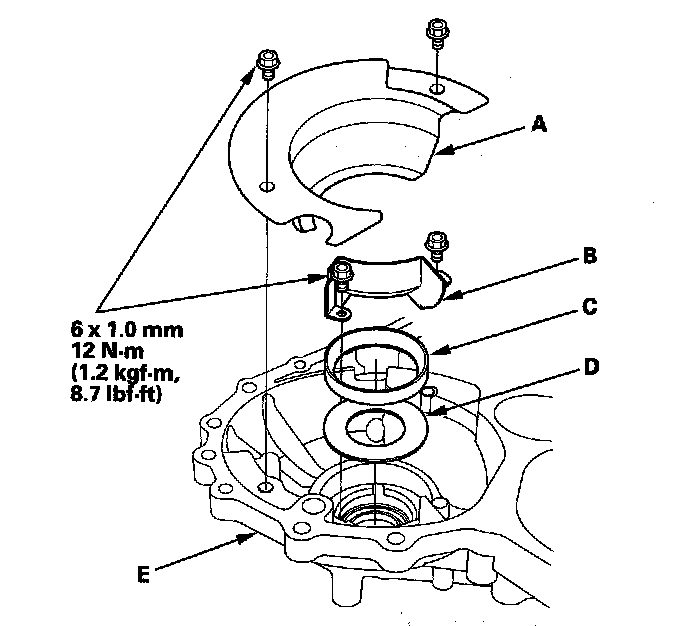
4. Remove the plates (A) (B), and remove the bearing outer rare (C) and the spacer (D) from the torque converter housing (E).
5. Install the spacer and a new outer race in the torque converter housing.
6. Install the bearing outer race securely in the torque converter housing using the driver and the attachment, 78 x 90 mm.
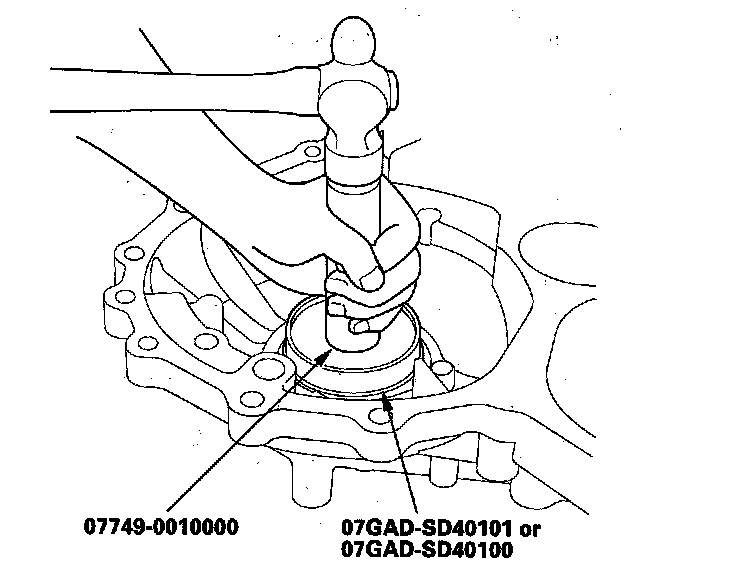
7. Install the plates over the outer race in the torque converter housing.
Carrier Bearing Preload Inspection
Special Tools Required
^ Driver 07749-0010000
^ Attachment, 83 mm 07HAD-SG00100
^ Preload inspection tool 070AJ-0020101
NOTE:
^ If the transmission housing, the torque converter housing, the differential carrier, the tapered roller bearing, the bearing outer race, or the thrust shim were replaced, the bearing preload must be adjusted.
^ Replace the bearing with a new one whenever the outer race is replaced.
^ Do not use the thrust shim on the torque converter housing.
^ Coat all parts ATF during installation.
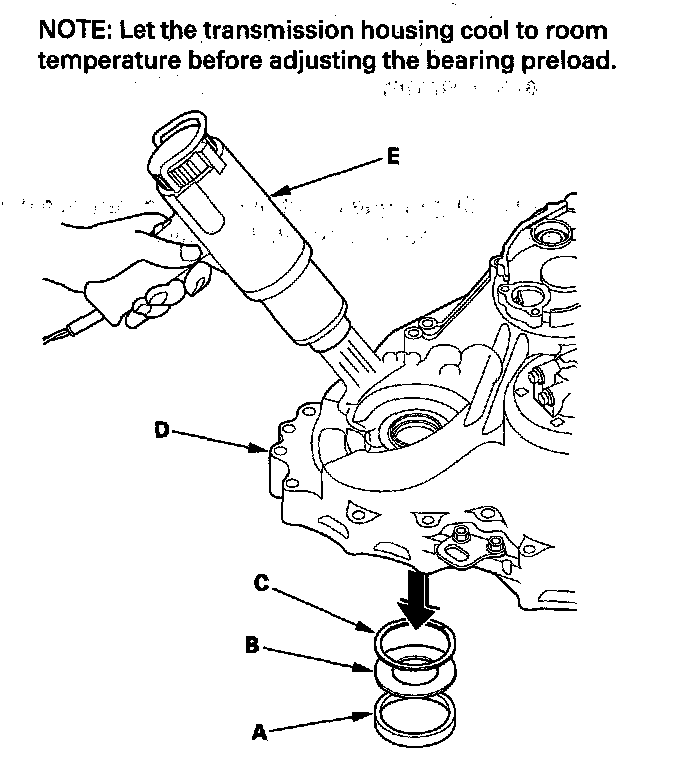
1. Remove the bearing outer race (A), the spacer (B), and the 85 mm thrust shim (C) from the transmission housing (D) by heating the transmission housing to about 212°F (100°C) using a heat gun (E). Do not heat the transmission housing more than 212°F (100°C).
2. Install the 85 mm thrust shim (A) in the transmission housing (B). If you replace the 85 mm thrust shim with a new one, use the same thickness shim as the old one.
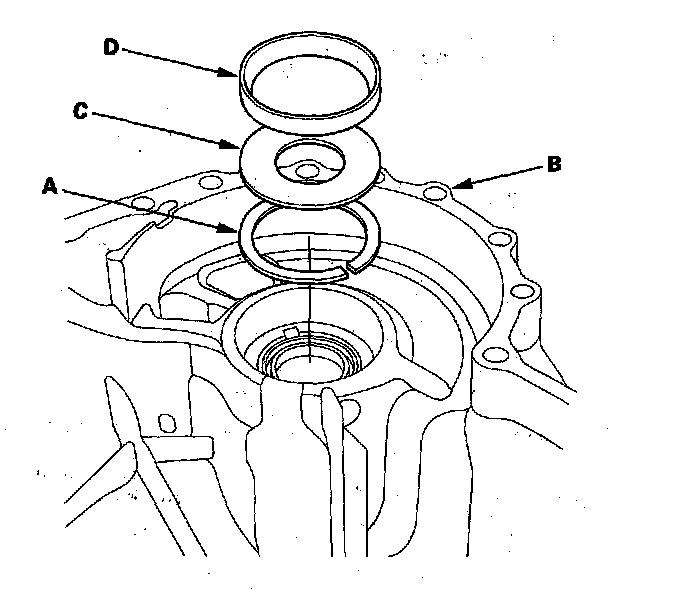
3. Install the spacer (C), and the bearing outer race (D) in the transmission housing.
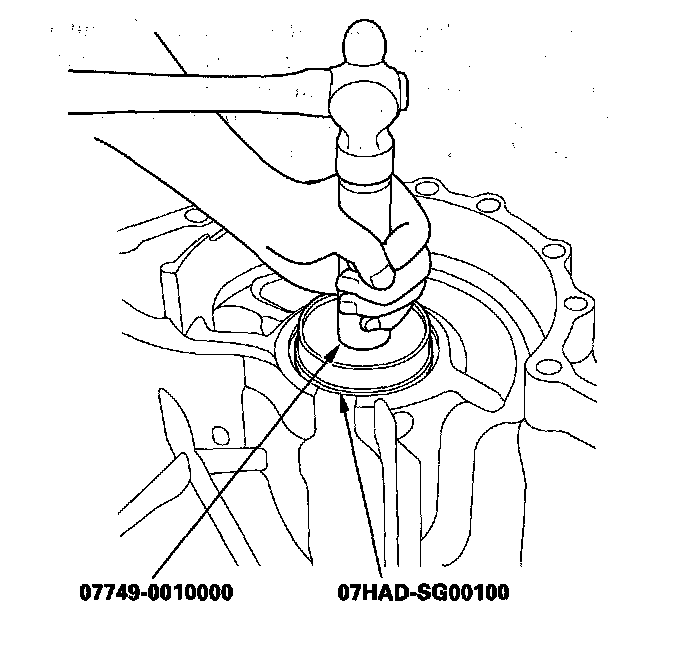
4. Install the outer race securely in the transmission housing using the driver and the attachment, 83 mm so there is no clearance between the outer race, the spacer, the shim, and the transmission housing.
5. Install the differential assembly (A) in the torque converter housing (B), and install the gasket (C) and the two dowel pins (D) on the torque converter housing.
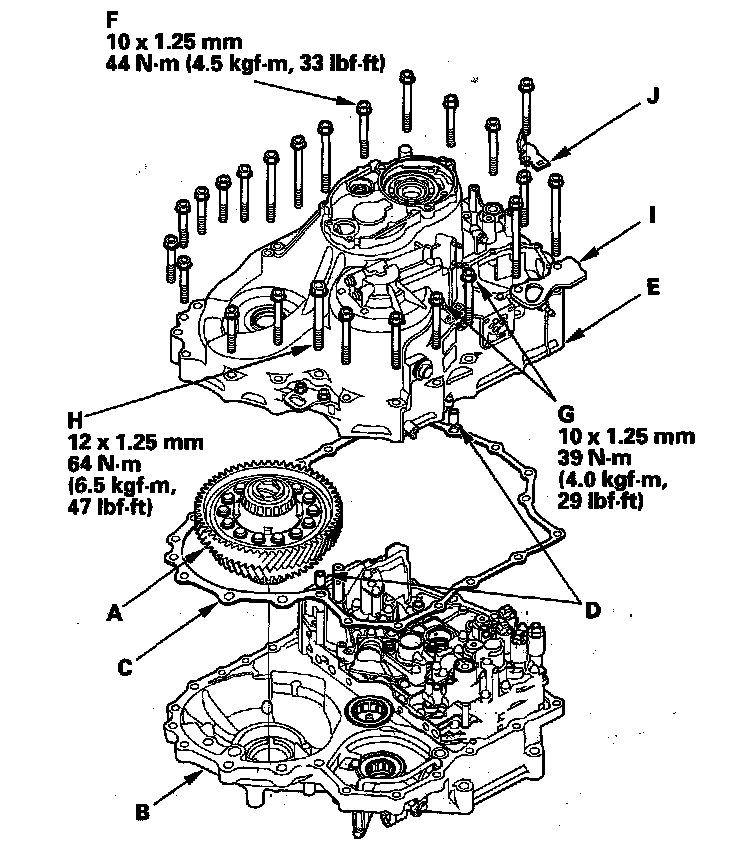
6. Install the transmission housing (E), and install the mounting bolts (F) (21 bolts), (G) (two bolts), and special bolt (H) with the transmission hanger (I) and the ground terminal bracket (J), then tighten the bolts to the specified torque.
7. Rotate the differential assembly in both directions to seat the bearings.
8. Measure the starting torque of the differential assembly using the preload inspection tool, a torque wrench (A), and a socket (B). Measure the starting torque at normal room temperature in both
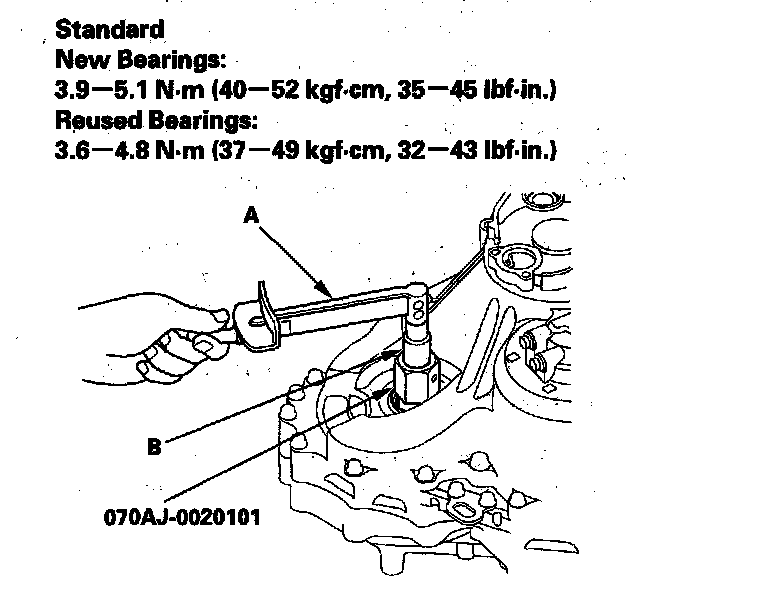
9. If the starting torque is out of standard, remove the thrust shim and measure its thickness.
10. Select a new thrust shim. To increase the starting torque, increase thickness of the thrust shim. To decrease the starting torque, decrease the thickness of the thrust shim. Changing the shim to the next size will increase or decrease the starting torque about 0.5 - 0.6 Nm (5 - 6 kgf-cm, 5 - 5 lbf-in.).
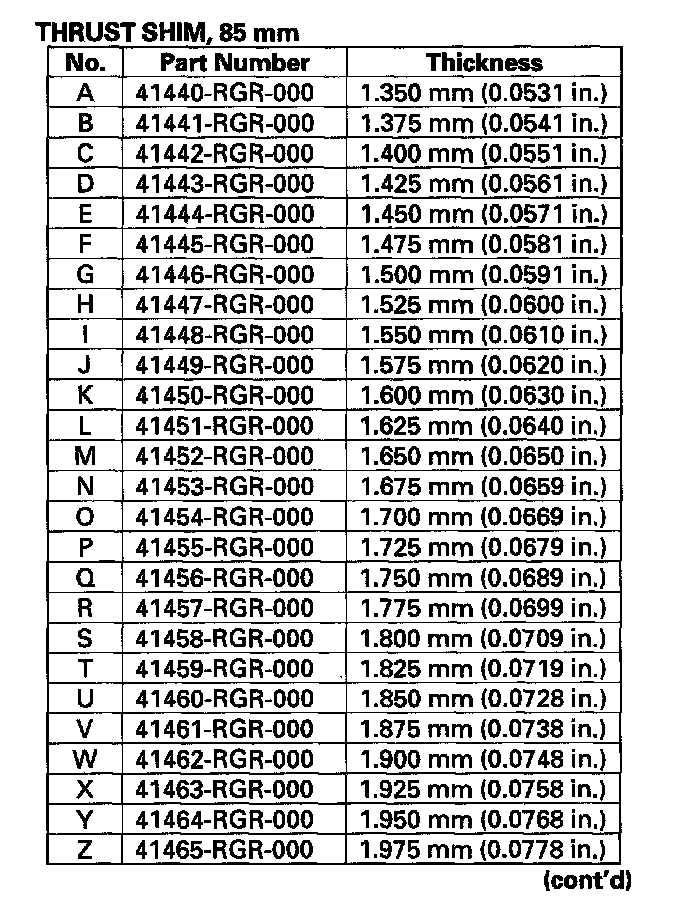
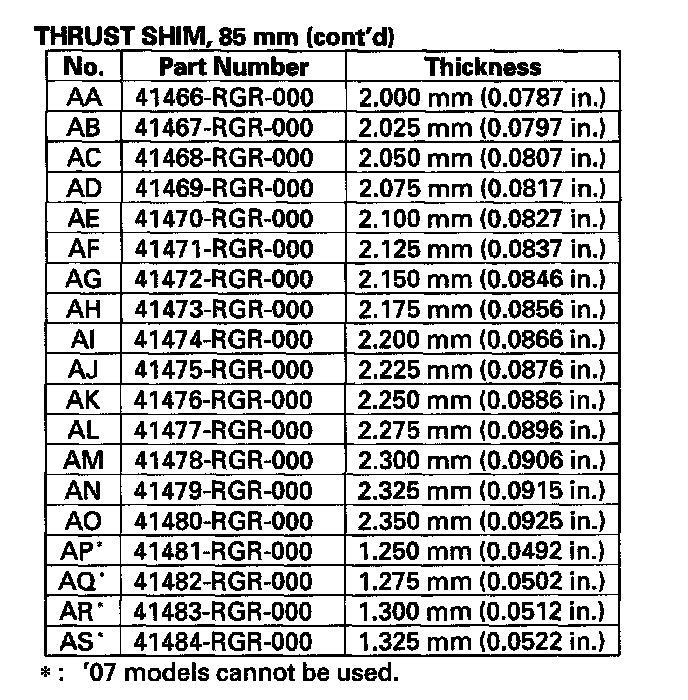
11. Install a new thrust shim, then recheck the starting torque.