Seat Occupant Sensor: Service and Repair
Front Passenger's Weight Sensor Replacement
Removal
NOTE: Removal of the front passenger's weight sensors must be performed according to the precautions and procedures described at the beginning of the SRS section. Technician Safety Information
1. Do the battery terminal disconnection procedure, Procedures and wait at least 3 minutes before beginning work.
2. Remove the front passenger's seat assembly section. Front Seat Removal/Installation
3. Remove the cushion cover/pad from the seat cushion frame. Front Seat Cushion Cover/Pad Replacement
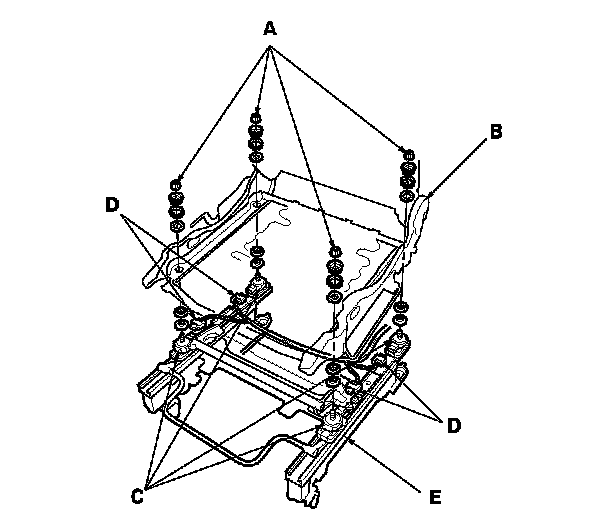
4. Using a TORX E18 socket, remove the TORX nuts (A) attaching the seat track (B) to the weight sensors (C).
5. Disconnect the sensor connectors (D) from the seat weight sensor, then remove the front passenger's seat slide assembly (E) including all four front passenger's weight sensors.
Installation
NOTE:
- Be sure to install the harness wires so they are not pinched or interfering with other parts.
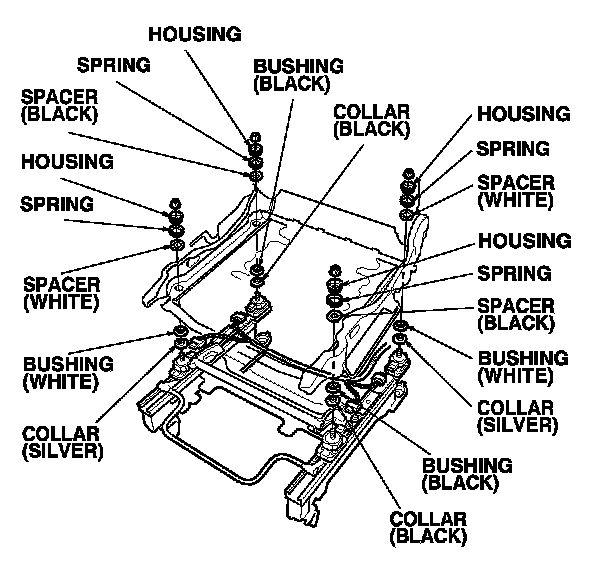
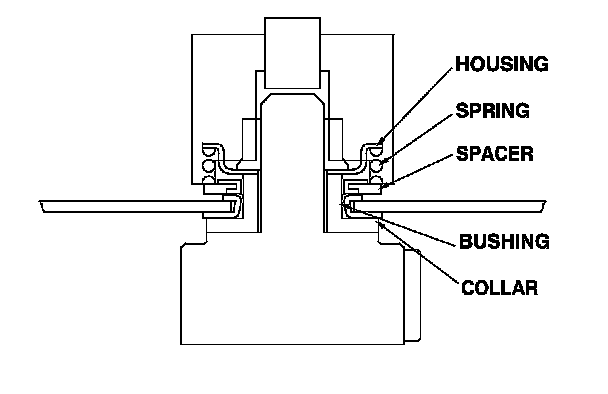
- A spacer has front and back faces. Be sure to install the spacer correctly.
1. Install the new front passenger's seat slide assembly under the seat track.
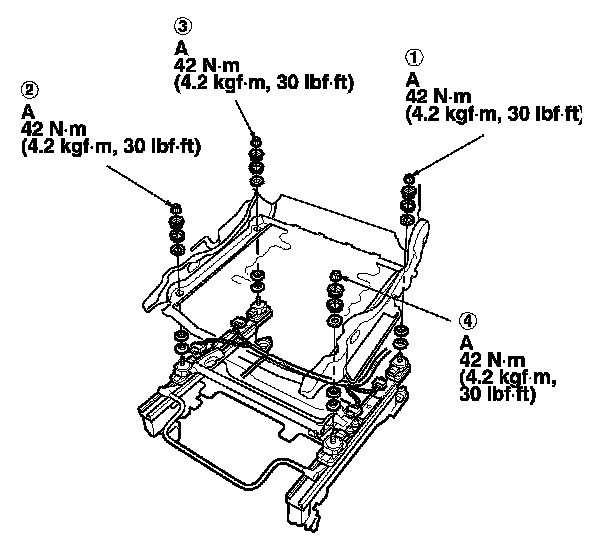
2. When tightening the TORX nuts (A), begin with (1), and tighten them in a crisscross pattern in two or more steps.
3. Torque the TORX nuts in the sequence shown in two or more steps.
4. Reassemble the front passenger's seat cushion cover/pad. Front Seat Cushion Cover/Pad Replacement
5. Reinstall the front passenger's seat. Front Seat Removal/Installation
6. Do the battery terminal reconnection procedure. Procedures
7. Clear any DTCs. Initial Inspection and Diagnostic Overview
8. Calibrate the ODS unit. Programming and Relearning
9. After installing the front passenger's weight sensors, confirm proper system operation: Turn the ignition switch to ON (II); the SRS indicator should come for about 6 seconds and then go off.