Hatch Handle Replacement
Hatch Handle Replacement
Special Tools Required
- KTC trim tool set SOJATP2014*
NOTE:
- Put on gloves to protect your hands.
- Use the appropriate tool from the KTC trim tool set to avoid damage when removing components.
1. Remove the hatch trim panel. Interior Trim Removal/Installation - Hatch Area
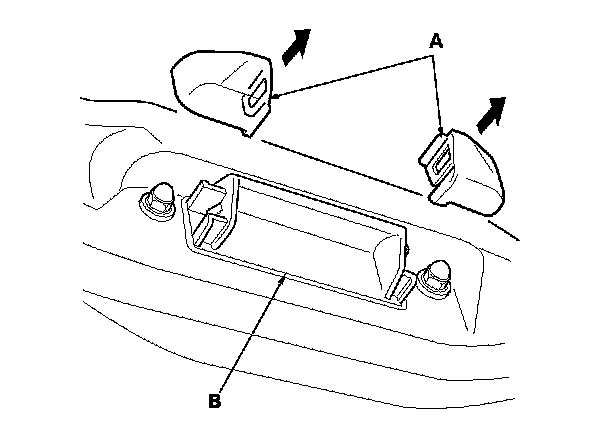
2. Pry the hatch handle covers (A) out from both sides using the appropriate trim tool, then remove them from the hatch handle (B).
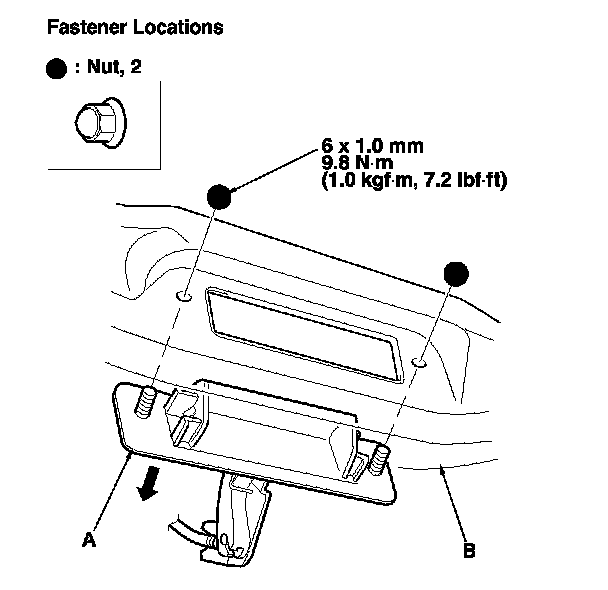
3. Remove the nuts, then remove the hatch handle (A) from the hatch (B).
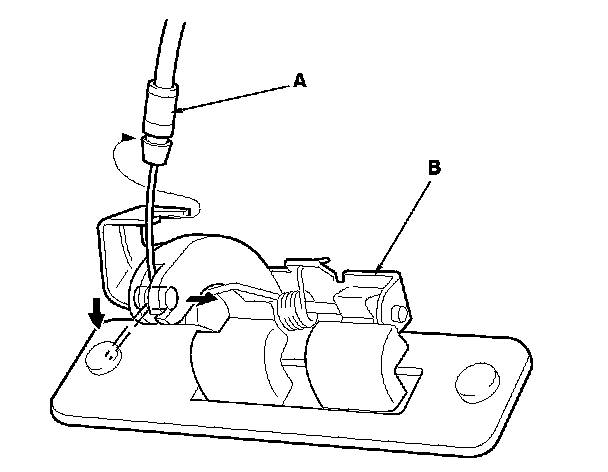
4. Disconnect the hatch opener cable (A) from the handle (B). Take care not to kink the cable.
5. Install the hatch handle in the reverse order of removal, and note these items:
- Make sure the hatch opener cable is connected securely.
- Make sure the hatch opens properly.