Part 2
Service Information
Heater Unit/Core Removal and Installation
5. A/C Line - Evaporator Side
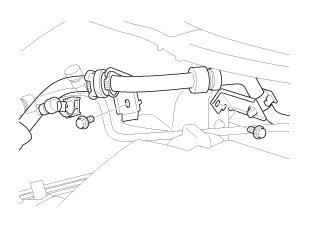
1. Remove the bolts.
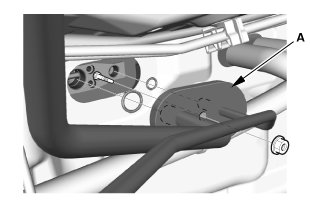
2. Disconnect the A/C line (A).
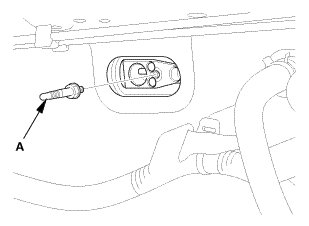
3. Remove the stud bolt (A).
6. Radiator Cap
1. Wait until the engine is cool, then carefully remove the radiator cap.
7. Radiator Coolant - Drain
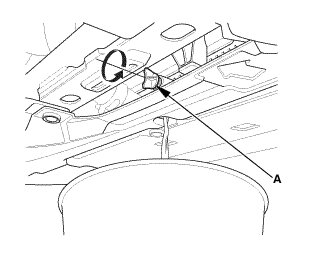
1. Loosen the drain plug (A), and drain the coolant.
2. Tighten the radiator drain plug securely.
8. Heater Hose - Body Side
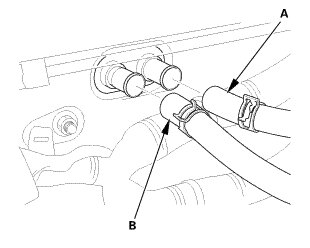
NOTE:
* Engine coolant will run out when the hoses are disconnected; drain it into a clean drip pan. Be sure not to let coolant spill on the electrical parts or the painted surfaces. If any coolant spills, rinse it off immediately.
* Note the layout of the hose.
1. Disconnect the inlet heater hose (A).
2. Disconnect the outlet heater hose (B).
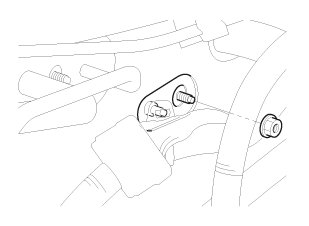
3. Remove the nut.
NOTE: Take care not to damage or bend the fuel lines or brake lines, etc.
9. Front Door Opening Seal as Needed Both
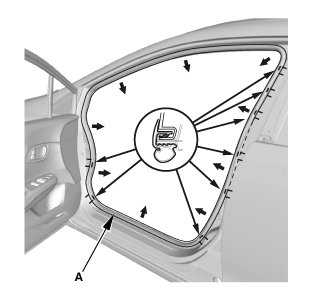
1. Remove the front door opening seals (A) as needed.
2. Repeat on the opposite side.
10. A-Pillar Trim Both
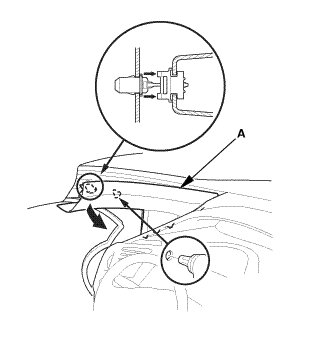
1. Pull out the A-pillar trim (A) to release the clips.
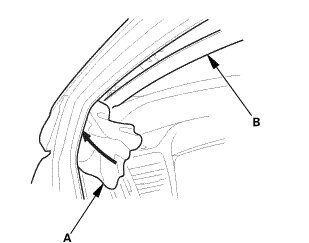
2. Put a shop towel (A) in the opening between the A-pillar trim (B) and the dashboard to prevent dropping the A-pillar clips.
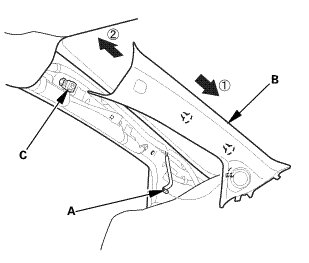
3. Disconnect the connector (A), then remove the A-pillar trim (B).
NOTE: The upper clip (C) will stay in the body.
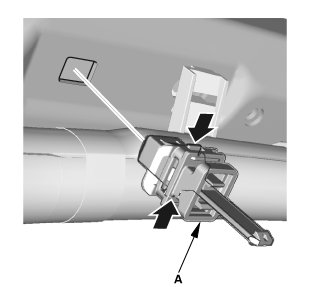
4. Remove the upper clip (A) from the body.
5. Repeat on the opposite side.
11. Driver's Dashboard Lower Cover
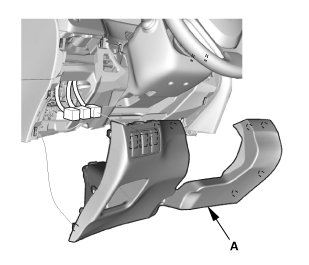
1. Remove the driver's dashboard lower cover (A).
2. Disconnect the connectors.
12. Both Front Door Sill Trims
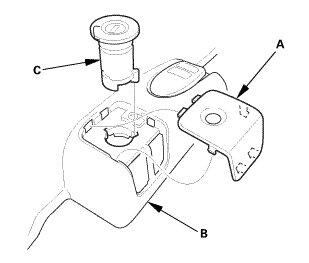
1. Driver's side: Remove the cap (A) from the front door sill trim (B).
2. Driver's side: Remove the opener lock cylinder (C).
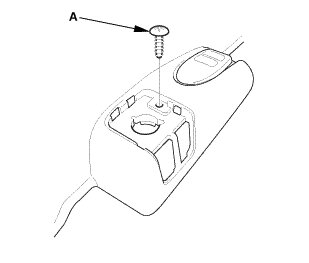
3. Driver's side: Remove the screw (A).
Driver's side
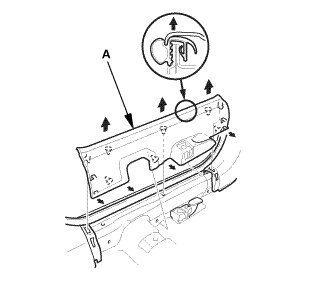
Passenger's side
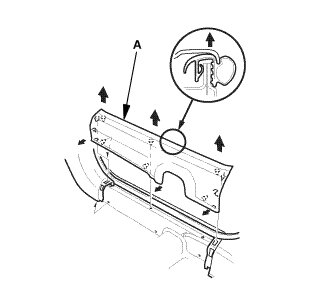
4. Remove both front door sill trims (A).