Coolant: Service and Repair
Service Information
Coolant Replacement
Removal
1. Vehicle - Lift
1. Raise the vehicle on a lift, and make sure it is securely supported.
2. Radiator Cap
1. Wait until the engine is cool, then carefully remove the radiator cap.
3. Radiator Coolant - Drain
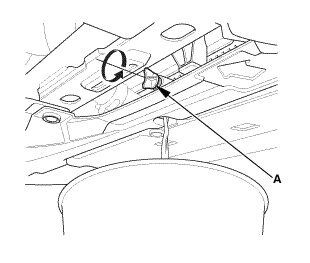
1. Loosen the drain plug (A), and drain the coolant.
2. Tighten the radiator drain plug securely.
4. Cylinder Block Coolant - Drain
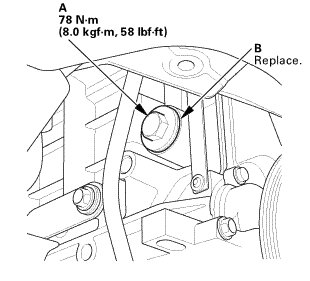
1. Remove the drain bolt (A) from the rear side of the engine block.
2. After the coolant has drained, reinstall the drain bolt with a new washer (B).
3. Tighten the radiator drain plug securely.
Installation
1. Radiator Coolant - Refill
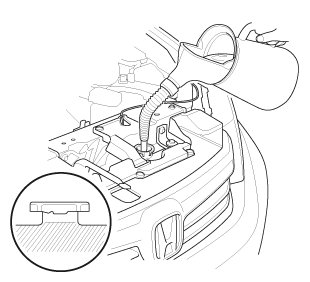
1. Pour Honda Long Life Antifreeze/Coolant Type 2 into the radiator up to the base of the filler neck.
NOTE:
* Always use Honda Long Life Antifreeze/Coolant Type 2. Using a non-Honda coolant can result in corrosion, causing the cooling system to malfunction or fail.
* Honda Long Life Antifreeze/Coolant Type 2 is a mixture of 50 % antifreeze and 50 % water. Do not add water.

2. Loosely install the radiator cap.
3. Start the engine, and let it run until it warms up (the radiator fan comes on at least twice).
4. Turn off the engine. Check the level in the radiator, and add Honda Long Life Antifreeze/ Coolant Type 2, if needed.
5. Install the radiator cap securely, then start the engine and check for leaks.
6. Clean up any spilled engine coolant.
2. Maintenance Minder Reset
1. After completing the entire procedure, select the individual maintenance item you wish to reset with the HDS. (See the Maintenance Minder General Information)