Drivers Vent Removal and Installation
Driver's Vent Removal and Installation
Removal
1. Battery Terminal (SRS) - Disconnection
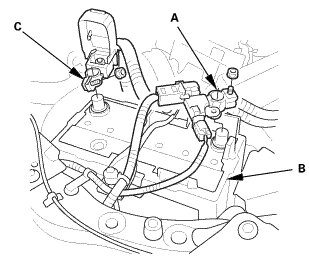
1. Make sure the ignition switch is in LOCK (0).
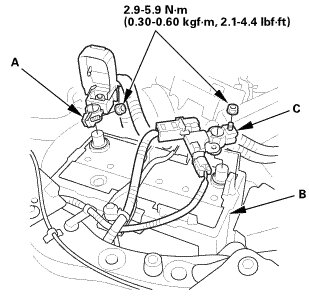
2. Disconnect and isolate the negative cable and battery sensor (A) from the battery (B).
NOTE: Always disconnect the negative side first.
3. Disconnect the positive cable (C) from the battery.
4. Wait at least 3 minutes before starting work.
2. Driver's Dashboard Lower Cover
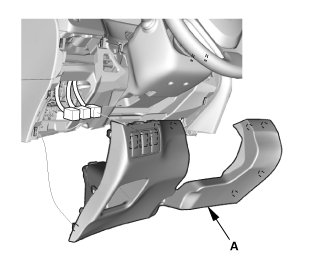
1. Remove the driver's dashboard lower cover (A).
3. Dashboard Subdisplay Visor
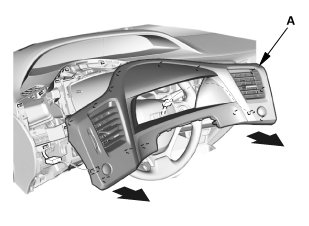
1. Remove the dashboard subdisplay visor (A).
4. Driver's Outer Vent
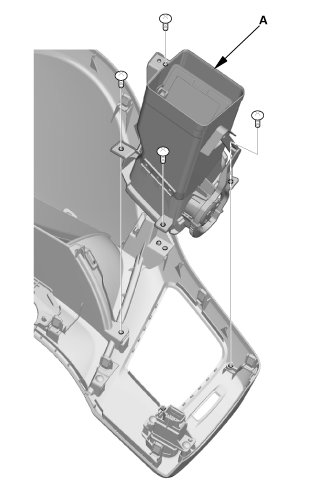
1. Remove the driver's outer vent (A).
5. Driver's Inner Vent
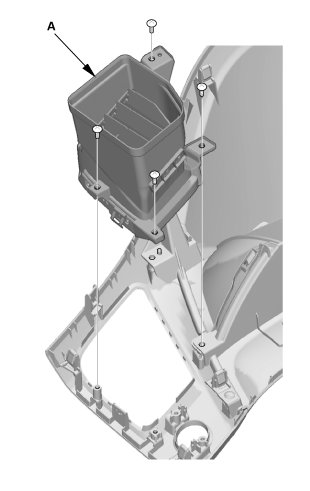
1. Remove the driver's inner vent (A).
Installation
1. Driver's Inner Vent
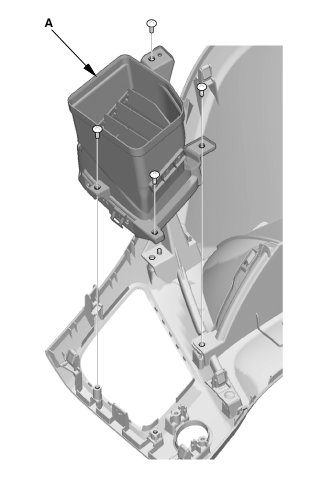
1. Install the driver's inner vent (A).
2. Driver's Outer Vent
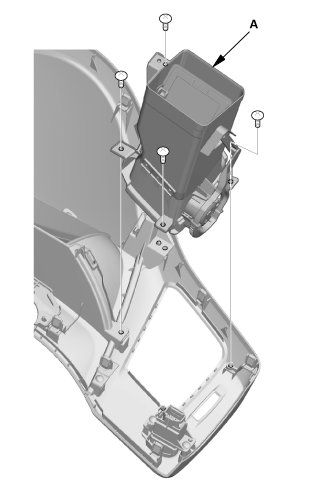
1. Install the driver's outer vent (A).
3. Dashboard Subdisplay Visor
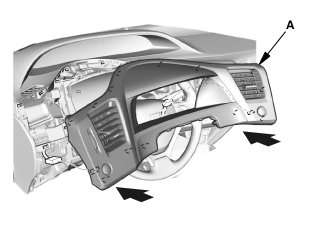
1. Install the dashboard subdisplay visor (A).
4. Driver's Dashboard Lower Cover
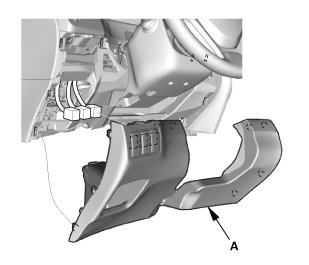
1. Install the driver's dashboard lower cover (A).
5. Battery Terminal (SRS) - Reconnection
NOTE: If the battery performs abnormally, test the battery.
1. Clean the battery terminals.
2. Connect the positive cable (A) to the battery (B).
NOTE: Always connect the positive side first.
3. Connect the negative cable and battery sensor (C) to the battery.
4. Apply multipurpose grease to the terminals to prevent corrosion.