Pressure Plate: Testing and Inspection
Clutch Pressure Plate Inspection
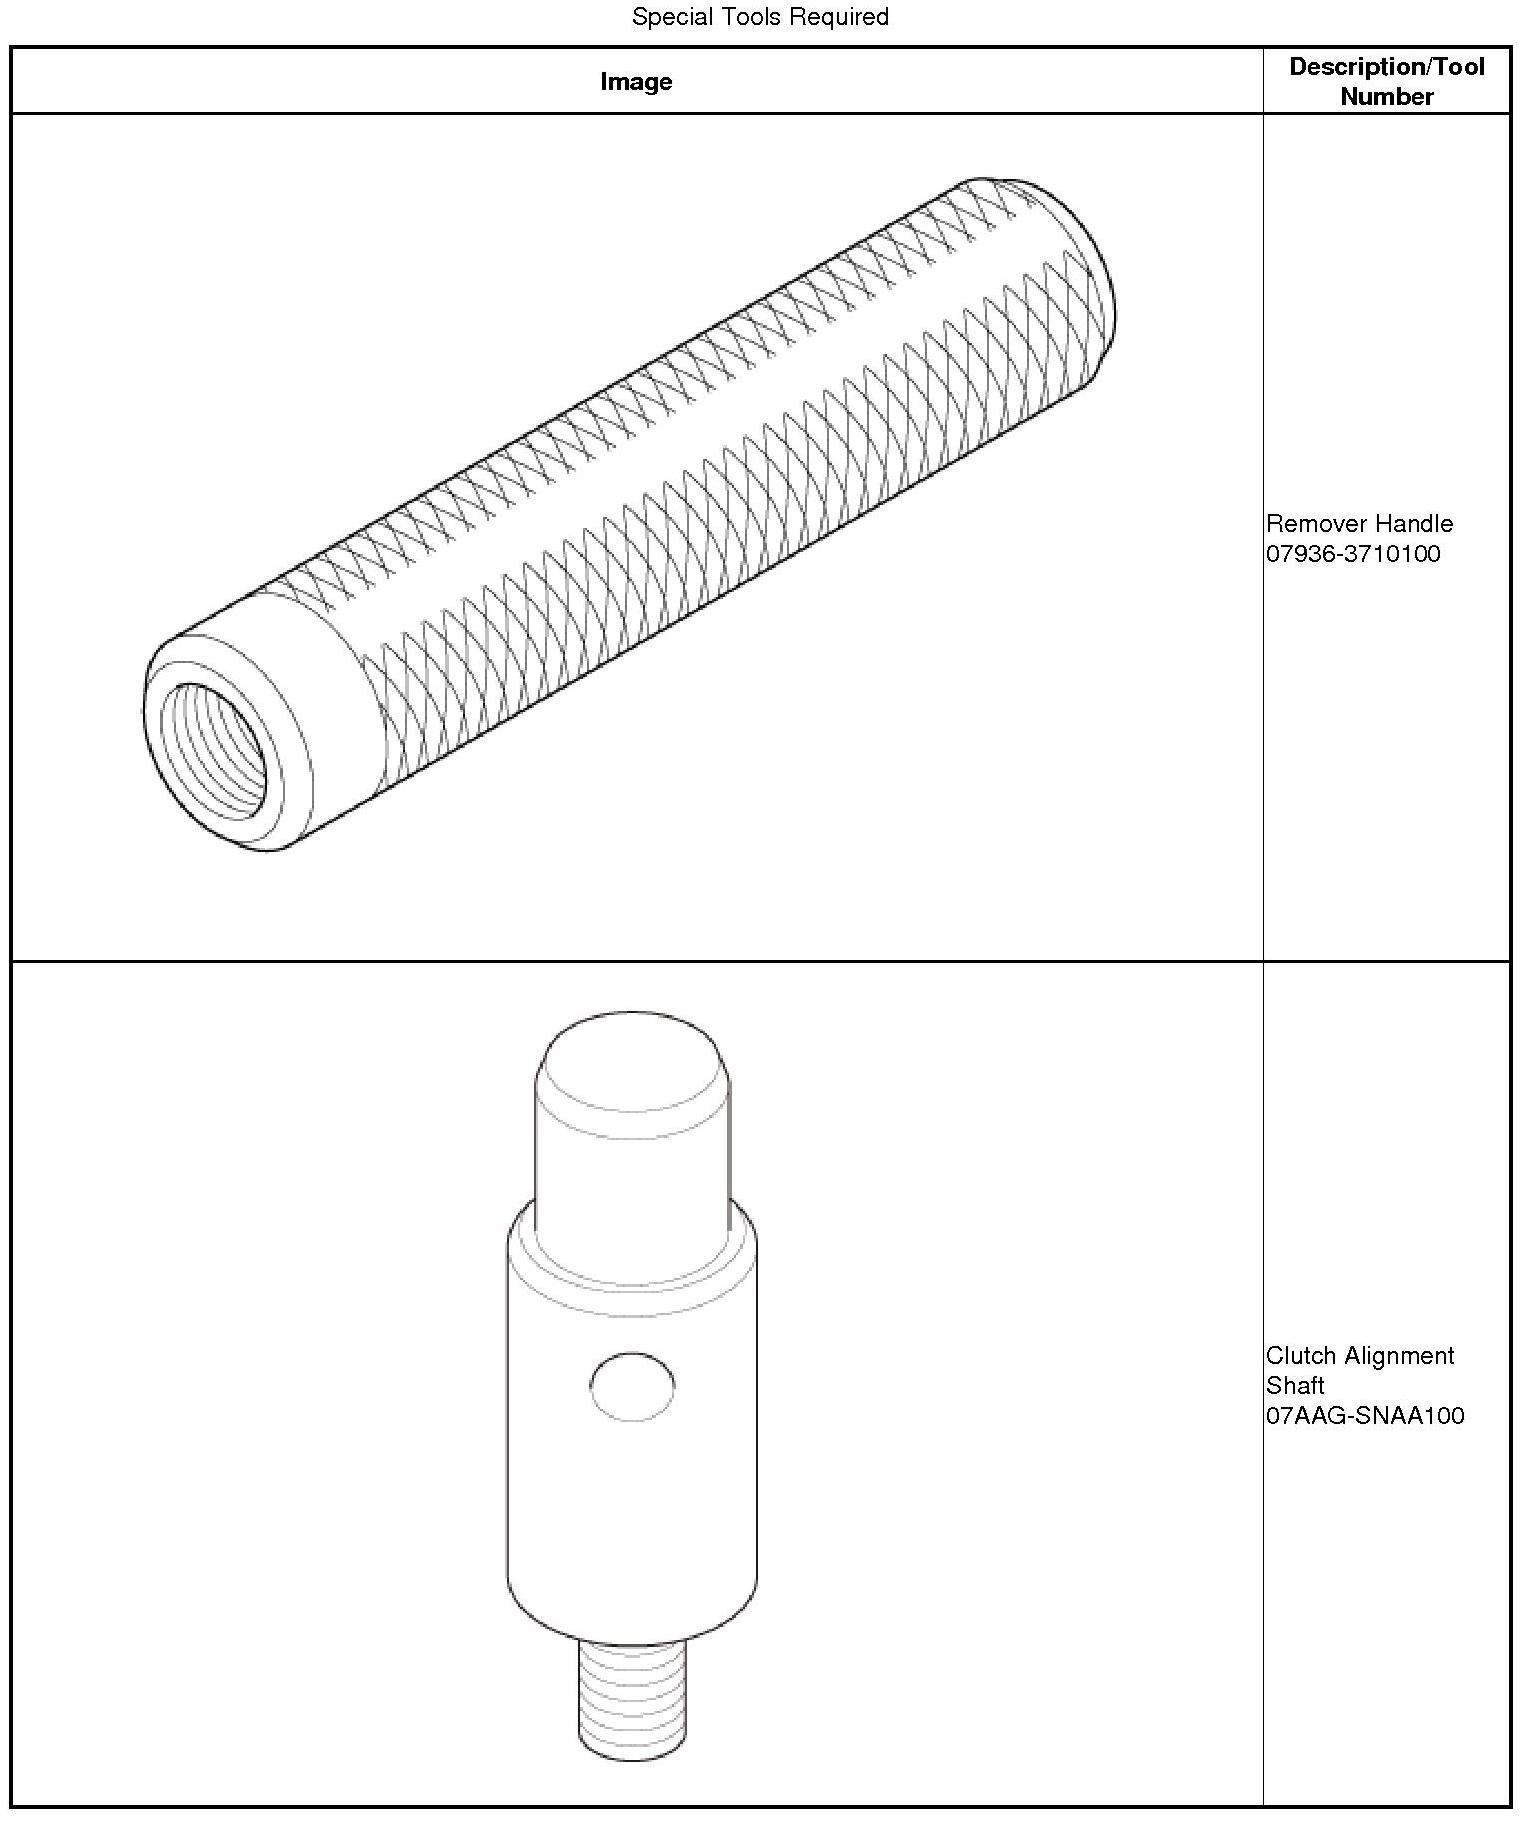
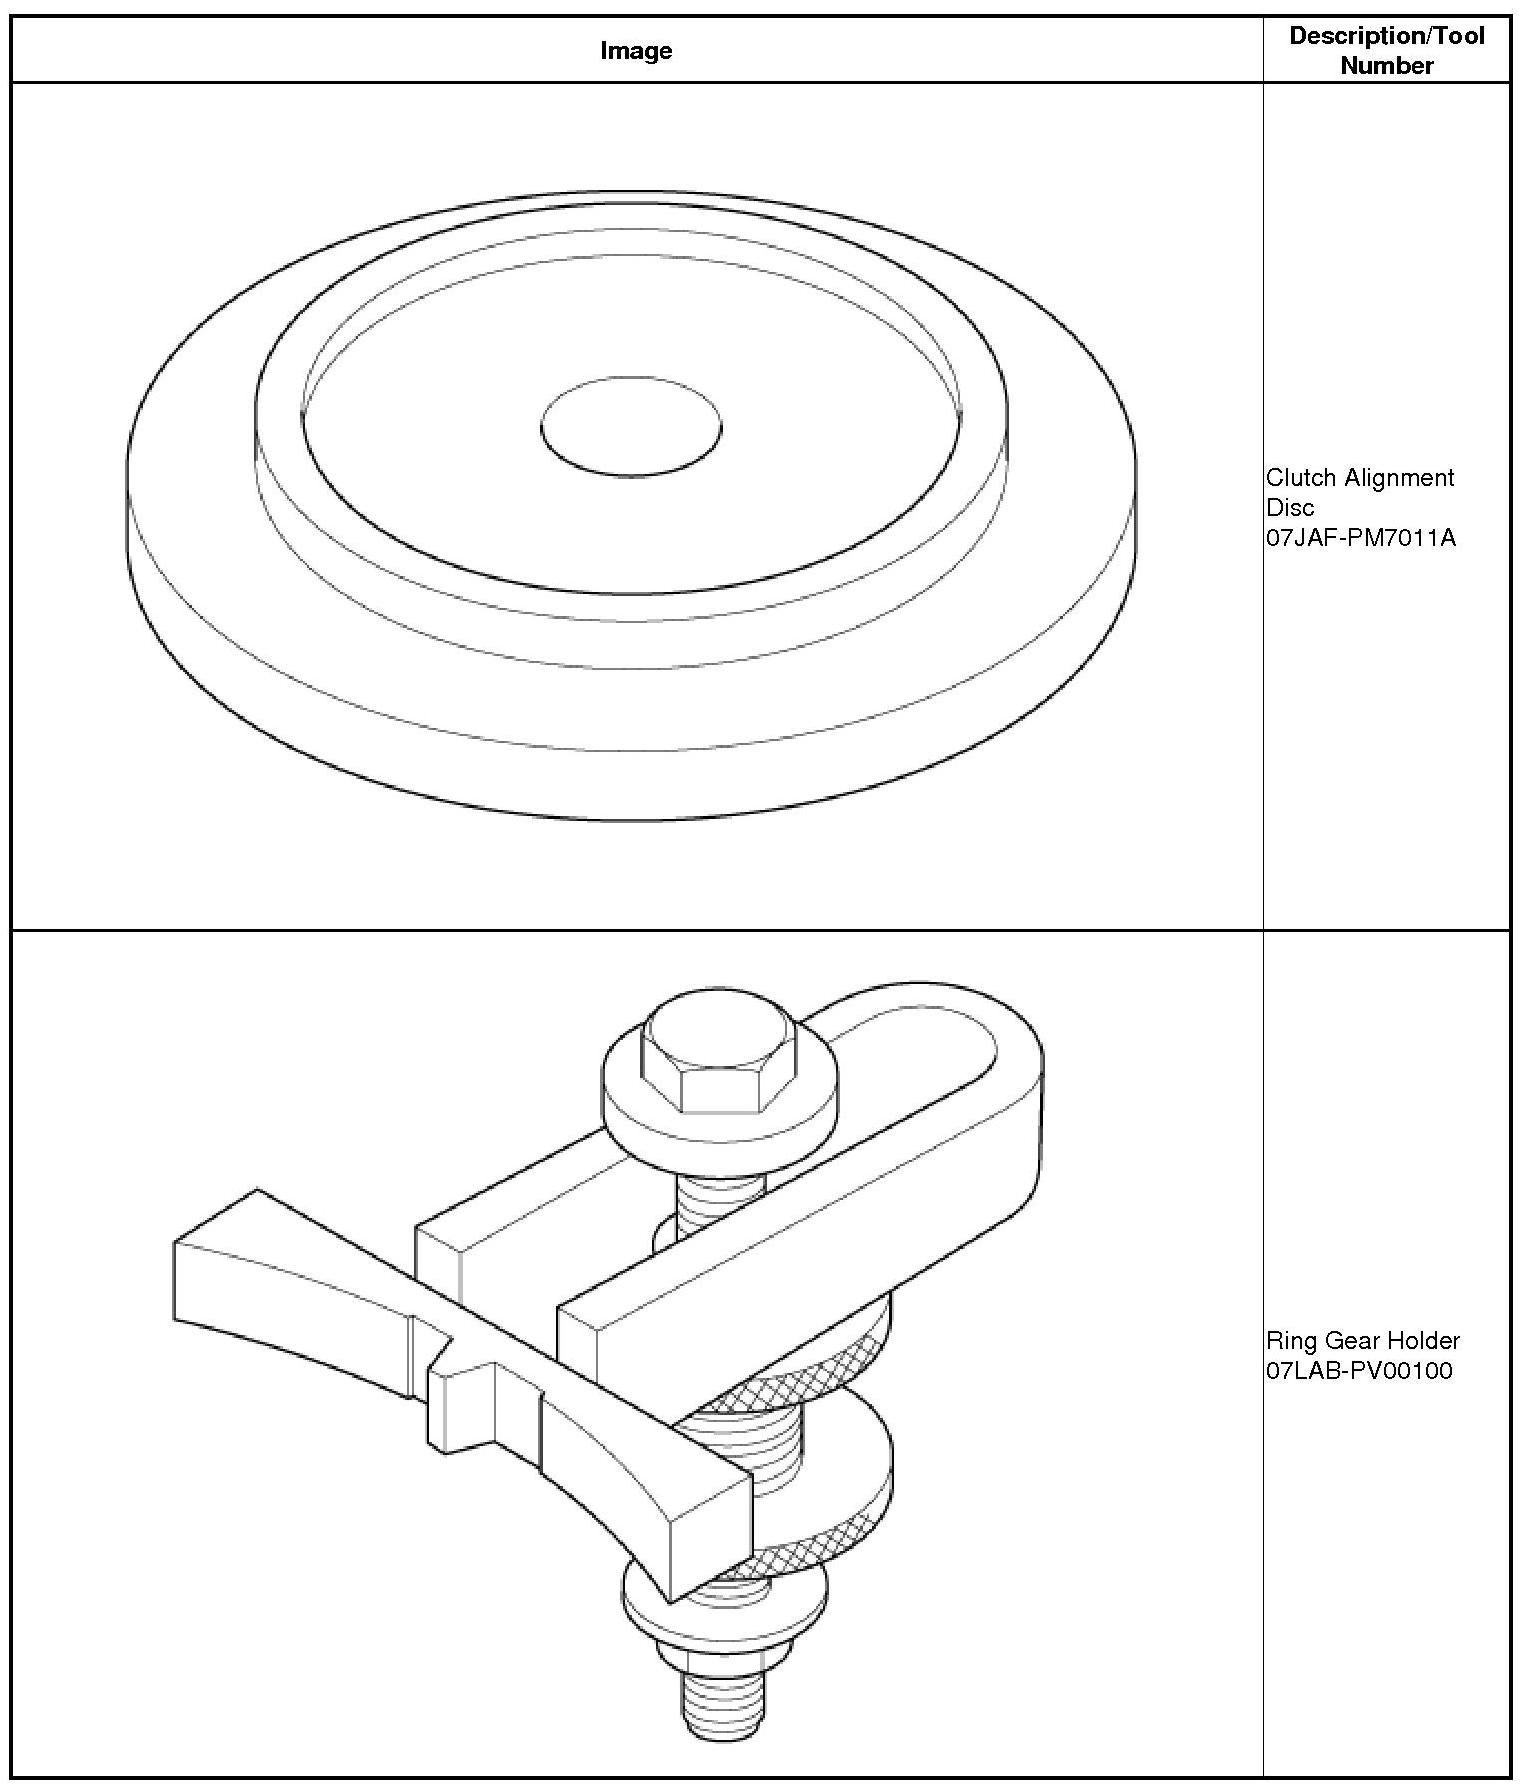
Inspection
1. Pressure Plate Diaphragm Height Check
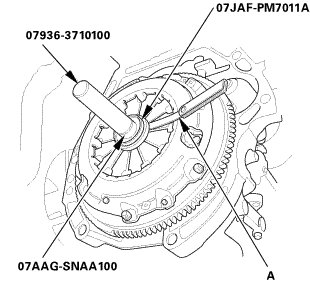
1. Check the evenness of the height of the diaphragm spring fingers using the clutch alignment disc, the clutch alignment shaft, the remover handle, and a feeler gauge (A). If the height difference is more than the standard, replace the pressure plate.

Removal
1. Pressure Plate
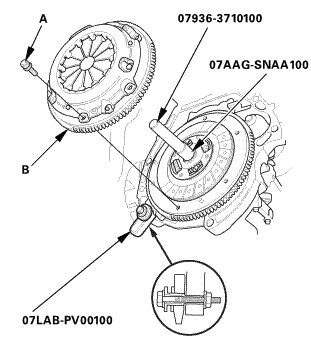
1. Install the ring gear holder.
2. Install the clutch alignment shaft and the remover handle.
3. To prevent warping, loosen the pressure plate mounting bolts (A) in a crisscross pattern in several steps.
4. Remove the pressure plate (B).
Inspection
1. Pressure Plate Inspection
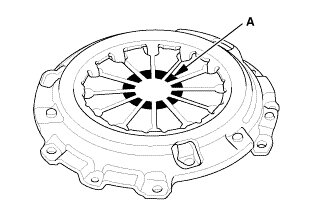
1. Inspect the fingers of the diaphragm spring (A) for wear at the release bearing contact area.
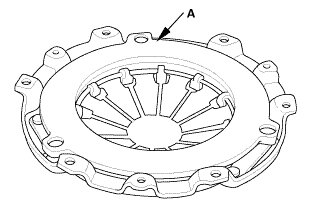
2. Inspect the pressure plate surface (A) for wear, cracks, and burning.
Installation
1. Pressure Plate
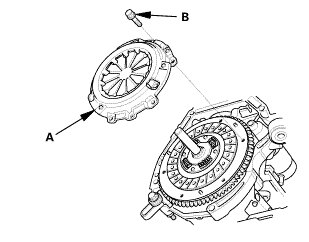
1. Install the pressure plate (A) and the mounting bolts (B) finger-tight.
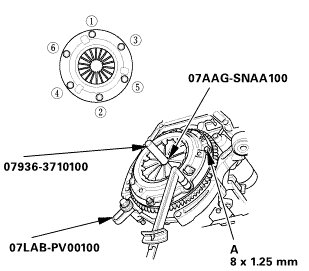
2. Torque the pressure plate mounting bolts (A) in a crisscross pattern.
NOTE:
* Tighten the bolts in several steps to prevent warping the diaphragm spring.
* Make sure that there is no clearance between the pressure plate and the flywheel.

3. Remove the ring gear holder.
4. Remove the clutch alignment shaft and the remover handle.
5. Make sure the diaphragm spring fingers are all the same height.