Trunk / Liftgate Hinge: Service and Repair
Liftgate Hinge Replacement
Removal Procedure
1. Mark the location of the liftgate hinges with a grease pencil.
2. Remove the liftgate. Refer to Liftgate Replacement (Liftgate Replacement).
3. Remove the garnish molding. Refer to Body Rear Corner Upper Garnish Molding Replacement (Body Rear Corner Upper Garnish Molding Replacement).
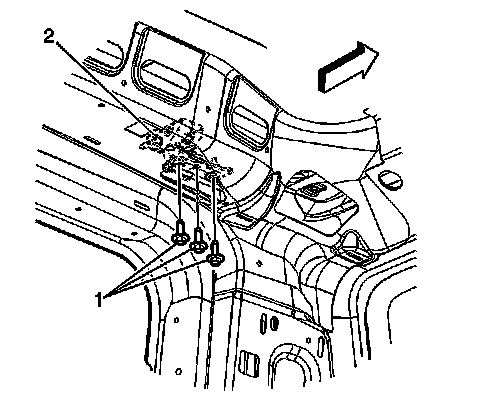
4. Remove the hinge bolts (1). It may be necessary to separate the hinge from the vehicle using a flat-bladed tool.
5. Remove the hinge (2) from the vehicle.
Installation Procedure
Note: Ensure that all factory sealer is removed from between the hinge and the vehicle prior to installation.
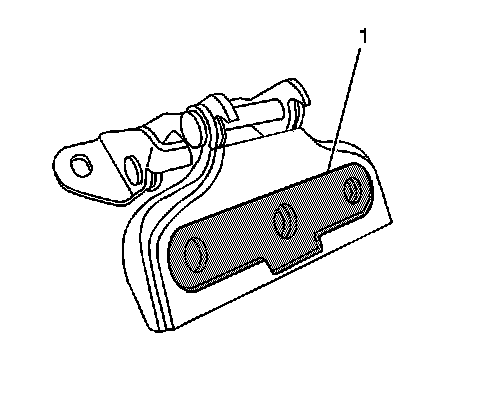
1. Apply silicone RTV sealer GM P/N 12346193 (Canadian P/N 10953536) to the entire shaded area of the hinge (1). Failure to do so will result in water and wind getting into the vehicle.
2. Align the liftgate hinge to the location marks previously made.
Caution: Refer to Fastener Caution (Fastener Caution).
3. Install the hinge bolts (1).
Tighten the bolts to 25 Nm (18 lb ft).
4. Install the garnish molding. Refer to Body Rear Corner Upper Garnish Molding Replacement (Body Rear Corner Upper Garnish Molding Replacement).
5. Install the liftgate. Refer to Liftgate Replacement (Liftgate Replacement).