Connecting Rod: Service and Repair
REMOVAL
NOTE:
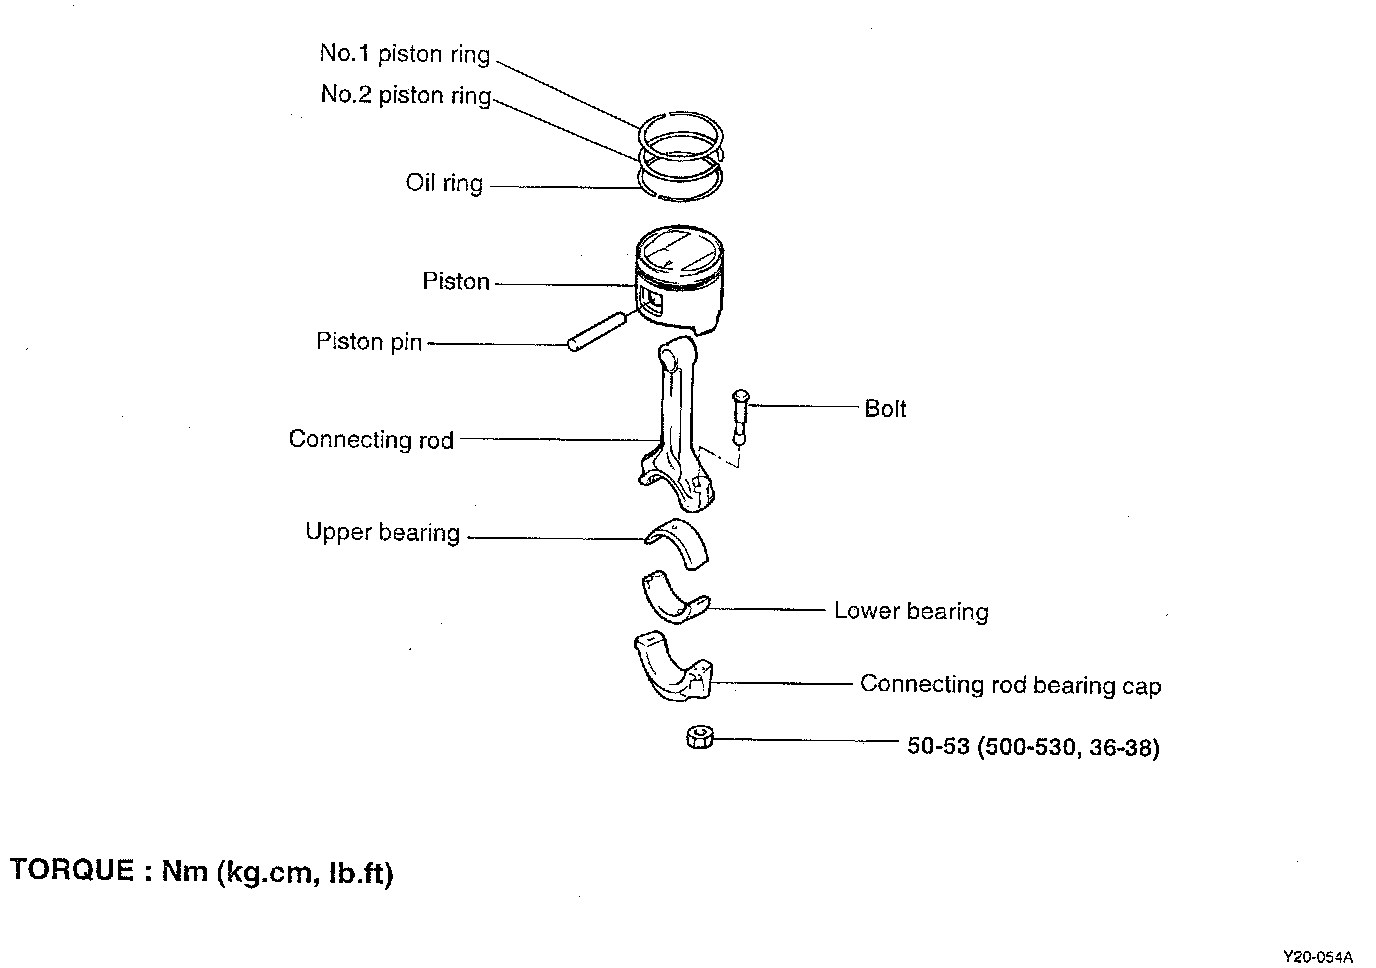
- Refer to the illustration when removing the connecting rod assemblies.
- Keep the bearings in order with their corresponding connecting rods (according to cylinder numbers) for proper reassembly.
- Prior to removing piston/rod assembly, inspect cylinder bore for wear ridge, if ridge is excessive, remove with a suitable ridge reamer.

1. Remove the connecting rod cap nuts and then remove the caps and the big end lower bearing.
2. Push each piston-connecting rod assembly toward the top of the cylinder.
3. Remove piston as described under Piston, Engine.
INSTALLATION
1. Install piston to rod, then rings to piston as described under Piston Ring, Engine.
2. Install upper bearing shell to rod, ensure notch in bearing is engaged into rod.
3. Install piston/rod assembly into cylinder block using a suitable piston ring compressor and rod guide.
NOTE:
- When the connecting rod cap is installed, make sure that cylinder numbers marked on rod end cap at disassembly match.
- When a new connecting rod is installed, make sure that the notches for holding the bearing in place are on the same side.
- Replace the connecting rod if it is damaged at either end of the thrust faces, if it has a step wear in, or if the surface of the inside diameter of the small end is severely rough.
- Check rod bearing oil clearance as described under testing and inspection.
4. Install rod bearing, cap and nuts, then tighten nuts to 50-53 Nm (500-530 kg. cm, 36-38 ft. lbs.).
5. Using a suitable feeler gauge, check connecting rod clearance.