Rear

REAR DISC BRAKE
REMOVAL
The procedure is the same with front disc brake pad.
INSPECTION
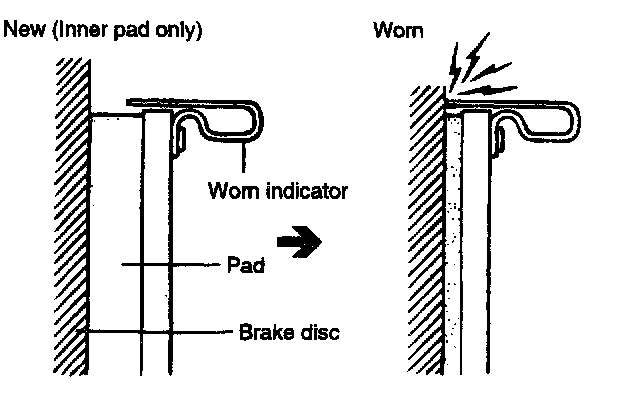
1. Check the pads for wear or oil contamination and replace if necessary.
NOTE: The pads for the right and left wheels should be replaced at the same time.
Pad thickness wear limit: 2.0 mm
2. Check the leading and trailing shoe keys and retaining screw for damage, or wear. Replace the keys and retaining screw at the same time when the pads are replaced.
3. Check for worn or damaged dust boots if dust or mud has entered the caliper assembly through this seal, the caliper assembly must be replaced or rebuilt.
INSTALLATION
Before replacing the brake pads, remove brake fluid from the master cylinder reservoir until it is half full.
CALIPER
DISASSEMBLY
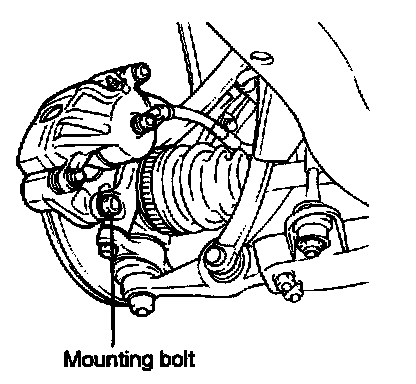
1. Remove the caliper mounting bolts, and the caliper assembly.
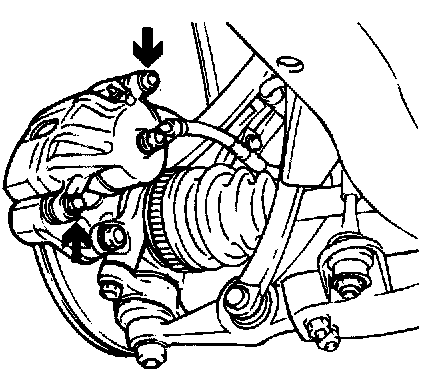
2. Remove the carrier bolt, and the carrier with the brake pad.
3. Remove the piston boot.
4. Remove the piston assembly.
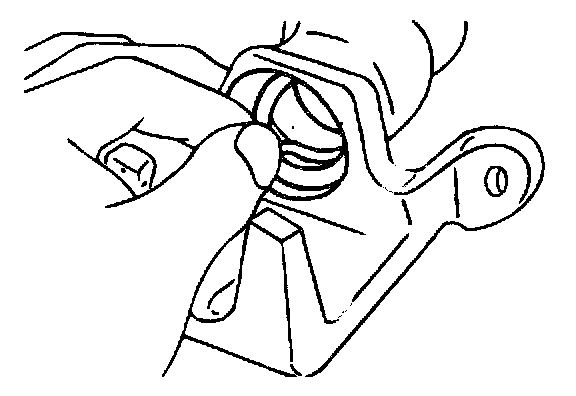
5. Remove the piston seal with finger tip.
CAUTION: Do not use sharpened tools to prevent damage to the inner surface of the cylinder.
REASSEMBLY
1. Check for worn, damaged, or rusted piston bore and piston. Replace the damaged parts if necessary.
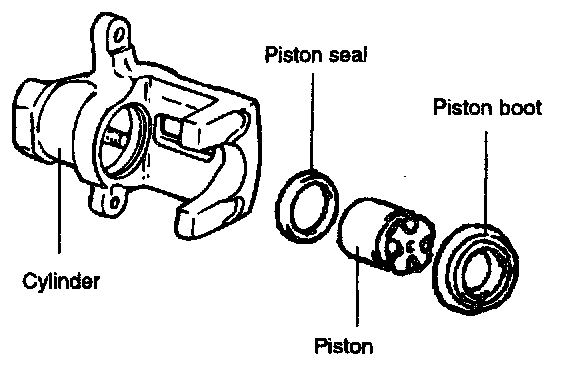
2. Check for damaged piston seal, boot and pin insulators.
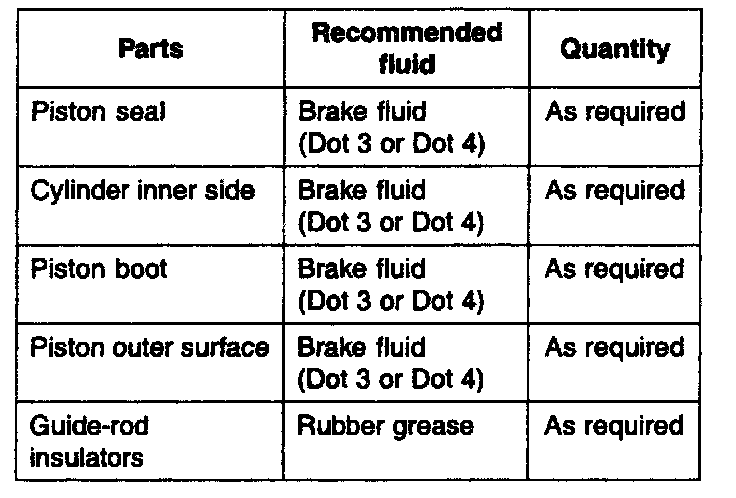
3. Apply the recommended fluid to the following parts.

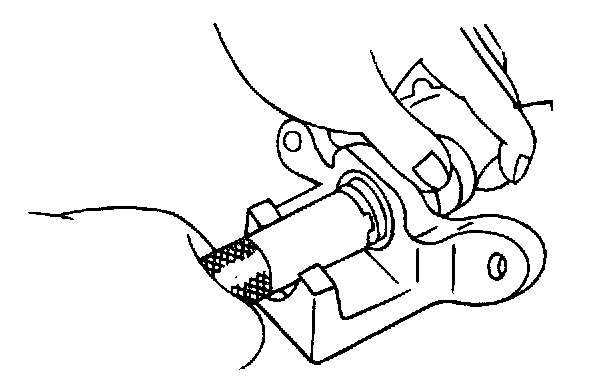
4. Push the piston into the caliper.
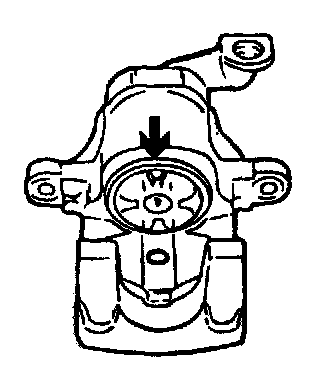
5. Align the piston matchmark to upward as shown in illustration.