Trunk / Liftgate: Service and Repair
REPLACEMENTTAILGATE TRIM REPLACEMENT
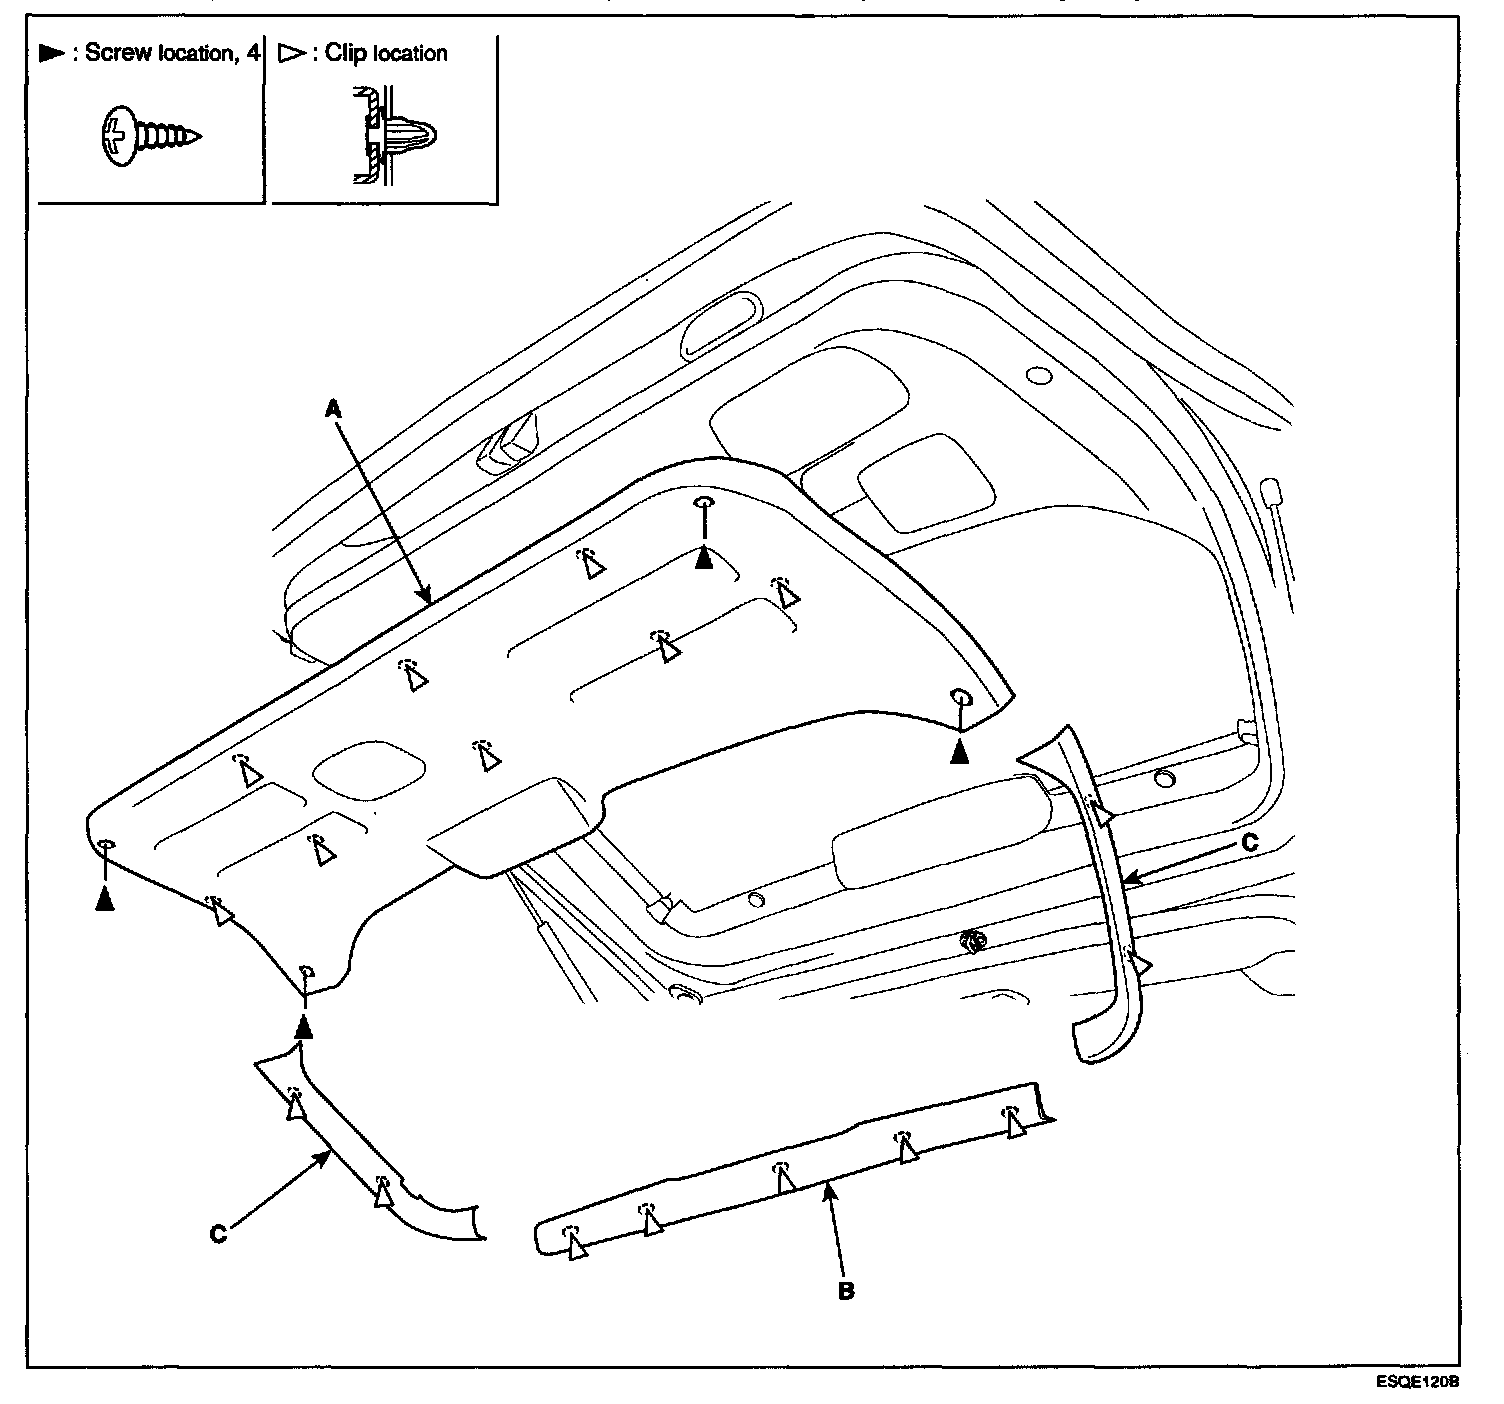
Tailgate Trim Replacement:
NOTE
- When removing and installing the trunk lid, an assistant is necessary.
- Wear gloves to protect hands from injury
1. Open the tailgate glass
2. After loosening the screws the remove the tailgate trim (A).
3. Remove the upper trim(B) and side trim(C).
4. Installation is the reverse of removal.
NOTE: Replace and damaged clips.
TAILGATE GLASS REPLACEMENT
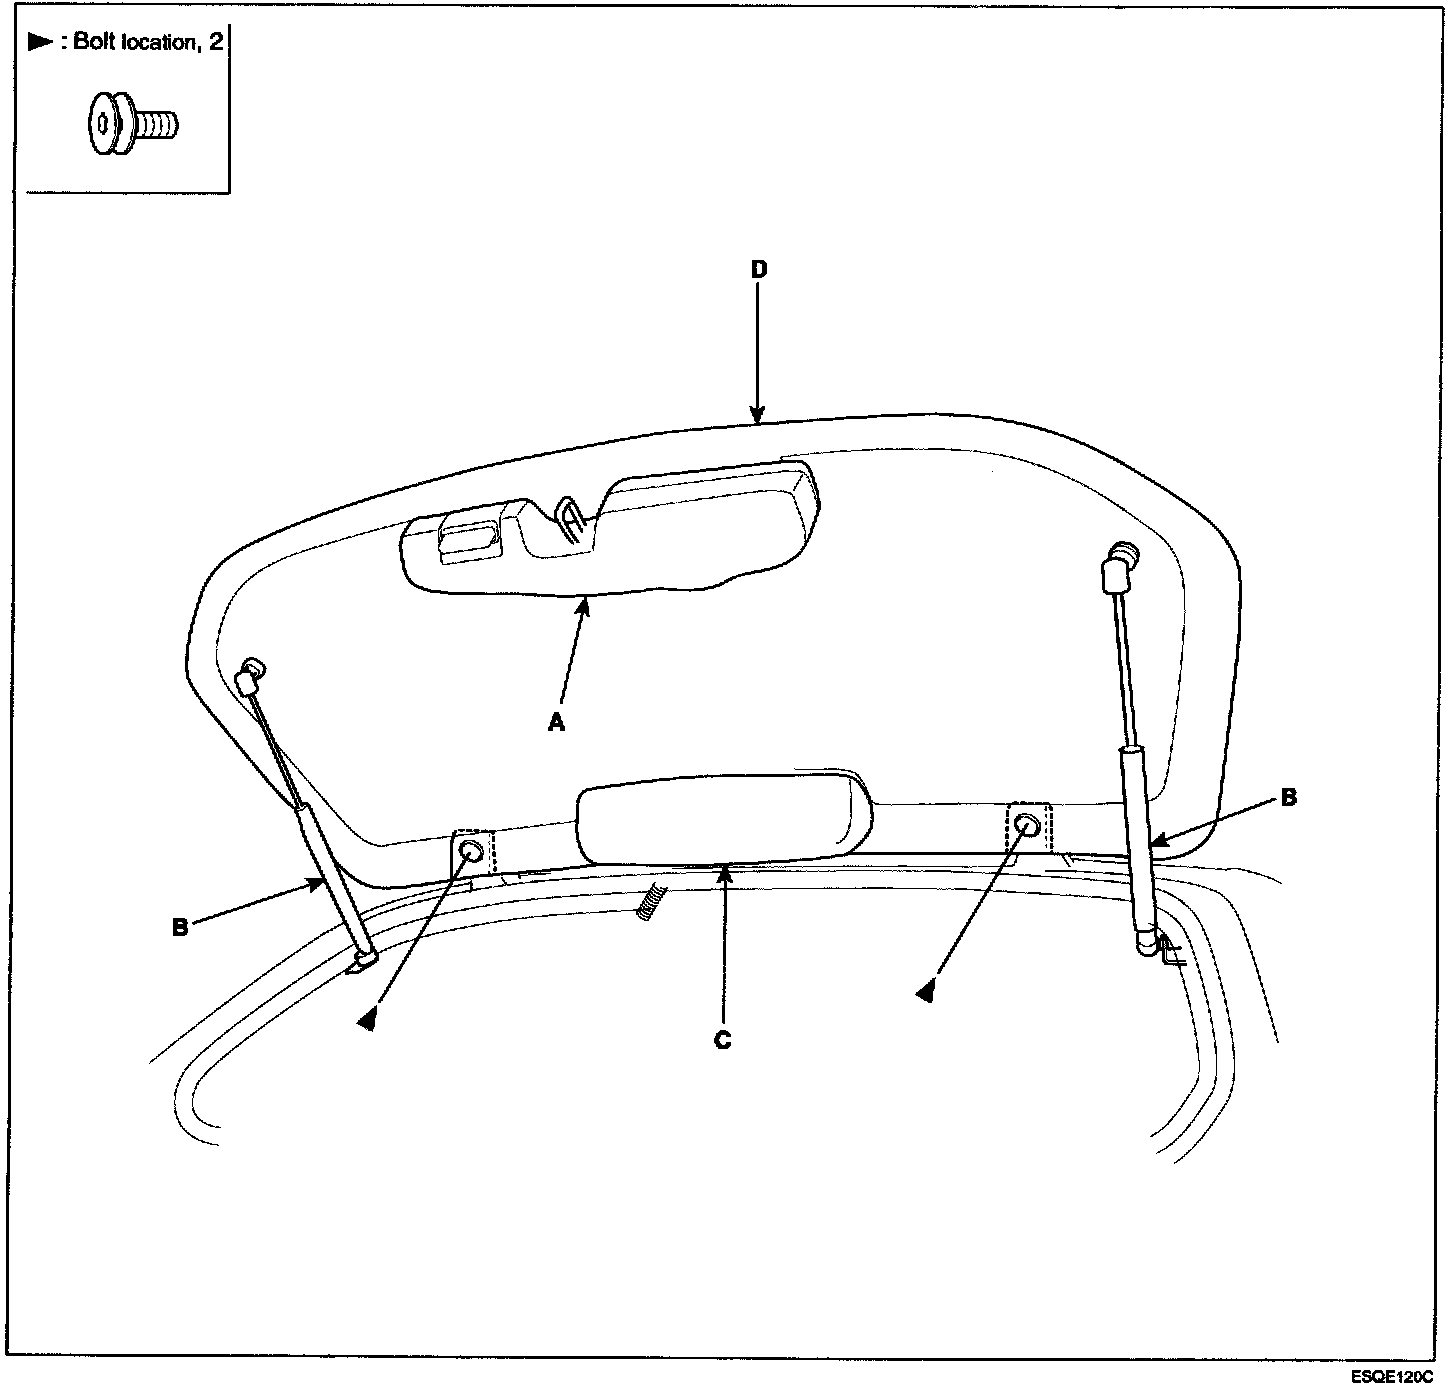
Tailgate Glass Replacement:
NOTE
- When prying with a flat-tip screwdriver, wrap it with protective tape, and apply protective tape around the related parts, to prevent damage.
- Take care not to scratch the surface the tailgate glass.
- Wear gloves to protect hands from injury
1. Remove the following items.
- Rear wiper assembly.
- Tailgate lifter.
- High stop lamp.
2. After loosening the mounting bolts remove the tailgate glass (D).
ACTUATOR ASSEMBLY
1. Remove the tailgate trim.
2. Disconnect the outside handle rod (A), actuator rod (B), glass latch rod (C), key cylinder rod (D) and connector.
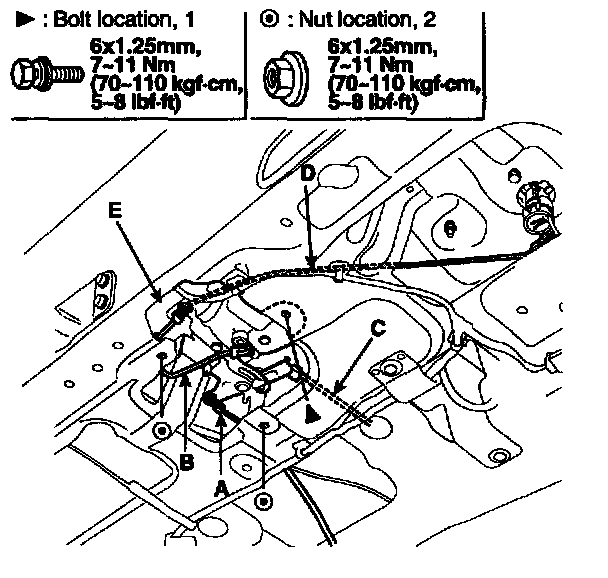
3. After loosening the mounting bolt and nuts, then remove the actuator assembly (E).
4. Installation is the reverse of removal.
NOTE
- Make sure the connector is connected properly and the connecting rod is connected properly
- Make sure the tailgate opens properly and locks securely
TAILGATE GLASS LATCH REPLACEMENT
1. Remove the tailgate trim.
2. Disconnect the tailgate glass latch rod (A).
3. After loosening the mounting bolts, disconnect the connector (B).
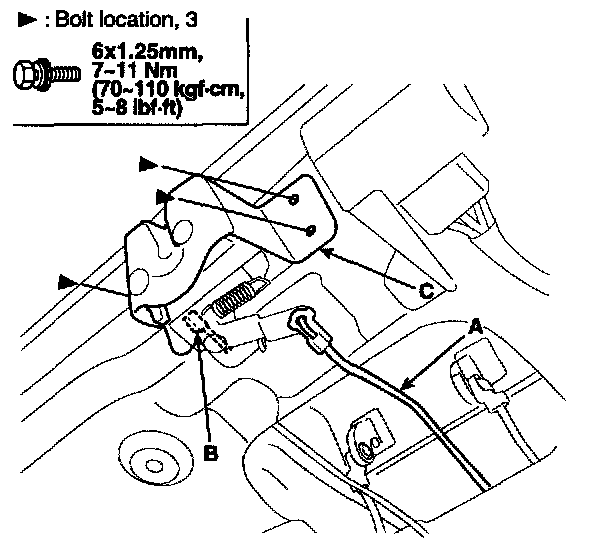
4. Remove the tailgate glass latch (C).
5. Installation is the reverse of removal.
NOTE: Make sure the tailgate glass opens properly and locks securely
KEY HOLDER REPLACEMENT
1. Remove the tailgate trim.
2. Remove the tailgate garnish.
3. Disconnect the key rod (A) and connector.
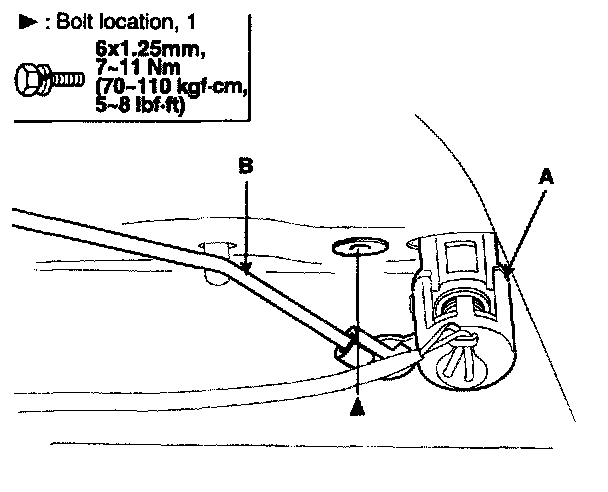
4. Remove the key holder (B).
5. Installation is the reverse of removal.
NOTE: Make sure the tailgate glass opens properly and locks securely
GLASS WEATHERSTRIP REPLACEMENT
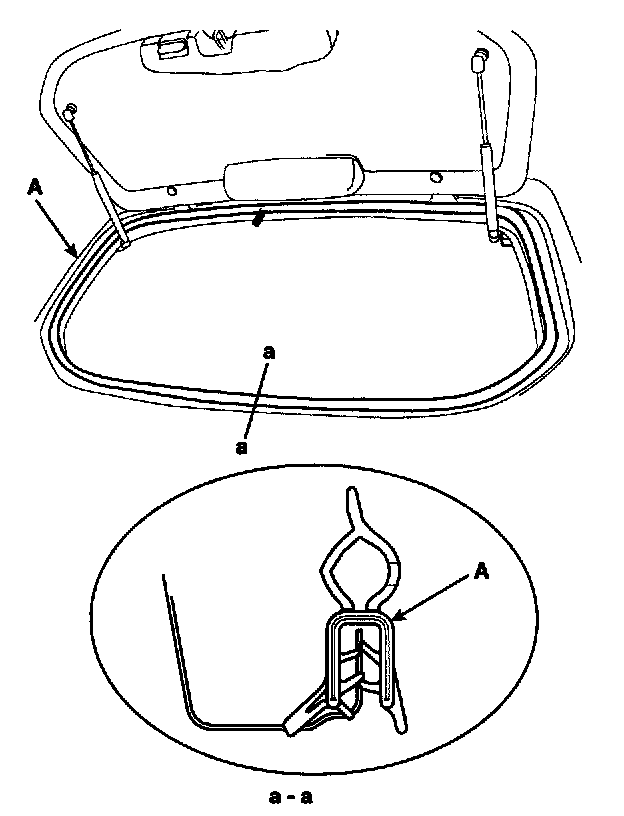
1. After disconnecting the tailgate lifter, remove the glass weatherstrip (A).
2. Installation is the reverse of removal.
TAILGATE WEATHERSTRIP REPLACEMENT
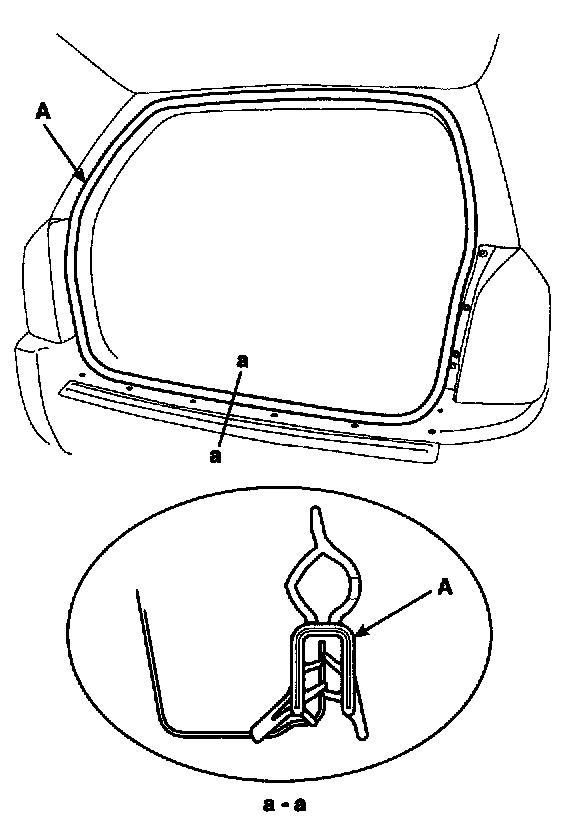
1. Remove the tailgate weatherstrip (A).
2. Installation is the reverse of removal.
OUTSIDE HANDLE REPLACEMENT
1. Remove the tailgate trim.
2. Disconnect the outside handle rod (A) and latch rod (B).
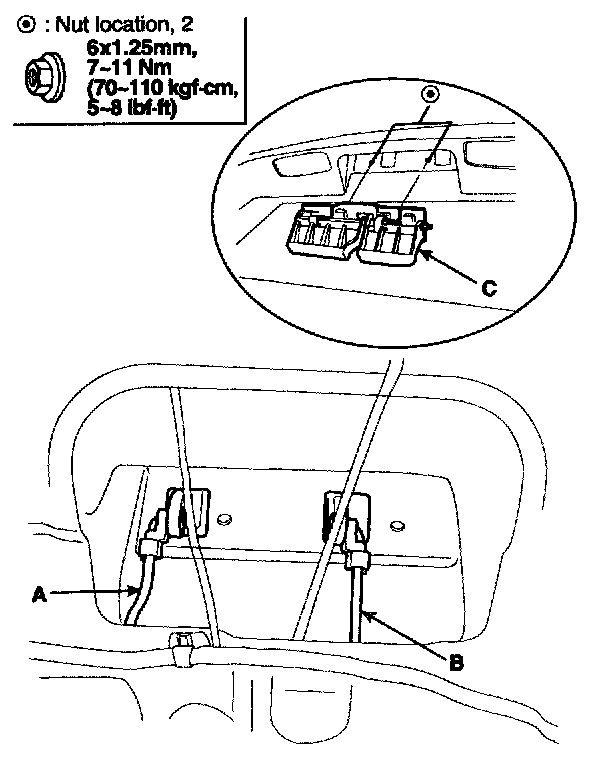
3. Loosen the inside handle (C) mounting bolts.
4. Installation is the reverse of removal.
NOTE: Make sure the tailgate glass opens properly and locks securely
LIFTER REPLACEMENT
1. Using a screwdriver (A), lift up slightly the socket clips (B) of both ends on the lifter (C), and then remove the lifter from the bracket (D).
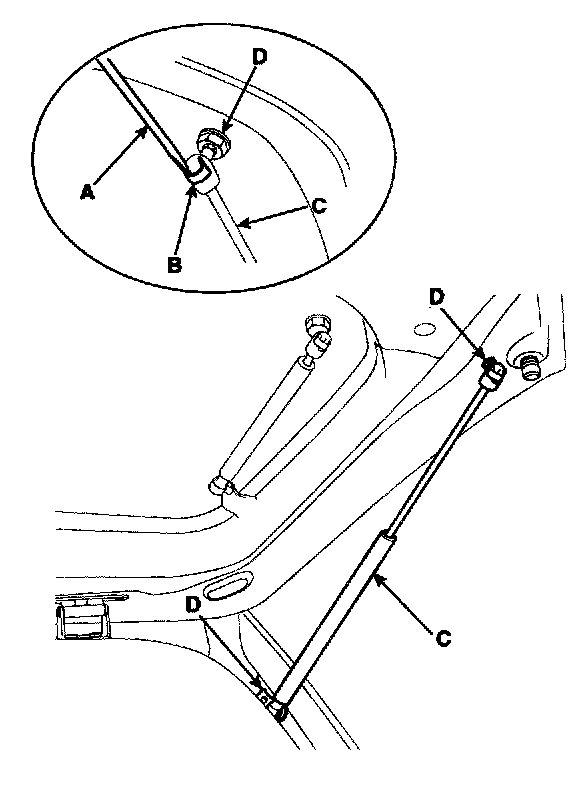
2. Push the socket of the lifter into the bracket for installation.
PULL HANDLE REPLACEMENT
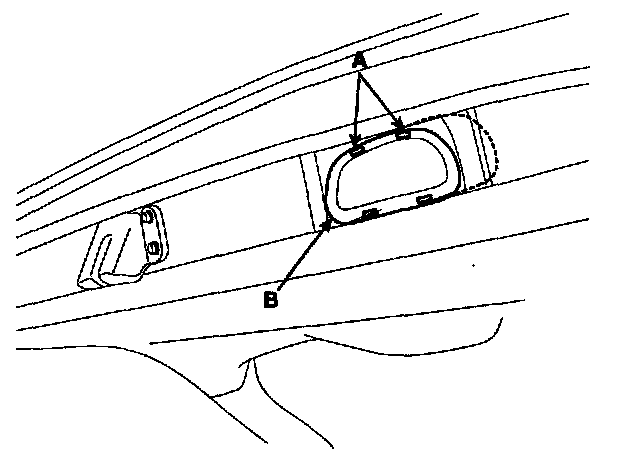
Push down the hook (A) on the upper part of the pull handle (B) by using the screwdriver or the remover.
FUEL FILLER DOOR RELEASE CABLE REPLACEMENT
1. Remove the following items.
- Front seat.
- Rear seat.
- Front door scuff trim LH.
- Rear door scuff trim LH.
- Center pillar lower trim.
- Luggage trim, left side.
Fuel Filler Door Release Cable Replacement:
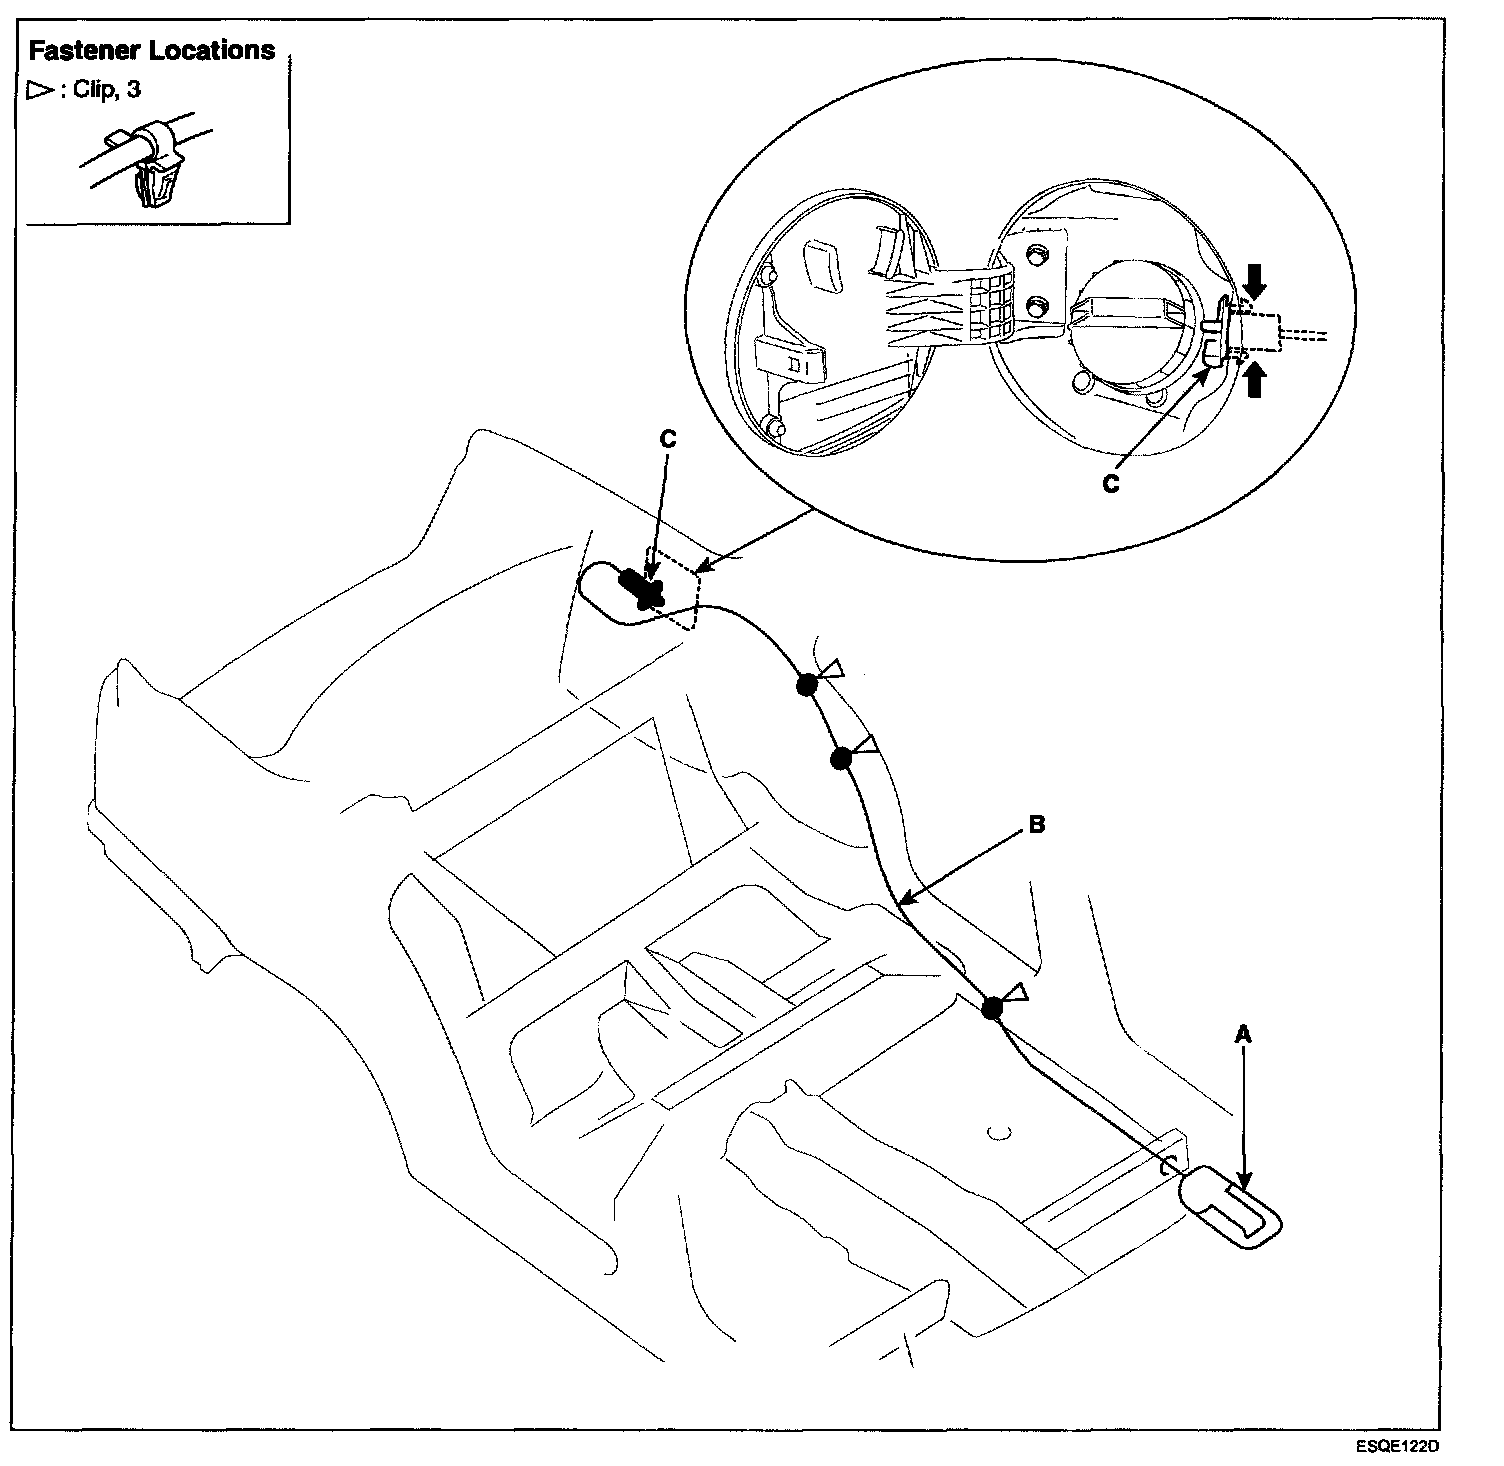
2. Disconnect the fuel filler door release cable from the release handle (A).
3. Remove the release cable (B) from the clip, and disconnect the fuel filler door catch (C), then remove the fuel filler door cable from the vehicle.
FUEL FILL DOOR REPLACEMENT
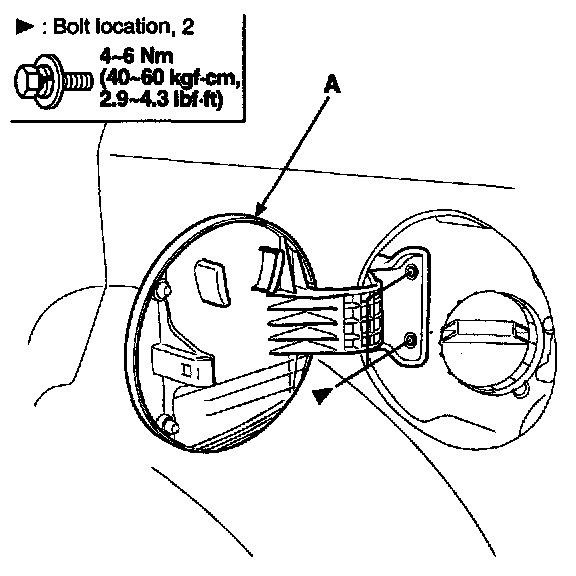
1. Loosen the bolts, then remove the fuel filler door (A).
2. Installation is the reverse of removal.
NOTE: Make sure the fuel fill door opens properly and locks securely
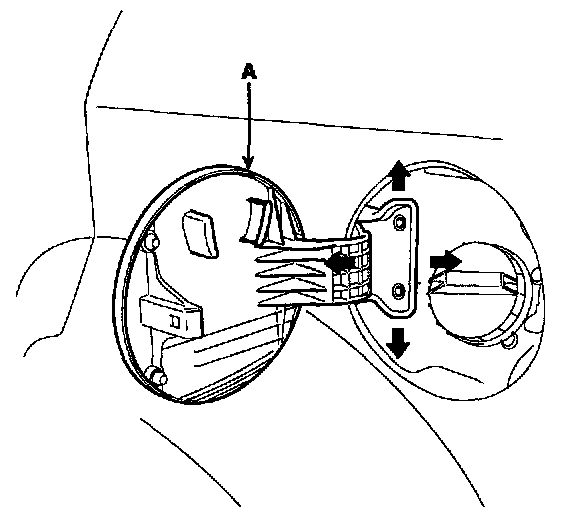
3. Check that the fuel fill door (A) fits flush against the body. If necessary, adjust it.
RELEASE HANDLE REPLACEMENT
1. Remove the front door scuff trim and center pillar lower trim.
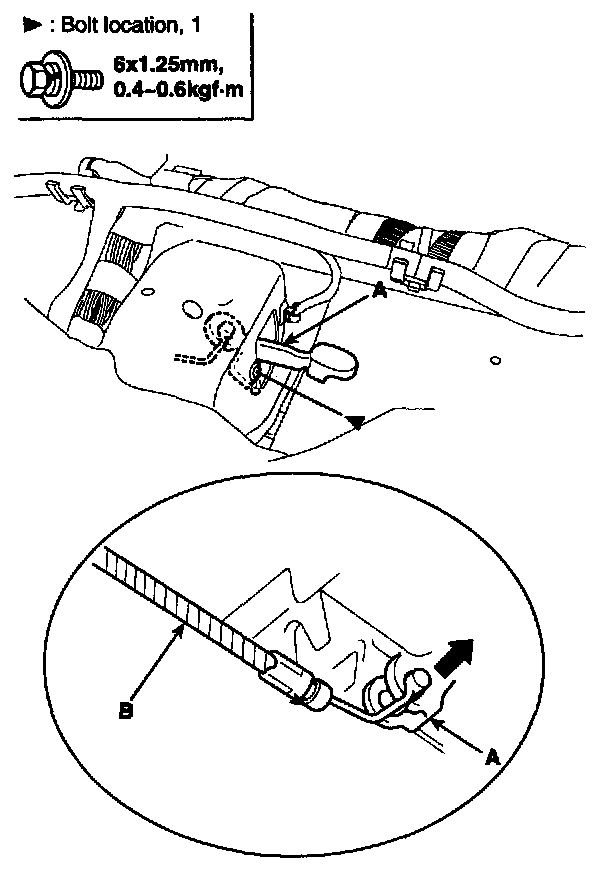
2. Loosen the release handle (A), mounting bolt. Disconnect the release cable (B), then remove the release handle.
3. Installation is the reverse of removal.
NOTE
- Make sure the release cable is connected properly.
- Make sure the fuel filler door/trunk lid open properly.