Exterior Moulding / Trim: Service and Repair
ROOF RACK REPLACEMENTNOTE
- When prying with a flat-tip screwdriver, wrap it with protective tape, and apply protective tape around the related parts, to prevent damage.
- Put on gloves to protect your hands.
- Take care not to scratch the body surface.
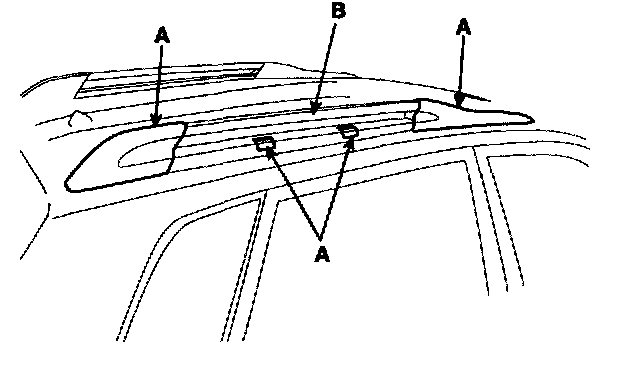
1. Remove the roof rack cover (A).
2. Remove the roof rack (B).
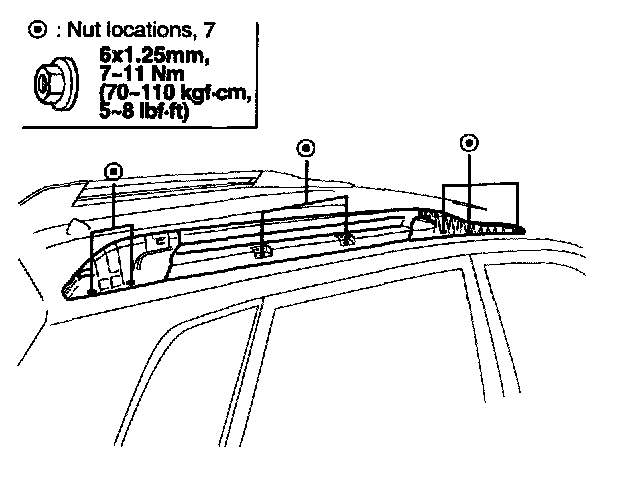
3. Installation is the reverse of removal.
FRONT MUD GUARD AND WHEEL GUARD REPLACEMENT
NOTE
- When prying with a flat-tip screwdriver, wrap it with protective tape, and apply protective tape around the related parts, to prevent damage.
- Put on gloves to protect your hands.
- Take care not to scratch the body surface.
1. Remove the mud guard (A).
2. Remove the wheel guard (B).
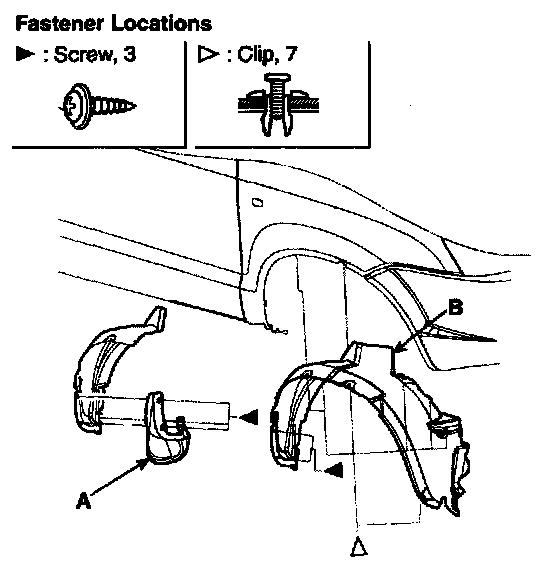
3. Installation is the reverse of removal.
REAR MUD GUARD AND WHEEL GUARD REPLACEMENT
NOTE
- When prying with a flat-tip screwdriver, wrap it with protective tape, and apply protective tape around the related parts, to prevent damage.
- Put on gloves to protect your hands.
- Take care not to scratch the body surface.
1. Remove the mud guard (A).
2. Remove the wheel guard (B).
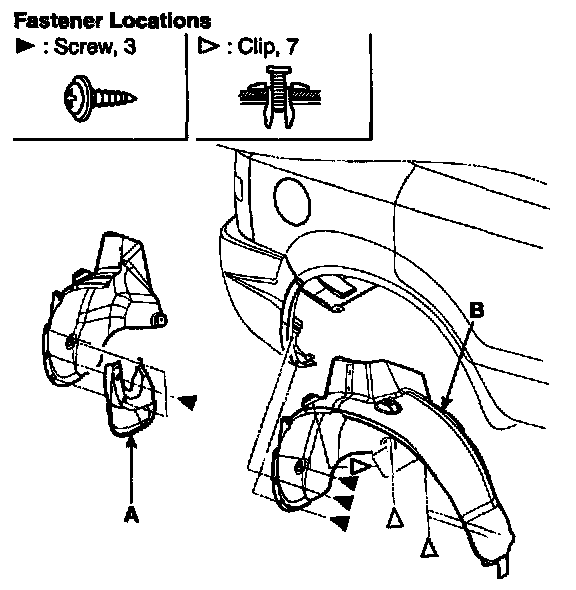
3. Installation is the reverse of removal.
TAILGATE GARNISH REPLACEMENT
1. Remove the tailgate trim.
2. Remove the key cylinder.
3. Remove the tailgate garnish (A).
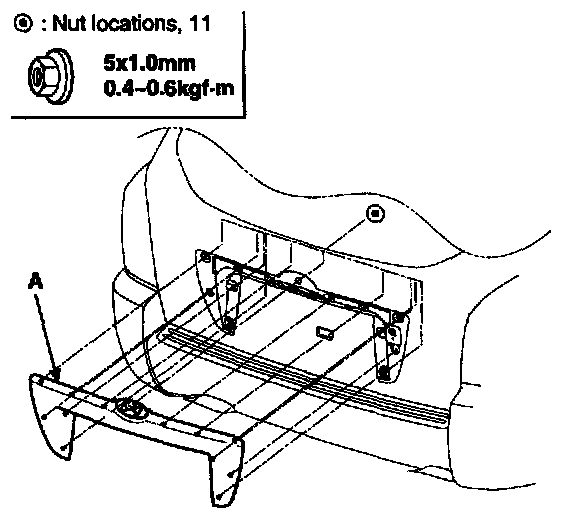
4. Installation is the reverse of removal.
RADIATOR GRILLE REPLACEMENT
1. Open the hood.
2. Remove the radiator grille (A).
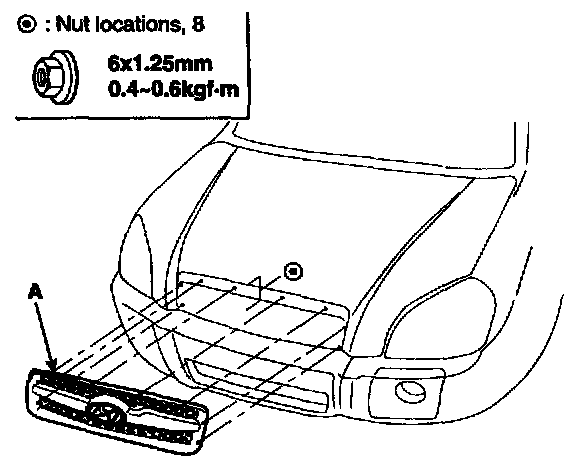
3. Installation is the reverse of removal.
SIDE GARNISH AND SIDE SILL REPLACEMENT
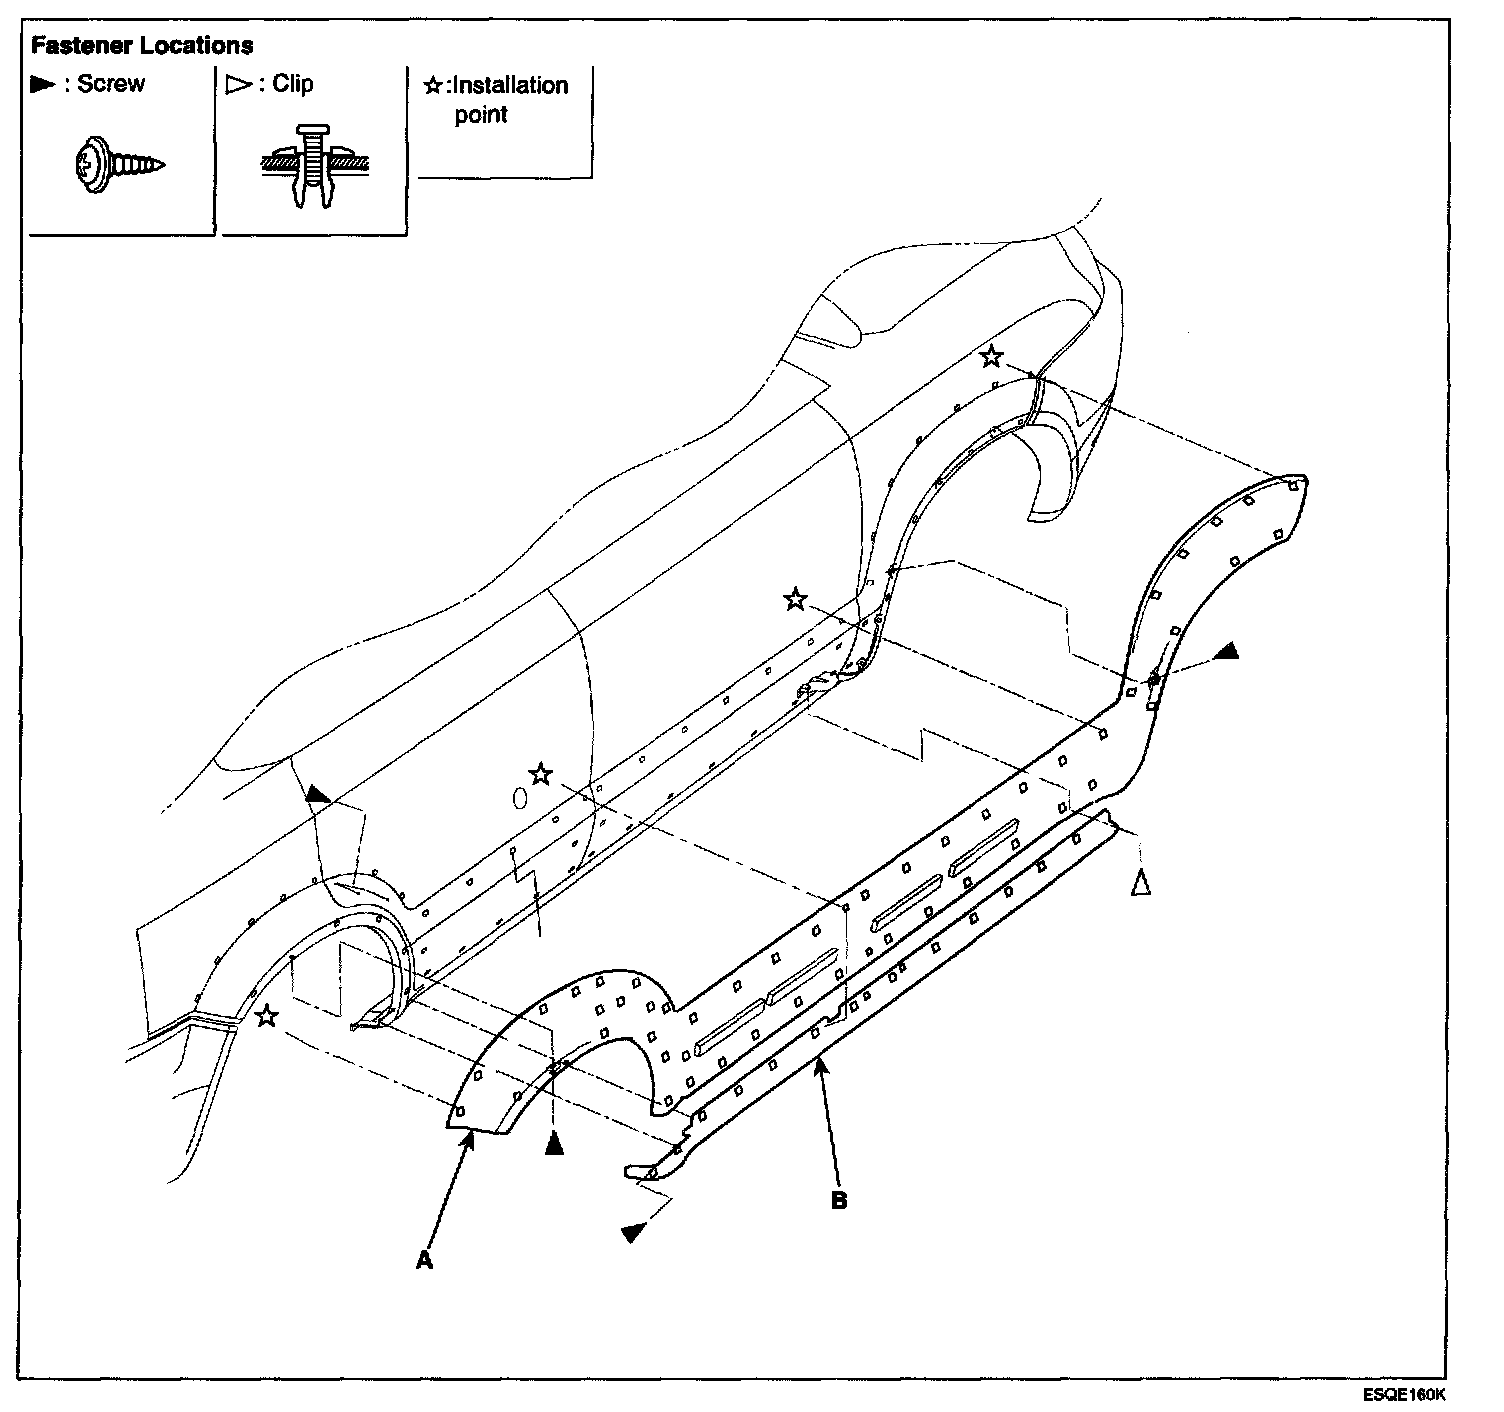
NOTE
- Wrap the blade of a putty knife or flat tip screwdriver with protective tape to prevent damage to the door
- Be careful not to pry too far or you may bend the garnish.
- Put on gloves to protect your hands.
1. Prepare to remove the garnish from inside the vehicle.
- Remove screws frame the front and rear door panel.
2. Remove the clips and screws and gently pry the side garnish (A) or side still (B) away from the door while removing the adhesive tape.
3. Installation is the reverse of removal. Replace any damaged clips adhesive tape.