Control Arm: Service and Repair
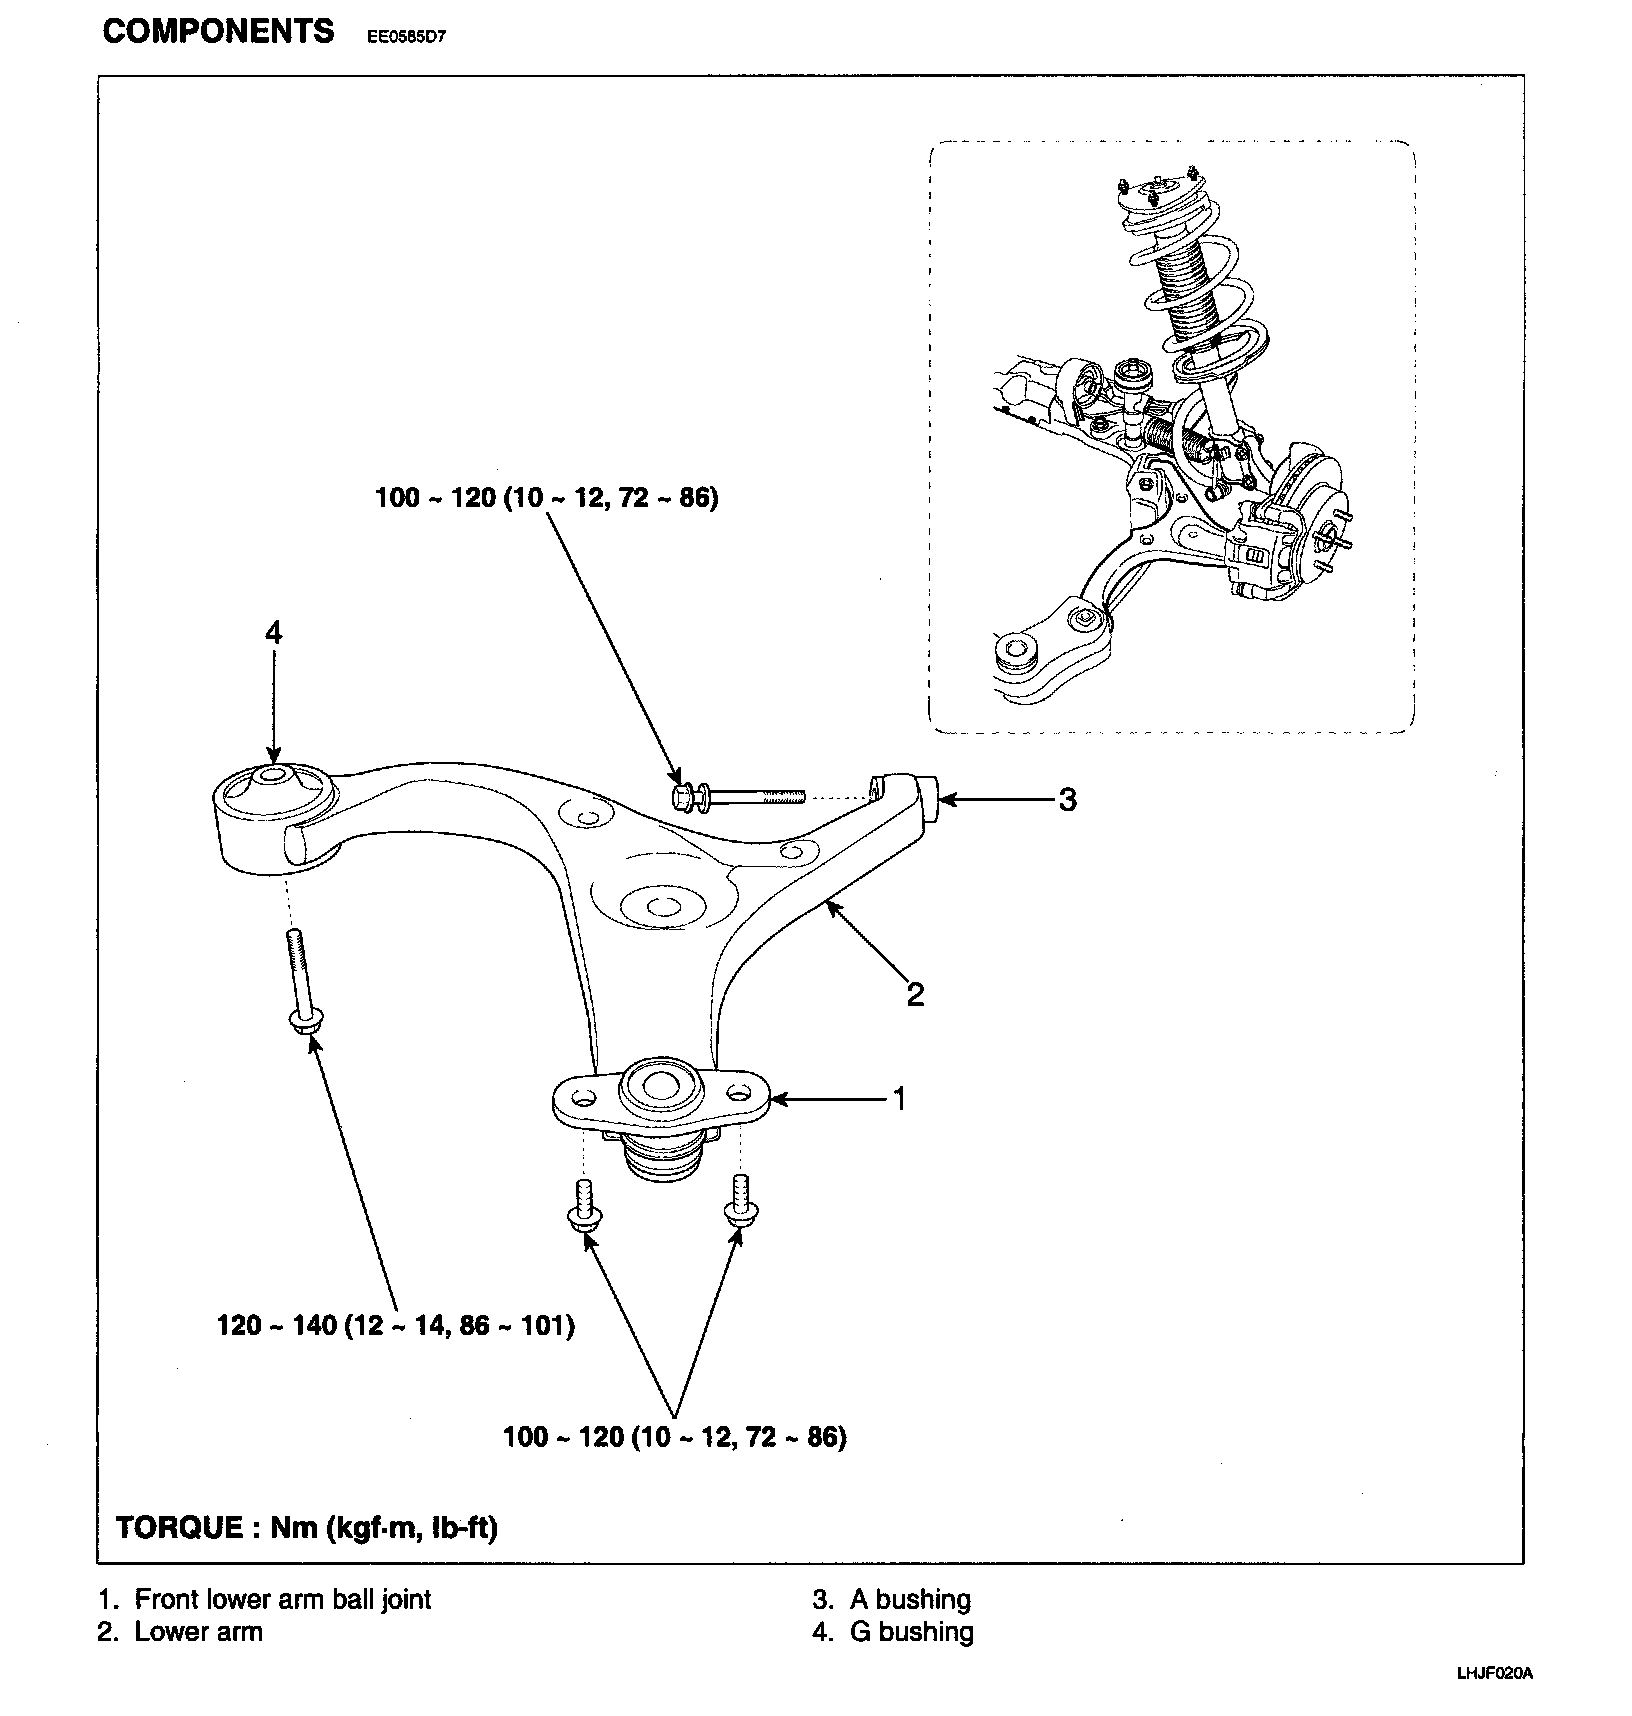
FRONT LOWER ARMCOMPONENTS:
REMOVAL
1. Loosen the wheel nuts slightly.
Raise the front of the vehicle, and make sure it is securely supported.
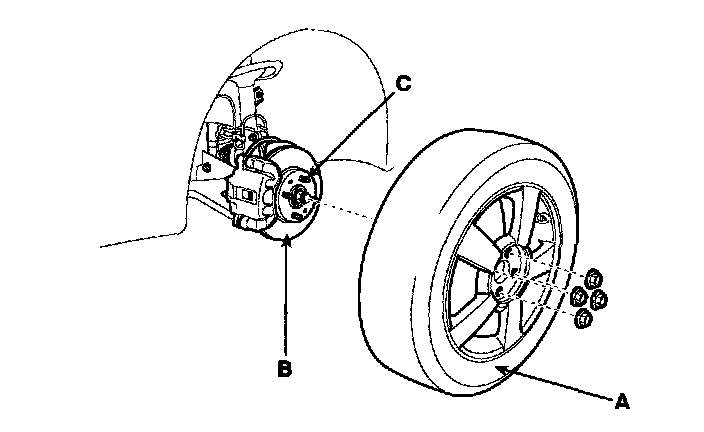
2. Remove the front wheel and tire (A) from front hub (B).
CAUTION: Be careful not to damage the hub bolts (C) then remove the front wheel and tire (A).
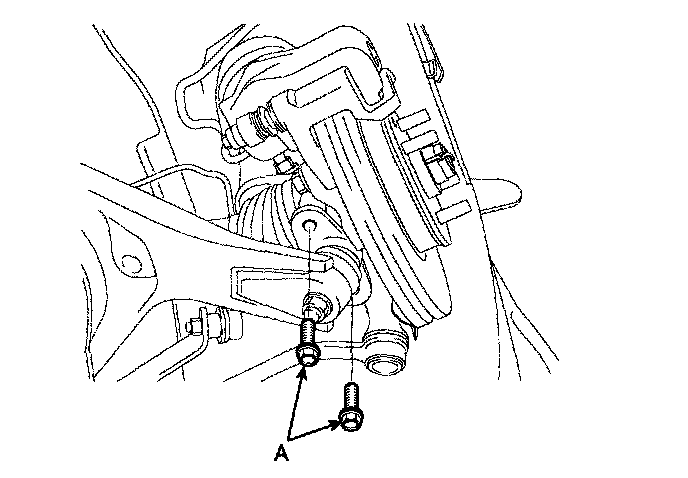
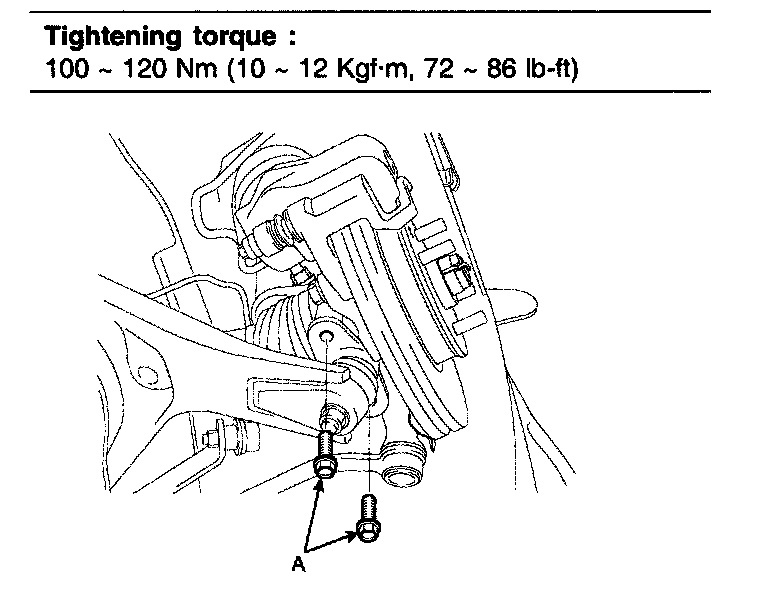
3. Remove the lower arm ball joint mounting bolts (A).
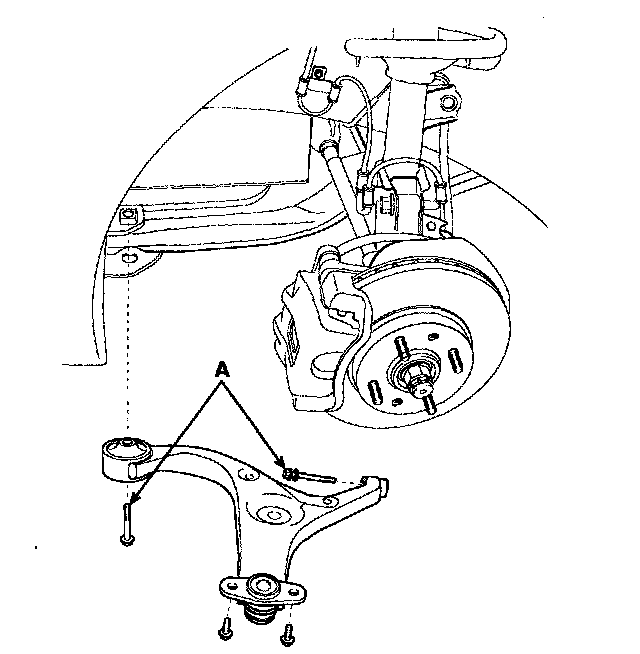
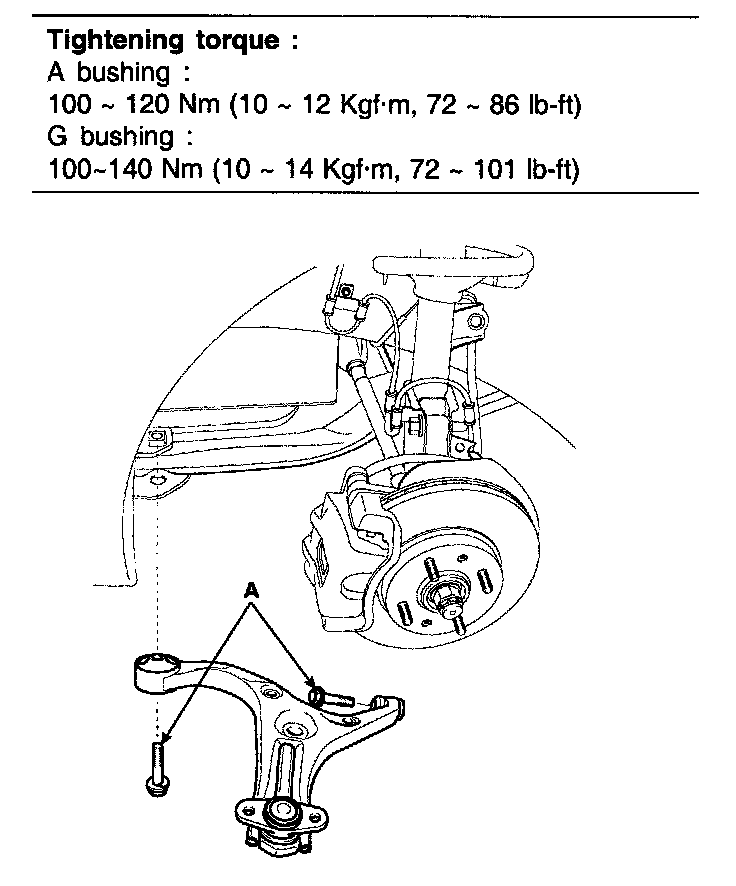
4. Remove the lower arm mounting bolts (A).
REPLACEMENT
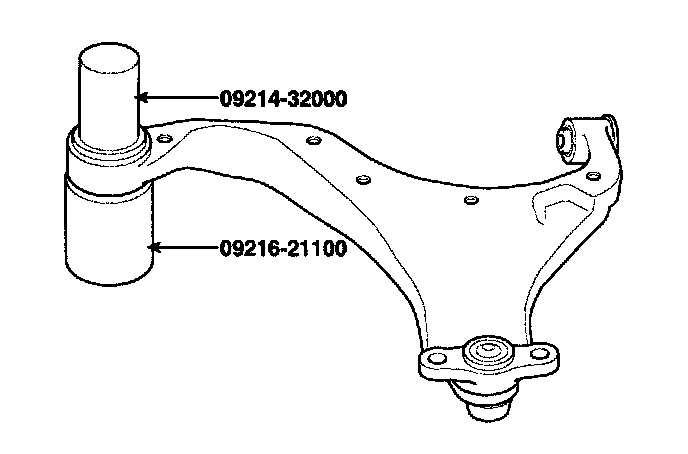
1. Using the special tools (09214-32000 & 09216-211000), remove the bushing from the lower arm.
2. Apply soap solution to the following parts.
^ Outer surface of the bushing.
^ Inner surface of the lower bushing mounting part.
3. Using the special tools (09214-32000 & 09216-21100), install the busing on the lower arm.

CAUTION: Insert bush as to arrow direct toward this direction shown.
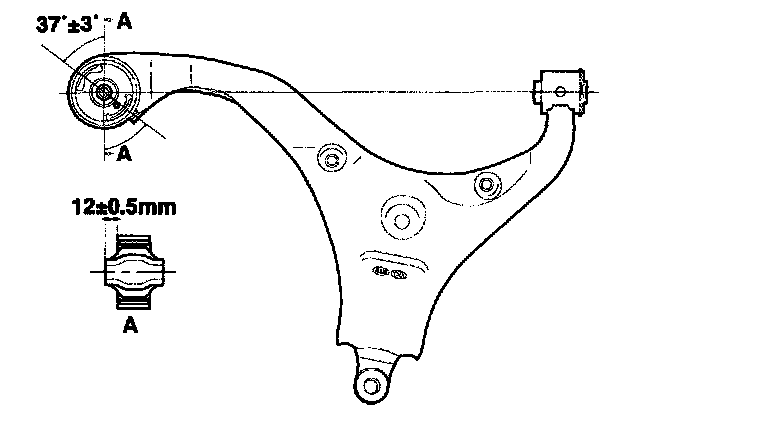
Separation force is over 800 Kg
INSTALLATION
1. Install the lower arm mounting bolts (A).
Tightening torque
2. Install the lower arm ball joint mounting bolts (A).
3. Install the front wheel and tire (A) on the front hub (B).
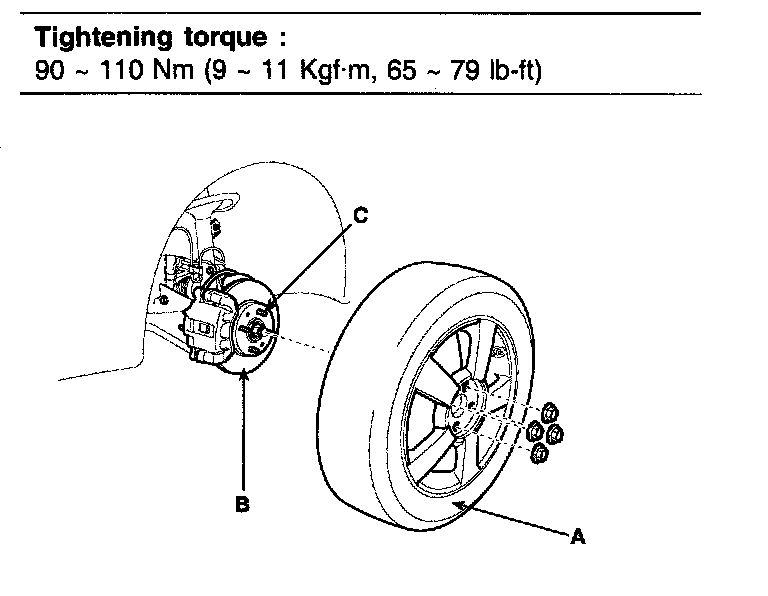
CAUTION: Be careful not to damage the hub bolts (C) then install the front wheel and tire (A).