Interior - Driver Seat Lumbar Support Inoperative
Group: BODYNumber: 07-60-001
Date: FEBRUARY, 2007
Model:
2007 ENTOURAGE
Subject:
DRIVER SEAT LUMBAR SUPPORT LINKAGE REPOSITIONING PROCEDURE
DESCRIPTION:
If a 2007 Entourage vehicle exhibits a condition of reduced or inoperable driver seat lumbar support adjustment with the seat back mounted lever, this may be due to improper positioning of the lumbar control linkage from the driven plate.
This bulletin provides a repair procedure to reinstall and stabilize the lumbar control linkage to the proper position.
VEHICLES AFFECTED:
^ Model: 2007 ENTOURAGE
^ Affected vehicle production date range: Start of Production to June 13, 2006
TOOLS & MATERIALS REQUIRED:
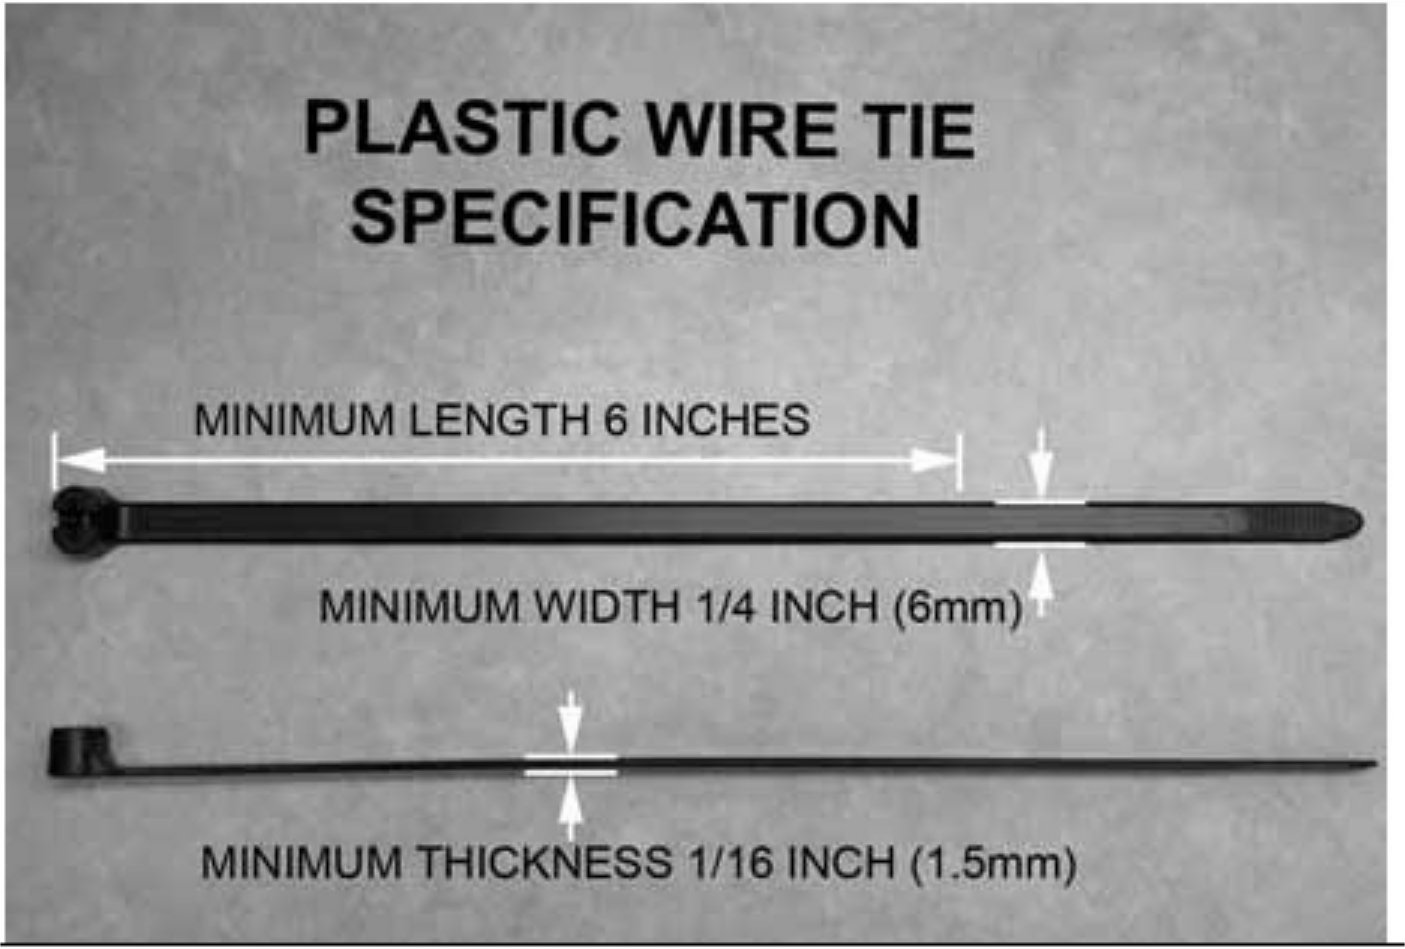
^ Heavy-duty plastic wire tie as shown.
SERVICE PROCEDURE:
NOTE:
Prior to performing the following procedure, prevent unnecessary soiling of the seat material by ensuring that tools, materials, and hands are free of any dirt or grease.
1. Slide the driver's seat forward and tilt the seat back slightly forward.
2. Turn ignition key to the OFF position and remove key from cylinder.
3. Remove the driver's seat back garnish assembly from the seat back.
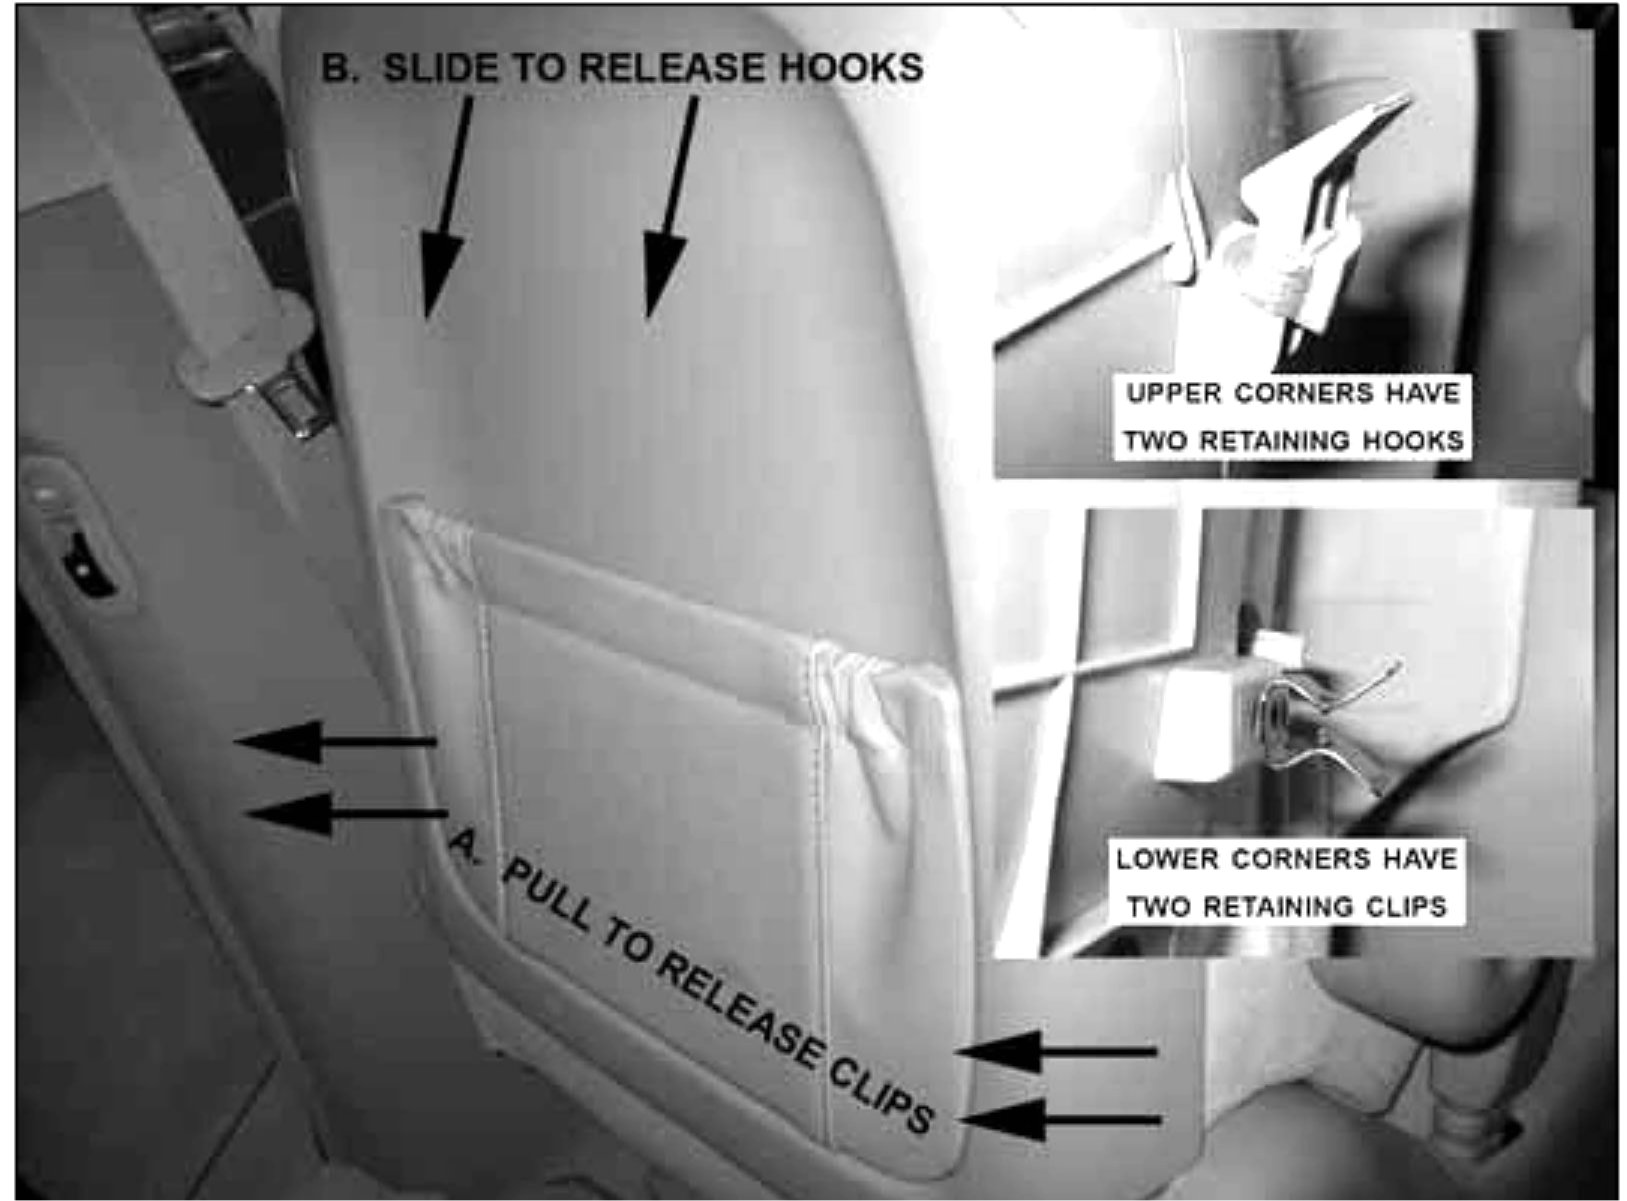
A. First, pull the bottom corners of the seat back garnish to release the lower clips.
B. Then, slide the assembly down to release the upper hooks.
NOTE:
When handling the seat back garnish, be careful not to damage the upper hooks or bend the lower clips.
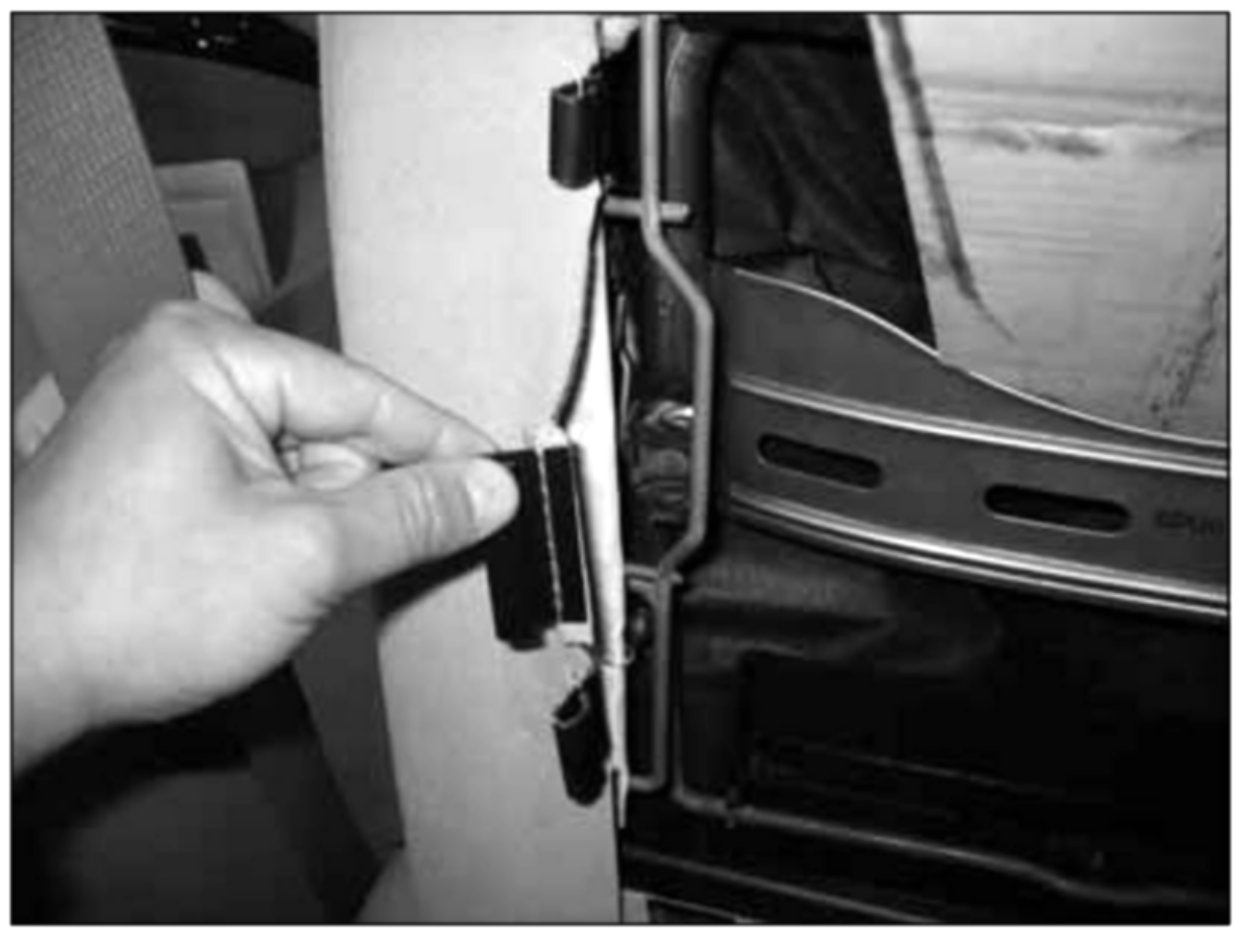
4. Release the seat side bolster upholstery hooks along the left side.
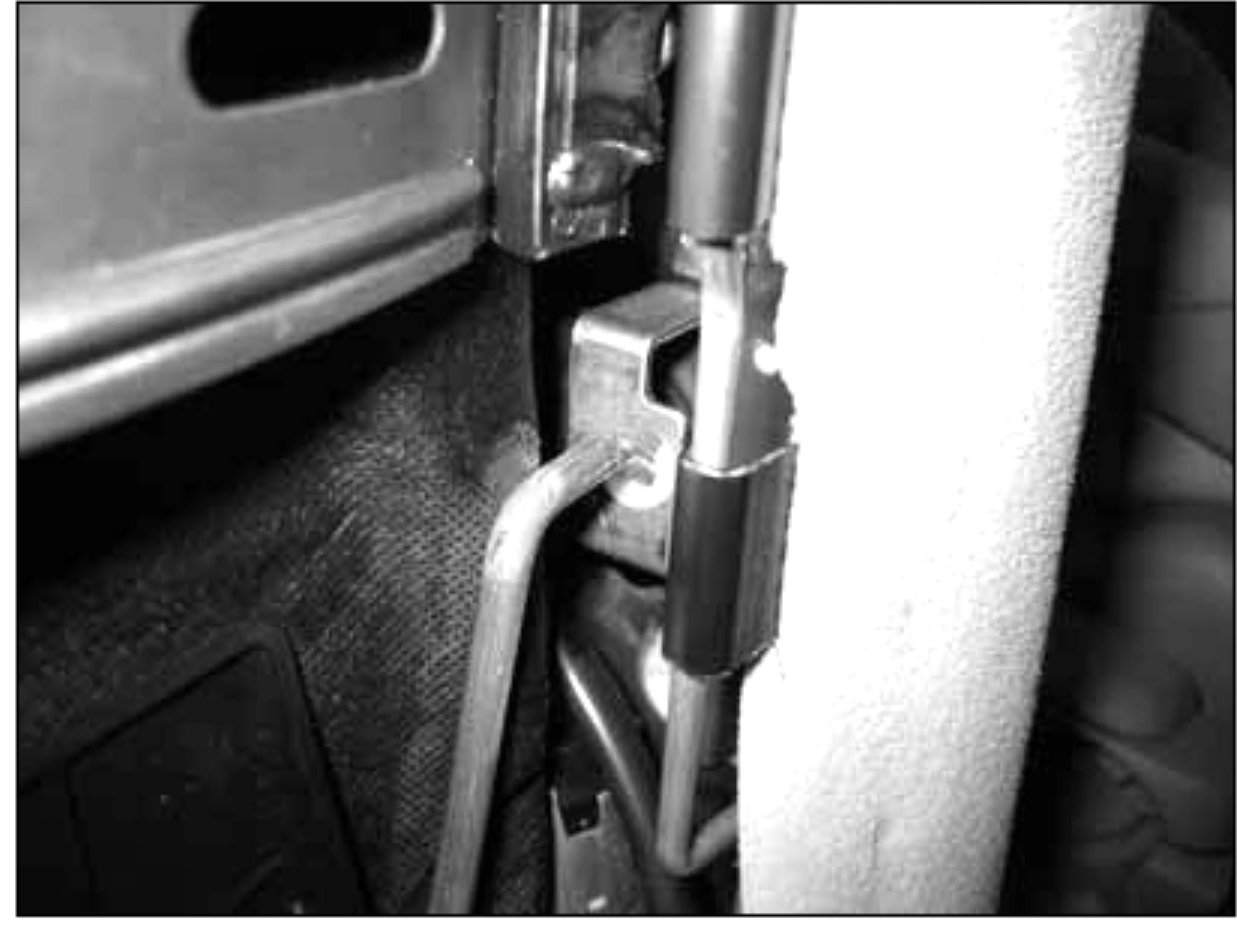
5. Verify the positioning of the lumbar control linkage into the pivot bracket on the right side of the seat back with the plastic bushing inserted in place.
^ The photo above shows the lumbar control linkage separated from the pivot bracket.
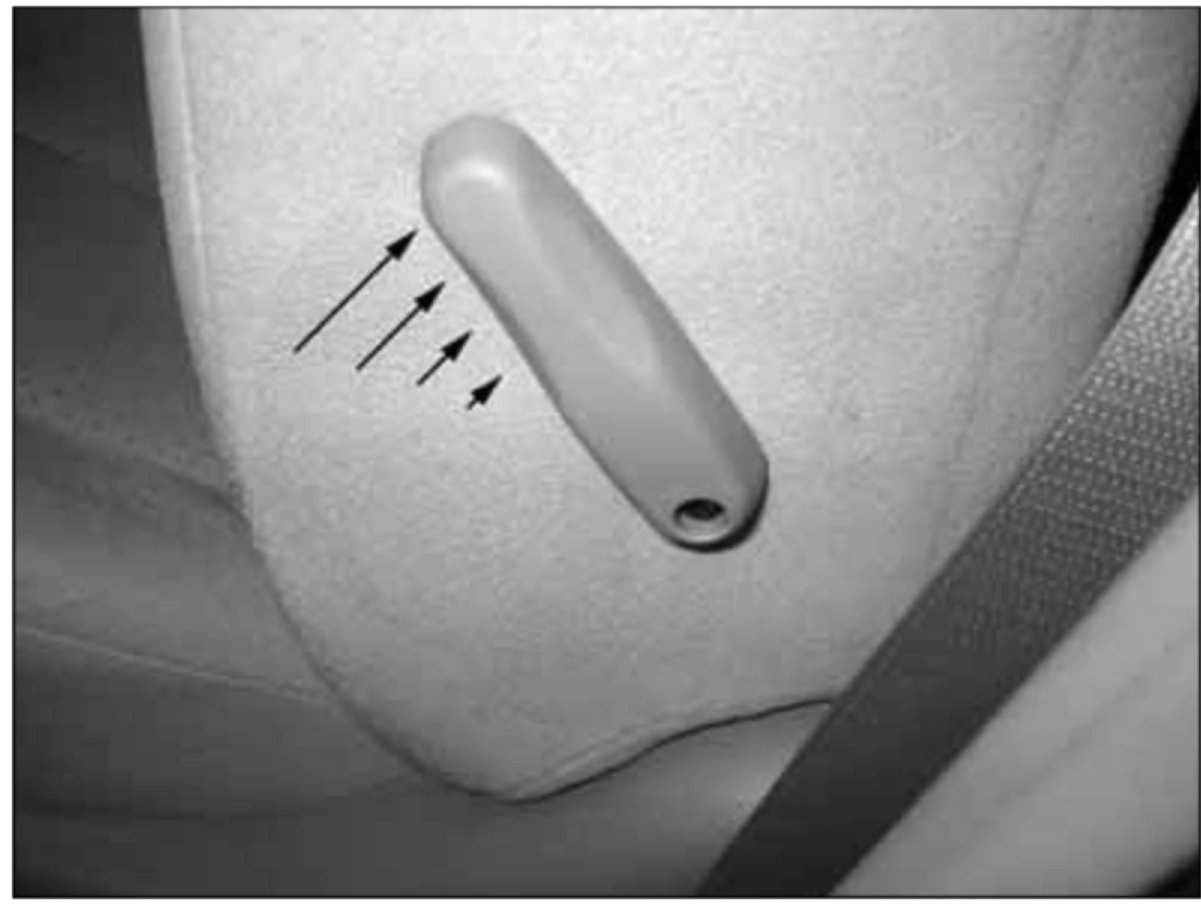
6. Tilt the lumbar support lever up.
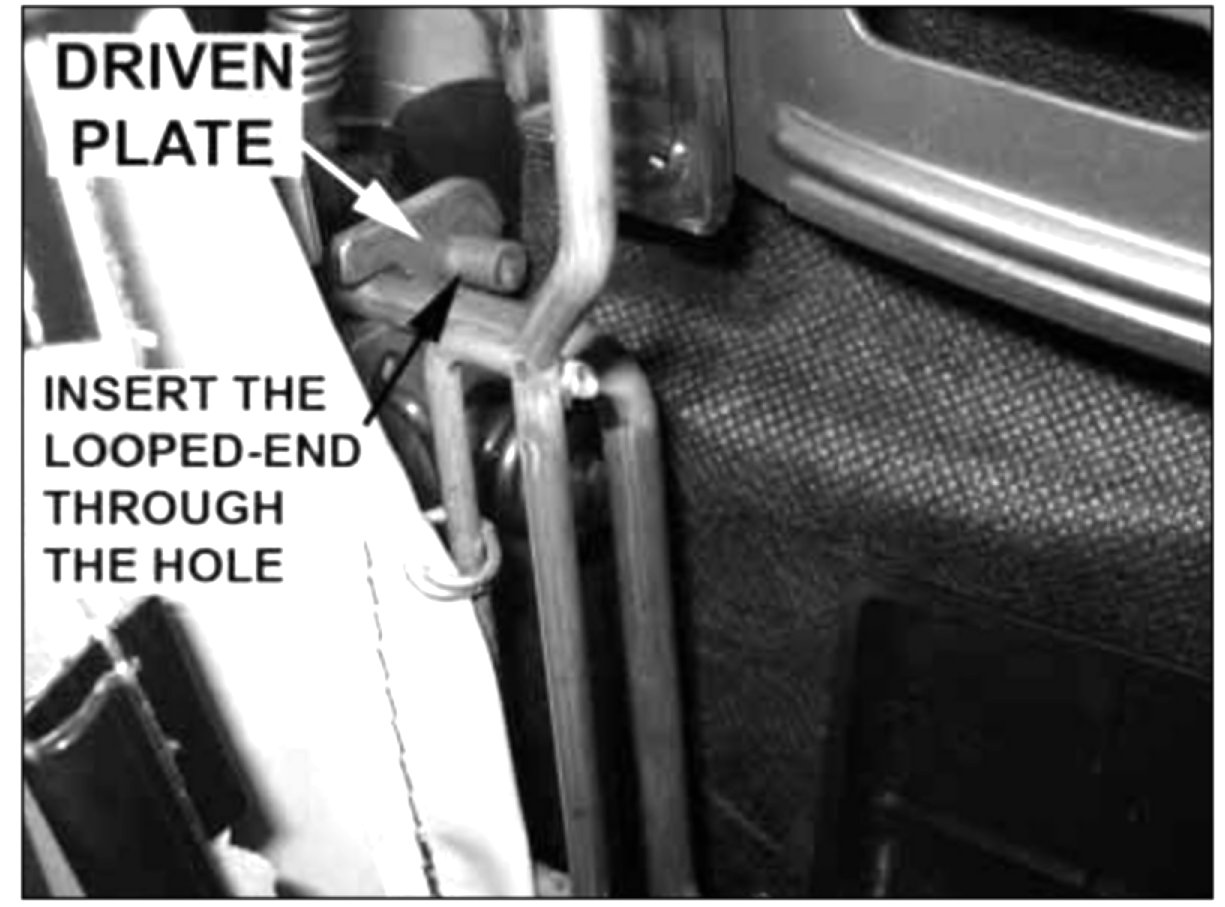
7. Reposition the looped-end of the lumbar control linkage through the slot and hole of the driven plate.
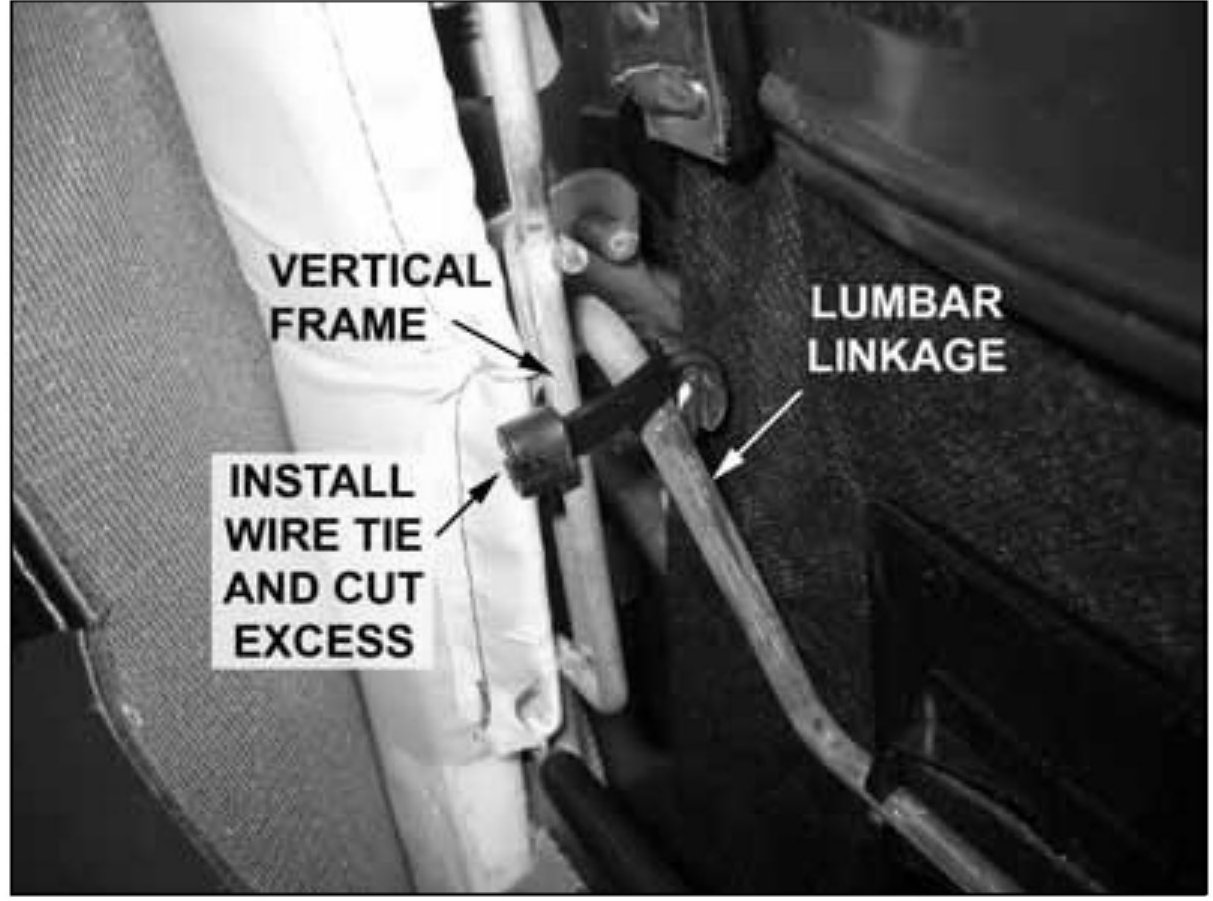
8. Position the plastic wire tie around the seat back vertical frame and the lumbar control linkage as shown in the picture.
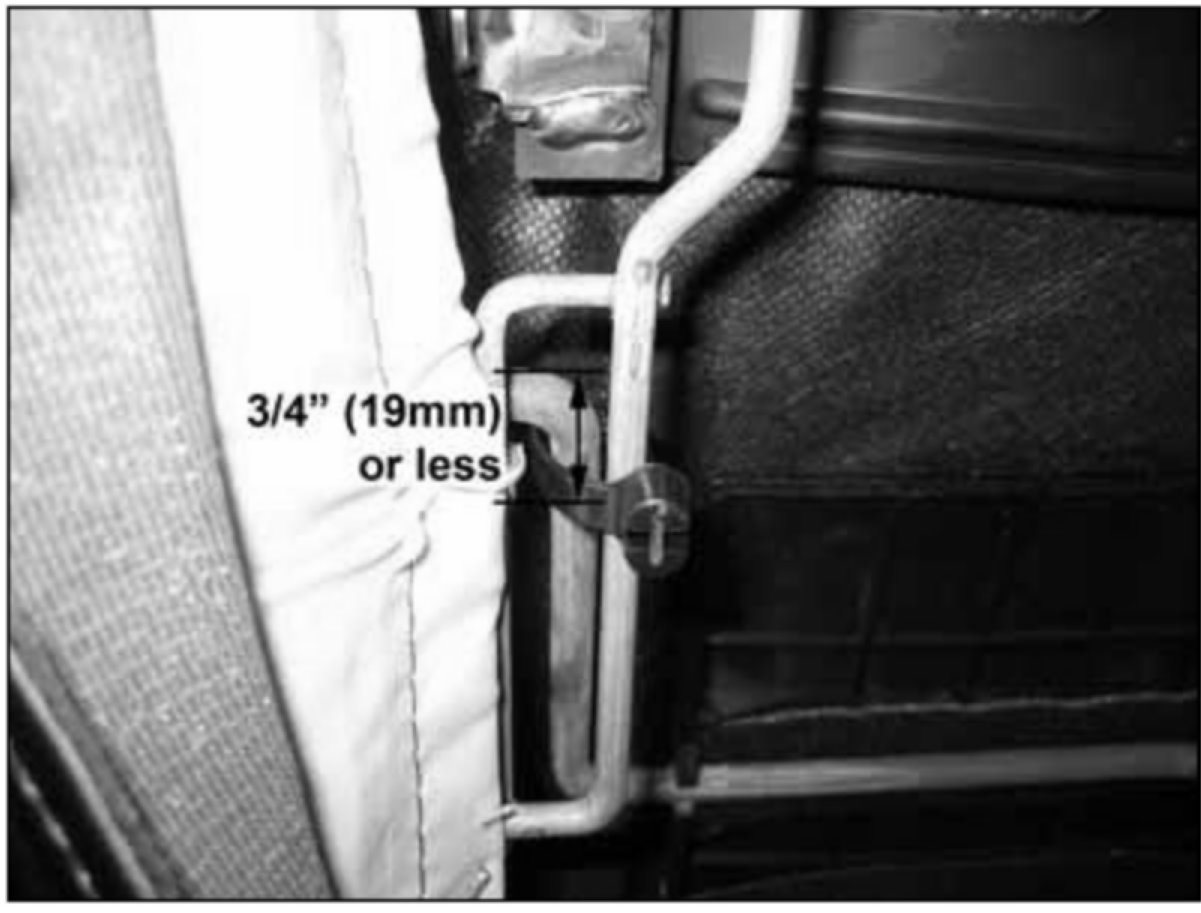
NOTE:
^ A heavy-duty plastic wire tie with a minimum width of 1/4 inch (6 mm) and minimum thickness of 1/16 inch (1.5 mm) must be used.
^ The wire tie should be placed within 3/4 inch (19 mm) from the upper end of the lumbar linkage.
^ The lumbar linkage must be stabilized to the vertical frame with slight tension. However, do not overstretch the plastic wire tie.
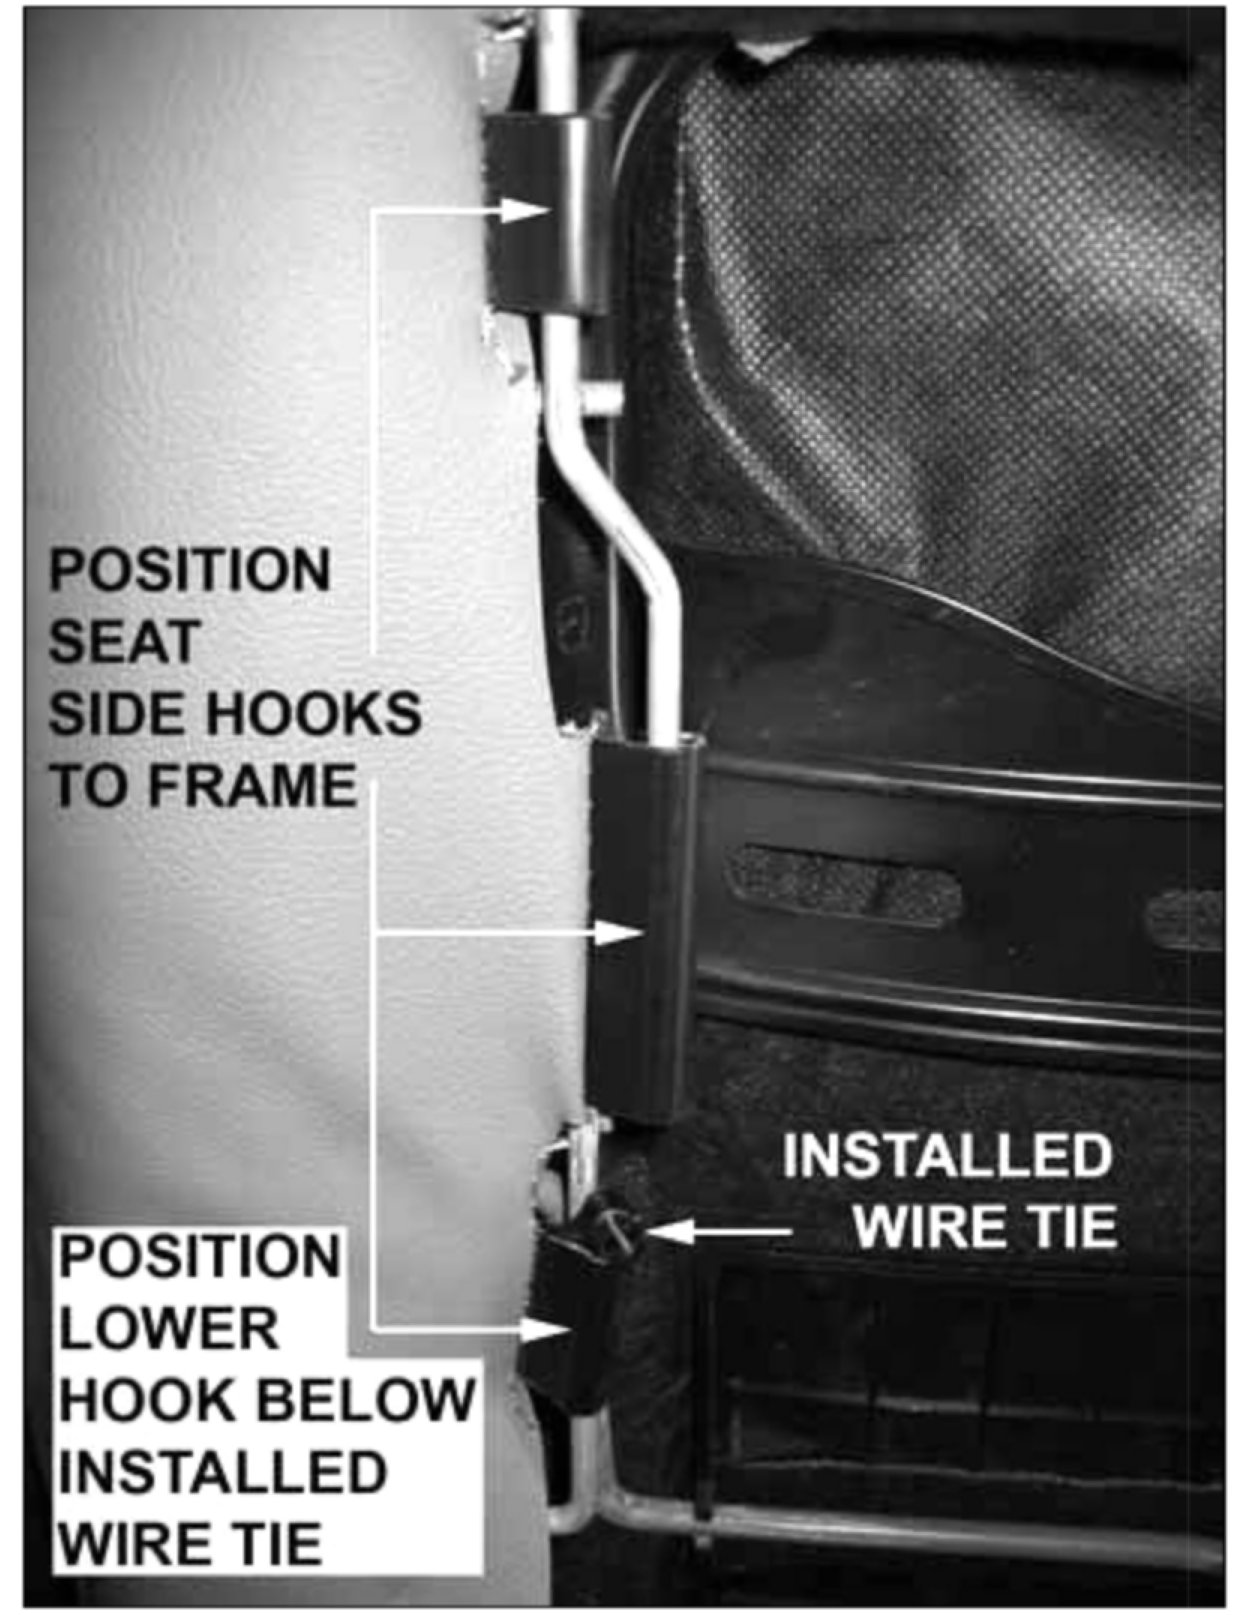
9. Reattach the seat side bolster upholstery hooks along the left side.
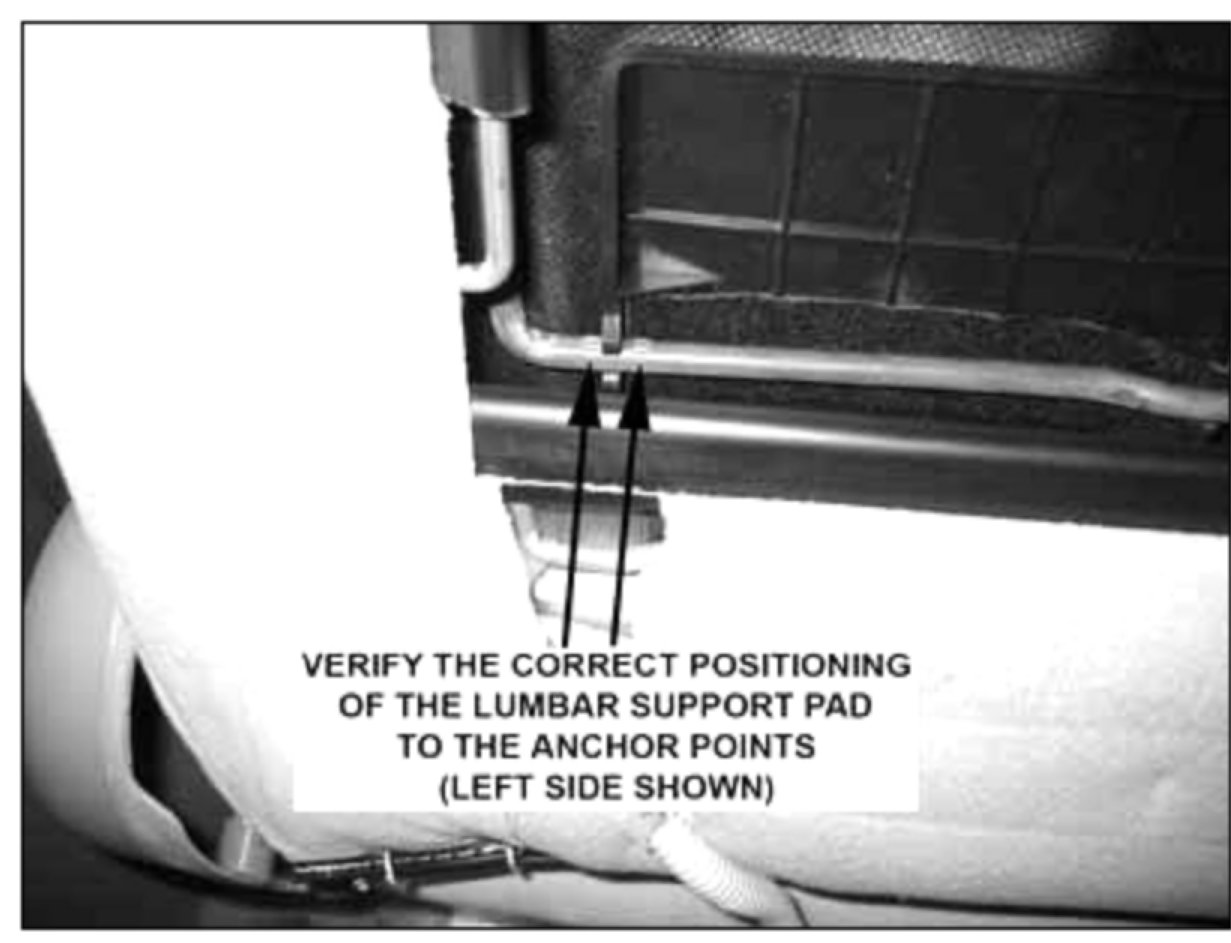
10. Verify that the lumbar support pad is properly attached and positioned to anchor points of the lumbar control linkage.
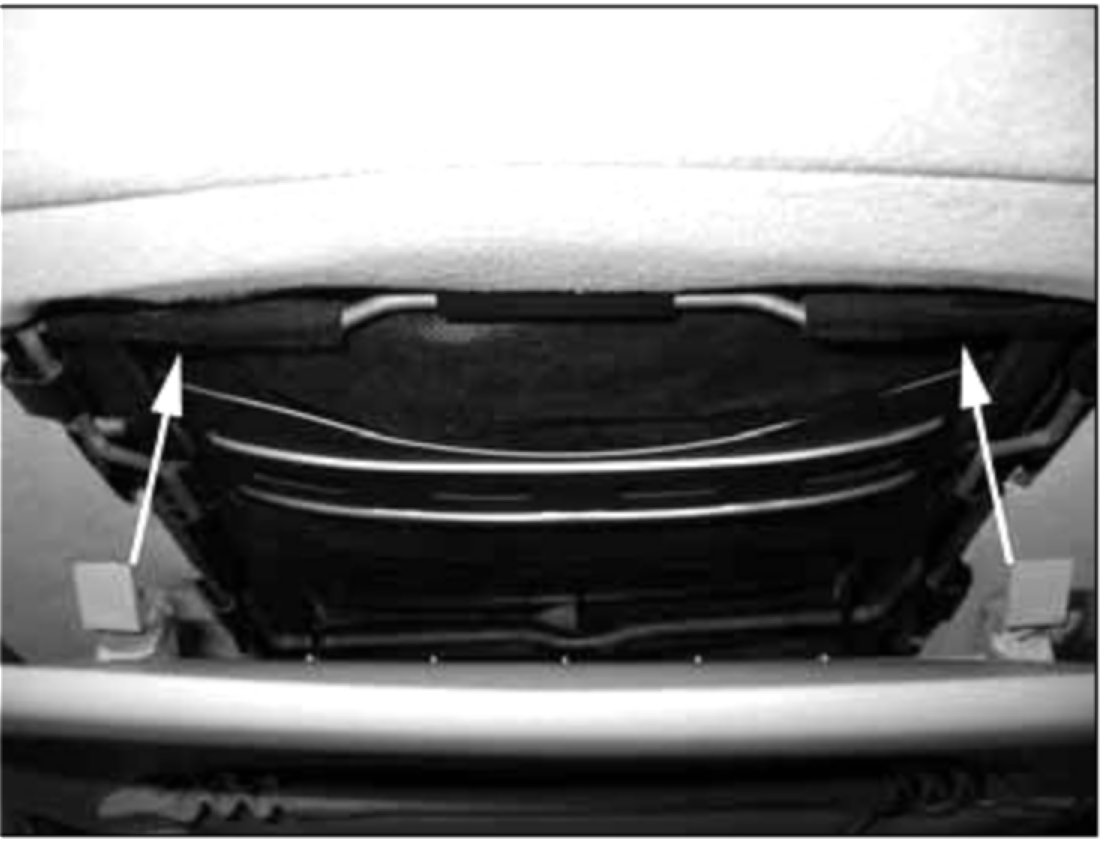
11. Position the seat back garnish with the retaining hooks below the hook points and slide the garnish assembly up until the hooks click into place.
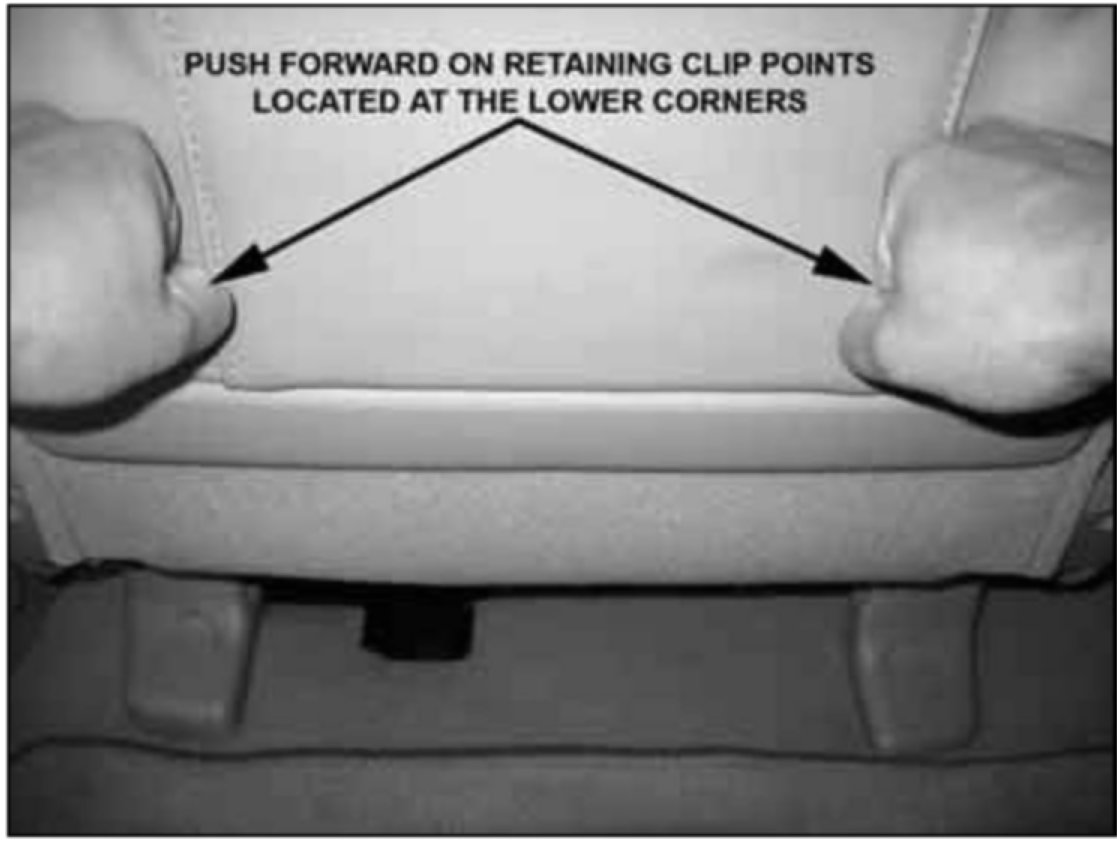
12. Press forward on the lower corners of the garnish to engage the retaining clips to the lower points.
13. Verify repair.
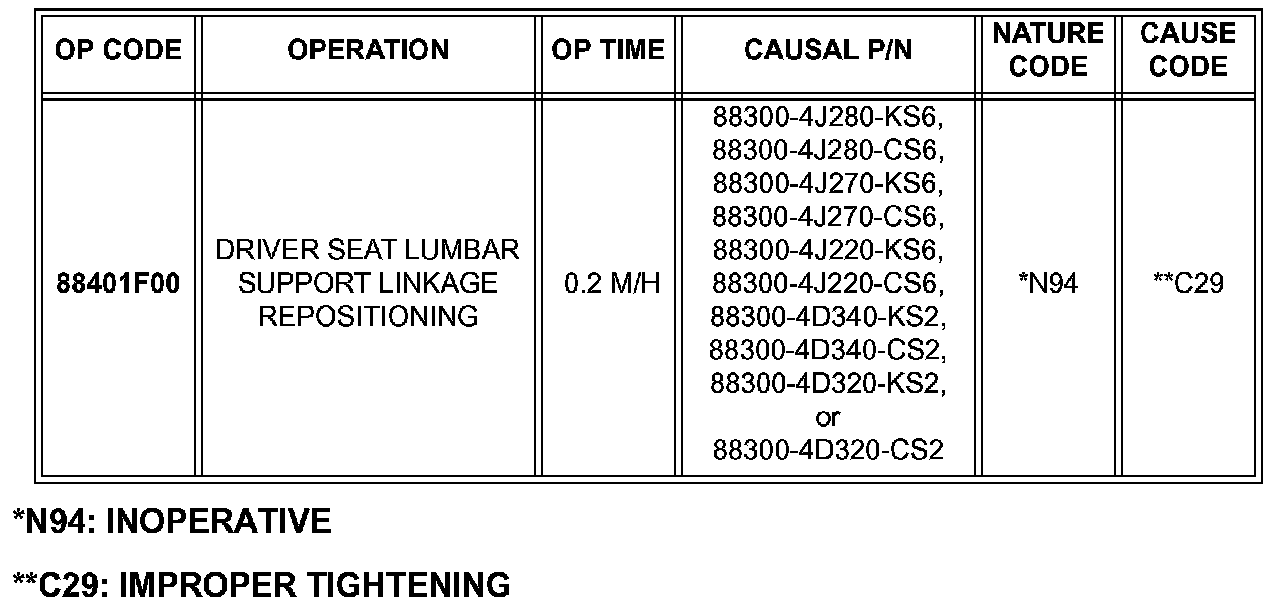
WARRANTY INFORMATION