Overhaul
Disassembly
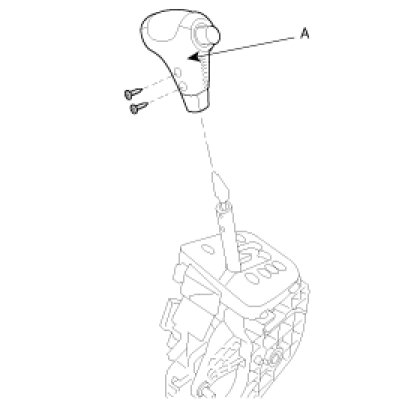
1. Remove the shift lever knob (A) by removing the two screws.
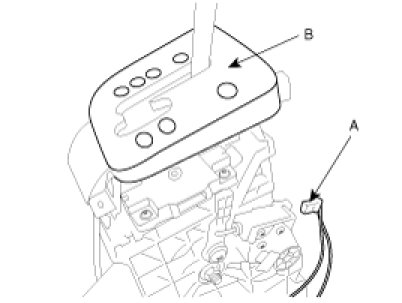
2. Disconnect the solenoid connector (A) and remove the indicator panel (B).
3. Remove the switch assembly (A) and 'P' position switch assembly.

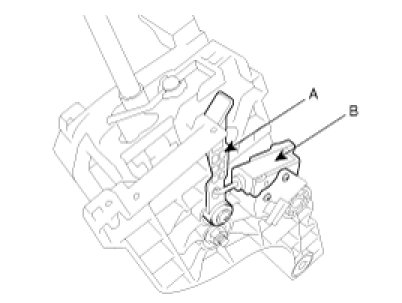
4. Remove the solenoid (B) and solenoid lever (A).
5. Remove the lever assembly (B) by the mounting bolt (A).
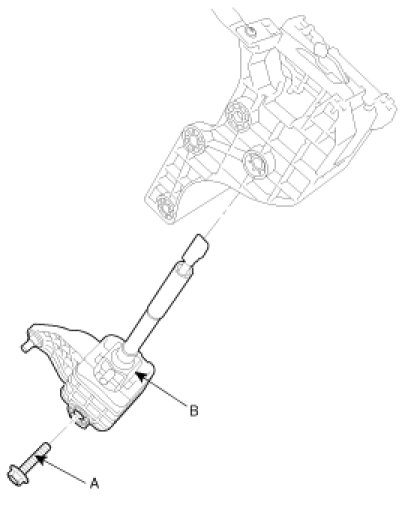
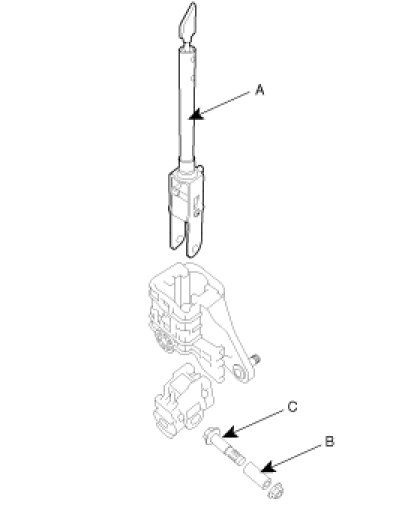
6. Remove the lever (A) and tube (B) by removing the bolt (C).
Reassembly
1. Grease the tube (B) and install the lever (A) by tightening the bolt (C).
Tightening torque :
8 - 12 Nm(80 - 120 kgf.cm, 5.8 - 8.7 lb-ft)
2. Install the lever assembly (B) by tightening the bolt (A).
Tightening torque :
8 - 12 Nm(80 - 120 kgf.cm, 5.8 - 8.7 lb-ft)
3. Install the solenoid (B) and solenoid lever (A).
4. Install the switch assembly (A) and 'P' position switch assembly.
Tightening torque :
1.3 - 1.9 Nm(13 - 19 kgf.cm, 0.95 - 1.38 lb-ft)
5. Connect the solenoid connector (A) and install the indicator panel (B).
6. Install the shift lever knob (A) by tightening the two screws.
Tightening torque :
2 - 3 Nm(20 - 30 kgf.cm, 1.45 - 2.18 lb-ft)
7. Install both sides of the brackets.
Tightening torque :
16 - 23 Nm(160 - 230 kgf.cm, 11.6 - 16.7 lb-ft)