Repair Procedures
Removal
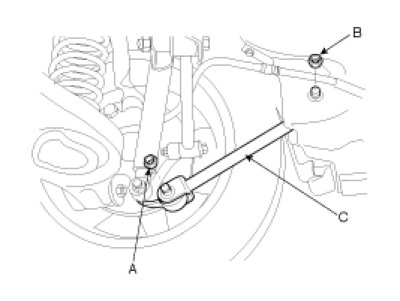
1. Remove the trailing arm mounting nut(A) from the rear knuckle.
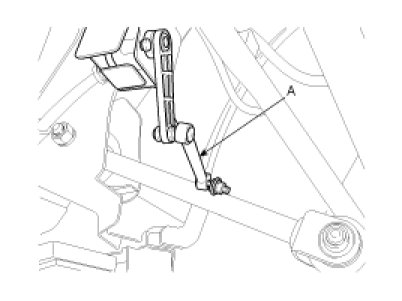
NOTE:
After removing the head lamp leveling link(A), remove the right trailing arm.
2. Remove the trailing arm mounting nut(B) from the body.
3. Remove the trailing arm(C).
Inspection
1. Check the bushing for wear and deterioration.
2. Check the trailing arm for bending or breakage.
3. Check all the bolts for damage.
Replacement
Trailing Arm Bushing
1. Using the special tools(09216-21600, 09552-38100), press-fit the bushing.
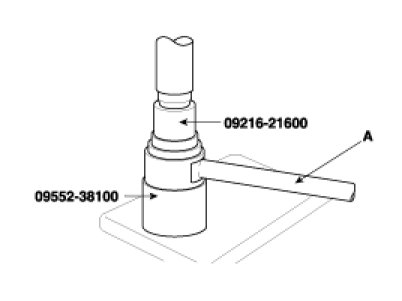
2. Remove the bushing from the trailing arm(A).
3. Using the special tool(09552-38000), replace the bushing.
Pull out force :over 100 kN (1,000 kgf, 2,204 lb)
NOTE:
Be sure to press the bushing with the jut of the bushing aligned parallel to the length of the trailing arm.
Installation
1. Place the trailing arm(C) as shown below.
2. Install the trailing arm nuts.
NOTE:
Fully tighten the trailing arm mounting nuts with the vehicle on the ground in unloaded condition.
A. Install the trailing arm mounting nut(A).
Tightening torque :
140 - 160N.m (14 - 16kgf.m, 101.2 - 115.7lb-ft)
B. Install the trailing arm bracket mounting nut(B).
Tightening torque :
140 - 160N.m (14 - 16kgf.m, 101.2 - 115.7lb-ft)
NOTE:
After installing the right trailing arm, install the head lamp leveling link(A).