Repair Procedures
Removal
1. Disconnect the brake fluid level switch connector, and remove the reservoir cap.
2. Remove the brake fluid from the master cylinder reservoir with a syringe.
CAUTION:
Do not spill brake fluid on the vehicle, it may damage the paint; if brake fluid does contact the paint, wash it off immediately with water.
3. Remove the wheel & tire.
4. Disconnect the brake tube by loosening the tube flare nut (B).
Tightening torque:
13.7 - 16.7 N.m (1.4 - 1.7 kgf.m, 10.1 - 12.3 lb-ft)
Front

Rear
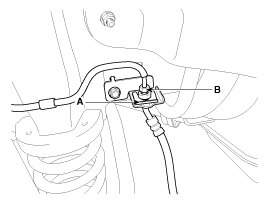
5. Remove the brake hose clip (A).
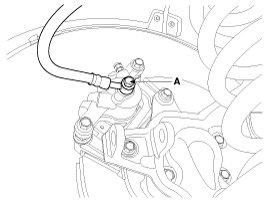
6. Disconnect the brake hose from the brake caliper by loosening the bolt (A).
Tightening torque:
24.5 - 29.4 N.m (2.5 - 3.0 kgf.m, 18.1 - 21.7 lb-ft)
Front

Rear
Inspection
1. Check the brake tubes for cracks, crimps and corrosion.
2. Check the brake hoses for cracks, damage and fluid leakage.
3. Check the brake tube flare nuts for damage and fluid leakage.
4. Check brake hose mounting bracket for crack or deformation.
Installation
1. Installation is the reverse of removal.
CAUTION:
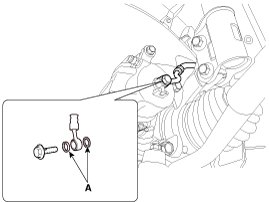
Use a new washer (A) whenever installing.
2. After installation, bleed the brake system.
3. Check the spilled brake oil.