Evaporator Temperature Sensor / Switch: Service and Repair
INTAKE SENSORRemoval and Installation
REMOVAL
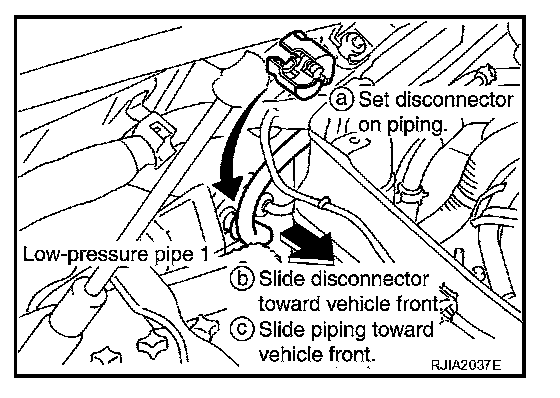
1. Set the temperature at 18 °C (60 °F), and then disconnect the battery negative cable.
2. Use a refrigerant collecting equipment (for HFC-134a) to discharge refrigerant.
3. Remove cowl top cover. Refer to "COWL TOP".
4. Remove high-pressure pipe 2 mounting clip.
5. Remove low-pressure flexible hose bracket mounting bolts.
6. Disconnect evaporator-side one-touch joints.
a. Set a disconnector (High-pressure side: 92530-89908, Low-pressure side: 92530-89916) on A/C piping.
b. Slide a disconnector toward vehicle front until it clicks.
c. Slide A/C piping toward vehicle front and disconnect it.
CAUTION: Seal connection opening of piping with a cap or vinyl tape to avoid exposure to atmosphere.
7. Remove blower unit. Refer to "BLOWER UNIT".
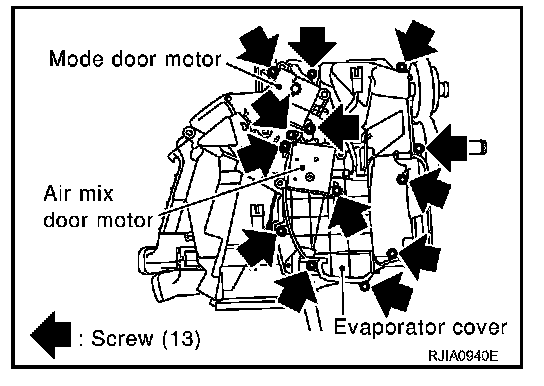
8. Remove air mix door motor (Passenger side), mode door motor and evaporator cover.
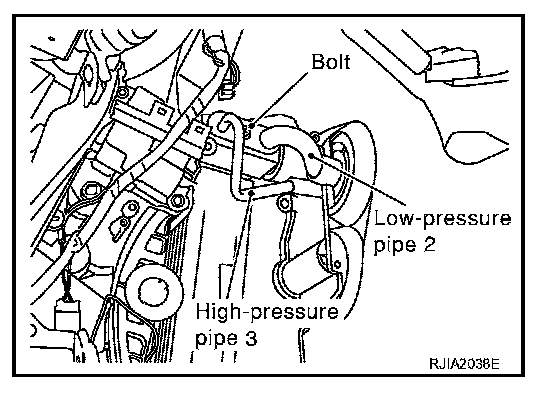
9. Remove the mounting bolt, then remove the low-pressure pipe 2 and high-pressure pipe 3.
CAUTION: Seal connection opening of piping with a cap or vinyl tape to avoid exposure to atmosphere.
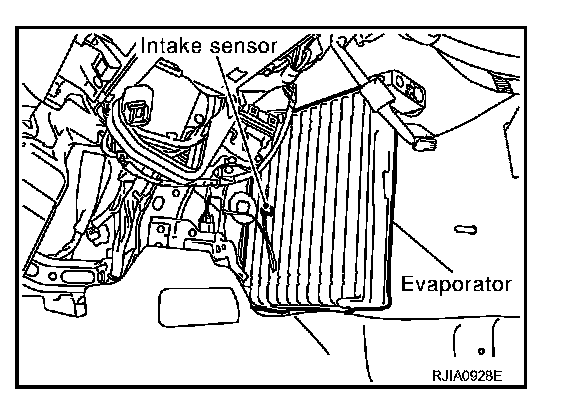
10. Slide the evaporator to passenger side, then remove the intake sensor.
INSTALLATION
Installation is basically the reverse order of removal.
CAUTION:
- Replace O-rings for A/C piping with new ones. Before installing, apply compressor oil to them.
- Connection point for female-side piping is thin. So, when inserting male-side piping, take care not to deform female-side piping. Slowly insert in axial direction.
- Insert one-touch joint connection point securely until it clicks.
- After piping has been connected, pull male-side piping by hand to make sure piping does not come off.