Oil Filter: Service and Repair
Removal and InstallationREMOVAL
CAUTION:
^ Oil filter is provided with relief valve. Use genuine NISSAN oil filter or equivalent.
^ Be careful not to get burned when engine and engine oil may be hot.
^ When removing, prepare a shop cloth to absorb any engine oil leakage or spillage.
^ Never allow engine oil to adhere to drive belt.
^ Completely wipe off any engine oil that adheres to engine and vehicle.
1. Remove engine undercover with power tool.
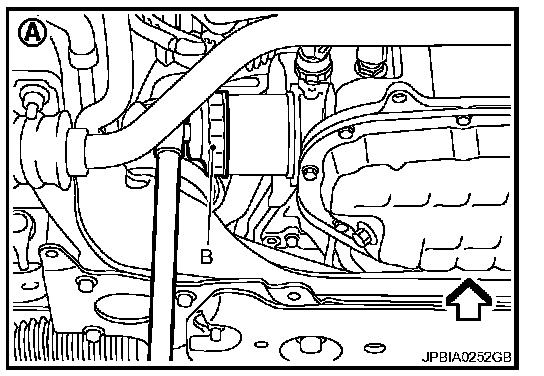
2. Using oil filter wrench [SST: KV10115801 (J38956)] (B), remove oil filter.
A: 2WD models
<---: Engine front
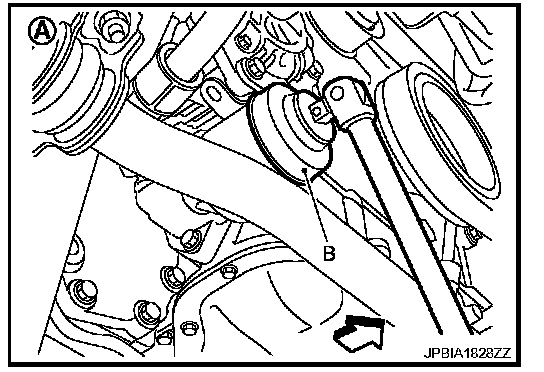
A: AWD models
<---: Engine front
INSTALLATION
1. Remove foreign materials adhering to oil filter installation surface.
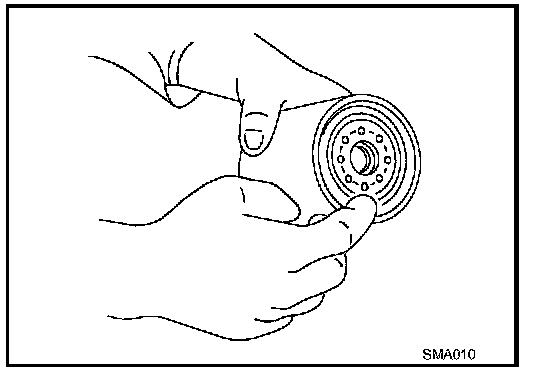
2. Apply engine oil to the oil seal contact surface of new oil filter.
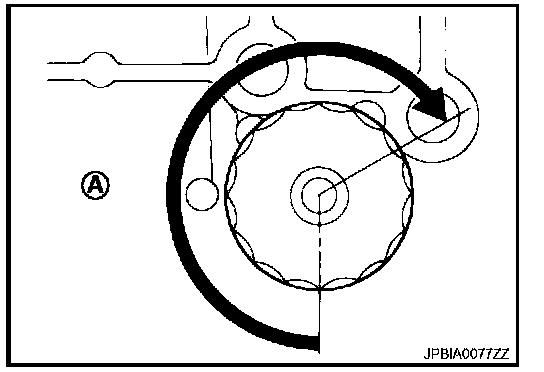
3. Screw oil filter manually until it touches the installation surface, then tighten it by 2/3 turn (A). Or tighten to the specification.
Oil filter: 17.7 Nm (1.8 kg-m, 13 ft-lb)
Inspection
INSPECTION AFTER INSTALLATION
1. Check the engine oil level. Refer to LU-6, "Inspection". Testing and Inspection
2. Start the engine, and check there is no leakage of engine oil.
3. Stop the engine and wait for 10 minutes.
4. Check the engine oil level, and adjust the level. Refer to LU-6, "Inspection". Testing and Inspection