Removal And Installation
EXHAUST MANIFOLD AND THREE WAY CATALYST
Removal and Installation
REMOVAL
WARNING:
Perform the work when the exhaust and cooling system have cooled sufficiently.
1.Drain engine coolant from radiator. Draining Engine Coolant.
CAUTION:
- Perform this step when the engine is cold.
- Never spill engine coolant on drive belt.
2.Remove reservoir tank. Exploded View.
3.Remove drive belt. Removal And Installation.
4.Remove power steering oil pump. Exploded View.
5.Remove radiator. Exploded View.
6.Remove front under cover. Exploded View.
7.Remove front wheels and tires. Exploded View.
8.Remove A/C compressor. Exploded View.
9.Remove alternator and alternator bracket. Exploded View.
10.Remove exhaust front tube (bank 1 and bank 2). Exploded View.
11.Remove front propeller shaft. Exploded View.
12.Disconnect steering lower joint. Exploded View.
13.Remove air fuel ratio sensor 1 as per the following:
CAUTION:
Air fuel ratio sensor 1 is not reusable. Never remove air fuel ratio sensor 1 unless this is required.
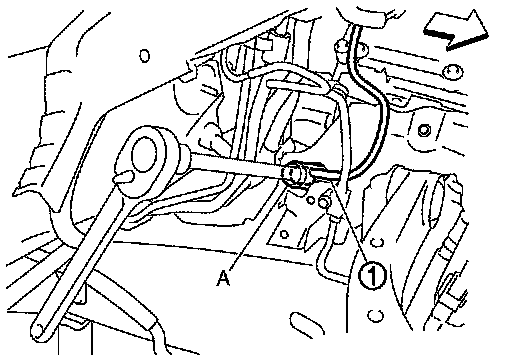
- Using the heated oxygen sensor wrench [SST: KV-10117100
(J-44626)] (A), remove air fuel ratio sensor 1 (1).

14.Remove exhaust manifold cover.
15.Remove oil level gauge guide. Exploded View.
16.Remove exhaust manifold.
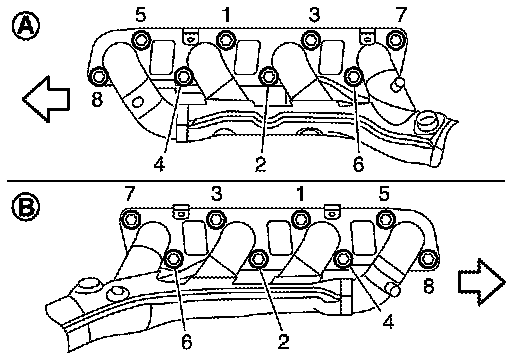
- Loosen nuts in the reverse order of figure to remove exhaust manifold with a power tool.

17.Remove exhaust manifold gaskets.
CAUTION:
Cover engine openings to avoid entry of foreign materials.
INSTALLATION
Note the following item, and install in the reverse order of removal.
Exhaust Manifold Gasket
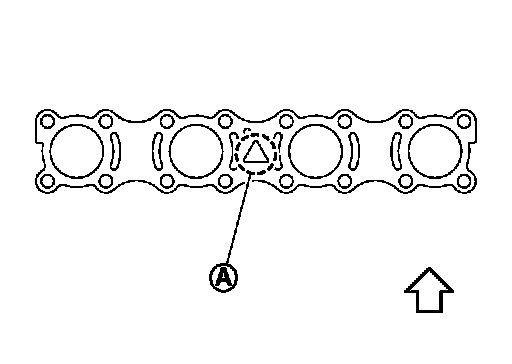
- Install exhaust manifold gasket in directional shown in the figure.
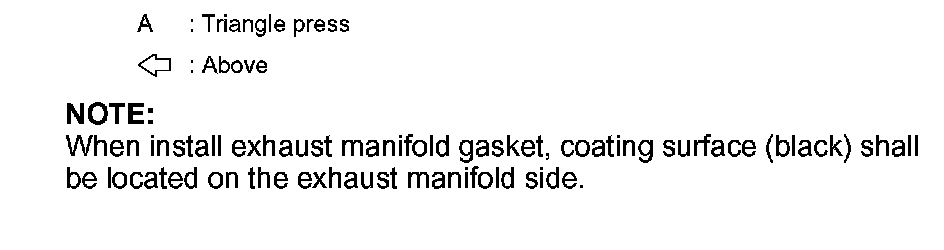
NOTE:
When install exhaust manifold gasket, coating surface (black) shall be located on the exhaust manifold side.
Exhaust Manifold
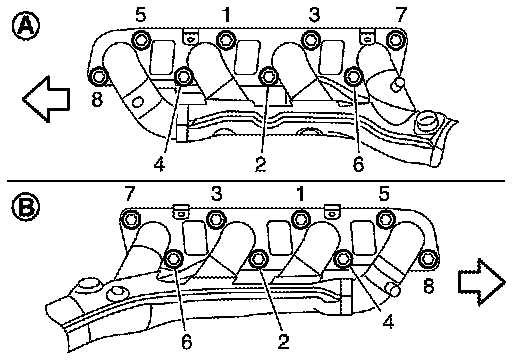
- Tighten mounting nuts in numerical order as shown in the figure.
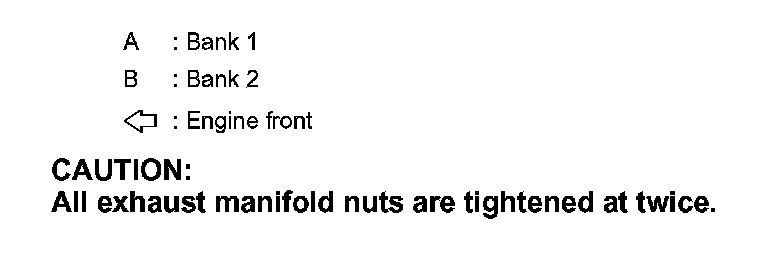
CAUTION:
All exhaust manifold nuts are tightened at twice.
Air Fuel Ratio Sensor 1
CAUTION:
- Before installing a new air fuel ratio sensor 1, clean exhaust system threads using oxygen sensor thread cleaner (commercial service tool: J-43897-18 or J-43897-12), and apply anti-seize lubricant (commercial service tool).
- Air fuel ratio sensor 1 is not reusable. Replace them with a new one after removal. When replacing them, handle with care not to impact on them.
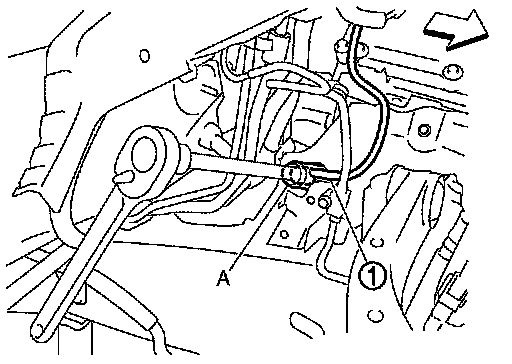
- When installing the new air fuel ratio sensors 1 (1), set the heated oxygen sensor wrench [SST: KV-10117100(J-44626)] (A)
in the hexagonal part to tighten the them.
- Never over torque sensors. Doing so may cause damage to the sensors, resulting in "MIL" coming on.
- Prevent rust preventative from adhering to the sensor body.