Disassembly
Fig. 7 Distributor exploded view.:
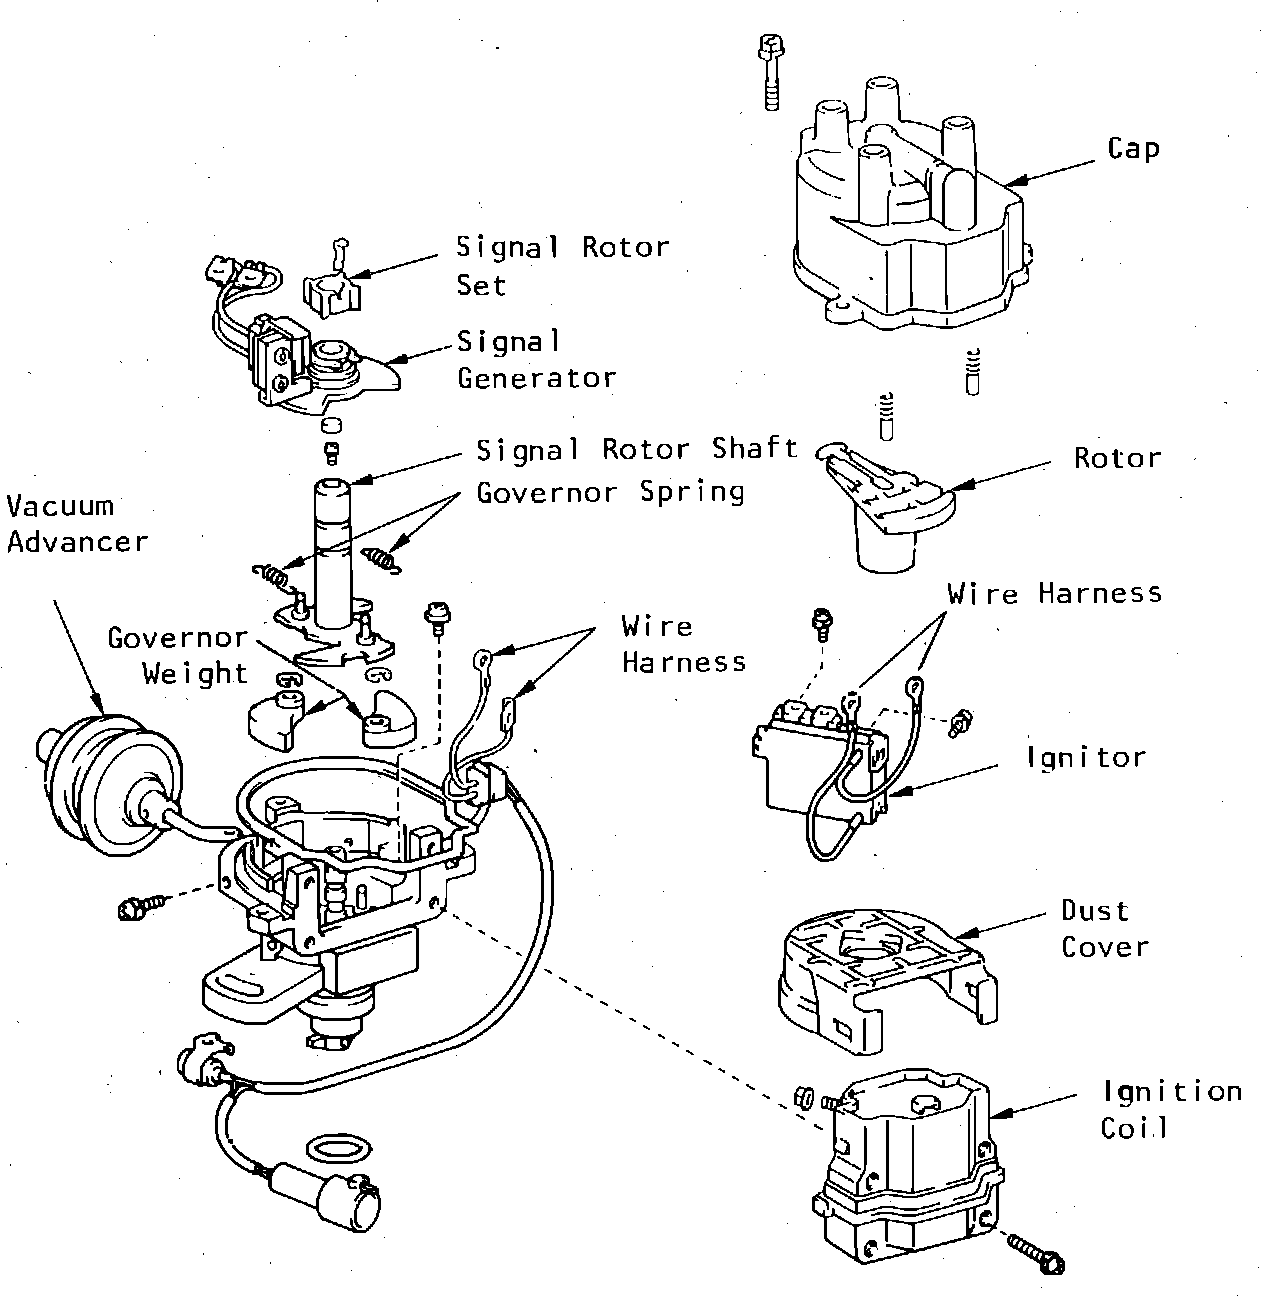
Refer to Fig. 7, during disassembly procedure. 1. Apply alignment marks on distributor and cylinder head, then remove distributor assembly from engine.
2. Remove distributor cap and rotor.
3. Remove dust cover, then the ignition coil attaching screws and ignition coil.
4. Disconnect wire harness electrical connectors, then remove igniter assembly.
5. Remove signal rotor set spring, then the signal rotor.
6. Remove vacuum advancer attaching screw, link from signal generator and vacuum advancer.
7. Remove signal generator attaching screws attaching screws, then the signal generator assembly.
8. Remove governor spring.
9. Remove grease stopper and screw, then the signal rotor shaft.
10. Remove governor weight snap ring, then the governor weight.
Inspection
1. Check distributor cap and rotor for cracks, burning, corrosion and wear.
2. Ensure distributor cap carbon contacts are approximately .087 inch or longer
3. Check signal generator, shaft bearing and signal rotor shaft for damage or wear.
4. Ensure vacuum controller operates smoothly when vacuum is applied.